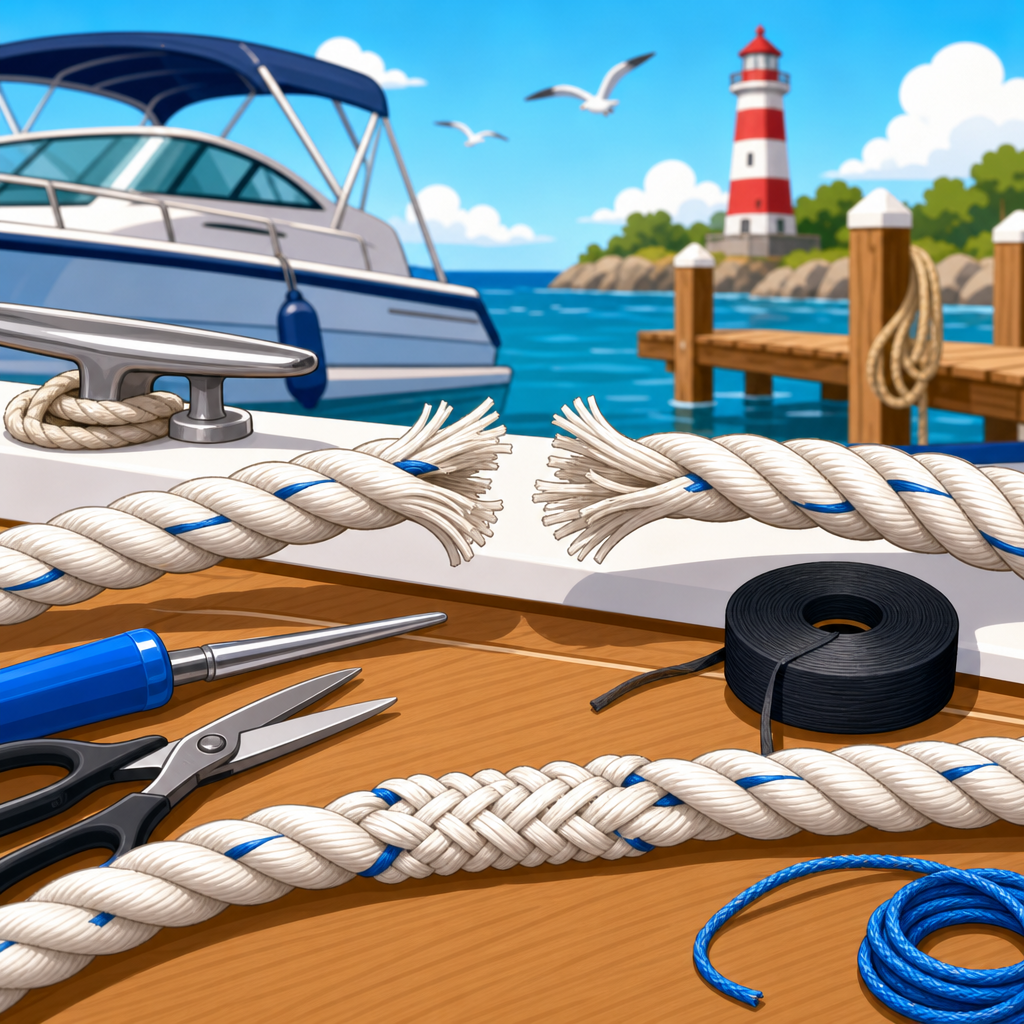
A broken or snapped boat rope can turn a routine docking, anchoring, or towing task into an immediate safety problem, and knowing how to repair it is one of the most practical emergency boat repairs any skipper can master. In boating, “rope” is often called line once it is assigned a job, whether that is a dock line, anchor rode, mooring line, tow line, or control line. Each line works under different loads, chafe conditions, and exposure to salt, sun, and shock. When a line parts, the right response depends on where it failed, what material it is made from, and whether the repair is meant to get you safely home or return the line to long-term service.
I have had to deal with snapped dock lines in rising wind, frayed anchor rodes after a rough night, and tow lines damaged by prop wash, and the pattern is always the same: the crews who stay calm and use a methodical process solve the problem fastest. The crews who guess, tie random knots, or trust badly damaged line usually create a second problem. That is why this topic matters far beyond one rope repair. Emergency boat repairs and quick fixes are about preserving control of the boat, protecting people, and preventing a small failure from escalating into grounding, collision, or gear loss.
Boat rope repair also sits at the center of broader boat maintenance and repairs because line condition reflects the health of the whole deck system. Worn fairleads, sharp chocks, undersized cleats, misaligned windlasses, UV exposure, and poor storage all show up first in the rope. Learning to repair a broken or snapped boat rope teaches you how to inspect deck hardware, choose proper knots, recognize load paths, and prepare a repair kit that supports other emergency fixes on board. This hub article covers the essential steps, the limits of temporary repairs, and the related quick-fix skills every boat owner should connect to rope work.
Assess the failure before touching the line
The first step in repairing a broken or snapped boat rope is to identify the type of failure and remove immediate risk. If the line failed under load, assume it can snap back again if re-tensioned suddenly. Keep hands and legs clear of the line of recoil, secure the boat by another method if possible, and reduce motion before beginning any repair. On a dock line failure, that may mean using a spare line from another cleat. At anchor, it may mean starting the engine and easing strain while the rode is inspected. During a tow, it often means reducing speed and reestablishing control before anyone handles the damaged line.
Look closely at the break. A clean cut usually points to chafe against metal edges, propeller damage, or a knife-like pinch point. Melted fibers indicate friction heat, often from winches, capstans, or synthetic line slipping under high load. Fuzzy, stiff, or discolored ends suggest UV degradation and long-term wear. A line that necked down before failure likely exceeded its working load limit or suffered shock loading, common when boats surge against short dock lines in wind or waves. This diagnosis matters because a rope that failed from age across much of its length should usually be retired, not repaired.
Identify the rope construction before choosing a fix. Three-strand nylon can be rejoined with a short splice or tied quickly with reliable knots, and it remains a common choice for dock and anchor use because it stretches and absorbs shock. Double-braid line is stronger and neater but harder to repair well without the proper fid and technique. Polypropylene floats and is cheap, making it common for ski ropes and utility use, but it has poor UV resistance and lower durability. High-modulus lines such as Dyneema are excellent in specific applications but demand more specialized splicing knowledge. In an emergency, material and construction determine what is realistic on deck.
Choose the right emergency repair for the situation
Not every broken boat rope should be repaired the same way. The correct emergency repair depends on load, duration, available tools, and the consequence of failure. If you only need enough strength to ease into a marina slip, the goal is a safe temporary connection. If the rope is part of your primary anchoring system overnight, the bar is much higher. As a rule, any knot or splice in a damaged line reduces original strength, and knots generally reduce strength more than a properly executed splice. That tradeoff is acceptable for controlled, short-term use but dangerous if ignored.
The quickest repair for many situations is to cut back to sound material and retie the working end. If a dock line chafed through near the eye, cut away the damaged section and tie a bowline to the cleat, piling ring, or thimble as a temporary measure. If a mooring pendant failed near a worn eye, replacing the eye with a temporary bowline is usually safer than trying to lash shredded fibers together. If the damage is mid-line, a double sheet bend can join two line ends of similar size in a true emergency, but for critical loads I prefer using a spare full-length line rather than trusting a mid-line knot.
For three-strand rope, a short splice is the best field repair when you need a stronger rejoin than a knot. It preserves more strength than many knots, runs reasonably well through chocks, and can be done aboard with basic tools. For double-braid, most emergency repairs should focus on cutting back damage and reassigning the line, not attempting a complex structural splice unless you have practiced it. Adhesives are rarely a true rope repair solution. Heat-shrink, whipping twine, and tape can tidy an end or protect a repair, but they do not restore load-bearing capacity. Mechanical rope clamps also have limited marine use and should not be trusted blindly on dynamic loads.
| Situation | Best Quick Fix | When It Works | Main Limitation |
|---|---|---|---|
| Damaged eye on dock line | Cut back and tie a bowline | Short-term docking or mooring adjustment | Lower strength than a proper spliced eye |
| Mid-line break in three-strand nylon | Short splice | Temporary reuse under moderate load | Bulky section may snag in hardware |
| Mid-line break in double-braid | Replace with spare line | Any critical load application | Damaged line usually not field-repaired well |
| Frayed bitter end only | Cut clean and whip or heat seal | Preventing further unraveling | Does not address hidden internal damage |
| Anchor rode chafe near chock | Relead, add chafe gear, shorten to sound section | Getting through immediate conditions | May leave inadequate rode length |
How to repair three-strand rope step by step
If you are carrying one repair method for a broken or snapped boat rope, make it the short splice in three-strand line. I have used it aboard cruising boats, work skiffs, and marina tenders because it can be taught quickly and executed with a marlinespike, fid, or even a screwdriver in a pinch. Start by cutting both damaged ends back to clean, undamaged strands. Unlay each end for several inches, enough for at least three full tucks per strand. Tape the strand ends if needed to keep them from fraying while you work.
Marry the two rope ends together by interlacing the unlaid strands so the standing parts meet in the center. You should now have three loose strands from one side alternating with three loose strands from the other. Begin tucking one strand over and under opposing strands exactly as in a standard splice, then rotate the rope and repeat with the next strand. Maintain the original lay of the rope. After the first round of tucks, pull everything snug but not distorted. Continue for at least three tucks per strand in nylon and more if the rope is slick or heavily used. Trim excess gradually rather than cutting flush too early.
Once the splice is complete, roll it underfoot or between gloved hands to settle the strands. Inspect for crossed tucks, gaps, or strands that were forced against the lay. A good emergency splice will look slightly bulky but uniform. Before placing it into service, load it progressively. Never shock-load a fresh repair. Apply light tension, check for slipping or opening, then increase load carefully. If the splice will pass through a chock or fairlead, verify that it does not jam. In many cases, the better choice is to position the splice where it will stay clear of hardware and use chafe protection around nearby contact points.
If you cannot execute a short splice confidently, use a simpler strategy: cut back the line and retie a secure end connection. For three-strand dock lines, this often gets you back in service faster and more safely than a rushed splice. Finish the cut end properly. Synthetic rope ends can be heat sealed with caution, but avoid creating a hard, sharp lump that interferes with knots. Better practice is a clean cut followed by whipping. A sailmaker’s whipping with waxed twine holds well and is worth learning because it supports many other emergency boat repairs, from securing split hose coverings to tidying temporary lashings.
What to do with braided rope, anchor rodes, and high-load lines
Braided lines require more caution because damage is often deeper than it appears. Double-braid rope has a load-bearing core and a protective cover, and either can fail first depending on abrasion and loading. If the cover is badly chafed but the core seems intact, the line may still be compromised because the braid balance is altered. If the core is exposed, retire the section from critical use immediately. In real-world service, I do not recommend improvised structural repairs to double-braid for anchoring, towing, or storm docking unless the person doing the work already knows the specific splice and has practiced it under calm conditions.
Anchor rodes deserve special treatment because they combine sustained load, shock loading, and consequences that can become serious quickly. If your rope rode is damaged near the bow chock, first inspect the hardware. I often find burrs, undersized rollers, or missing chafe gear causing repeat failures. Cut back to sound rope if enough length remains for safe scope. Add anti-chafe protection using purpose-built chafe guards, reinforced hose, leather, or heavy tubular webbing secured so it cannot slide away from the wear point. If the rode includes chain, check the rope-to-chain splice closely; this is a common weak point after heavy weather.
For tow lines, ski lines, and other high-load dynamic applications, replacement is usually the correct answer. These lines see shock loads that make temporary repairs risky. The same applies to halyards and control lines that run through blocks or clutches where a bulky knot or splice can jam and create a second failure. A damaged braided line can often be cut down and reassigned to a lighter-duty job, such as a fender lanyard or utility lashing, but that decision should follow inspection of the full length. When in doubt, downgrade the line’s duty or remove it from service. Good seamanship is conservative for a reason.
Build a rope repair kit and connect it to other emergency boat fixes
The best rope repair is the one you are prepared to make in minutes. Every boat should carry spare dock lines, at least one multipurpose utility line, sharp line cutters, a marlinespike or fid sized to your rope, whipping twine, sail needles, rigging tape, chafe gear, gloves, and a lighter or hot knife used carefully. On larger cruising boats, I also keep color-coded spare line by diameter, premeasured soft shackles, and stainless thimbles for quick eye rebuilding. These tools support far more than rope work. The same kit helps secure a loose battery box, lash a broken bimini frame, stabilize damaged rail hardware, and improvise a steering or throttle aid long enough to get home safely.
This is why rope repair belongs at the center of any hub on emergency boat repairs and quick fixes. The habits overlap. You inspect before acting. You reduce load before disassembly. You use temporary fixes to restore control, not to postpone real maintenance forever. You document what failed so the permanent repair addresses the root cause. On boats I maintain, a snapped rope triggers a full review of cleats, chocks, fairleads, windlass alignment, and line sizing. Standards from organizations such as the American Boat and Yacht Council help frame these inspections, while manufacturer guidance for rope and hardware should always govern final replacement choices.
After any emergency repair, label the line, limit its use, and schedule replacement if there is any doubt about integrity. A repaired line may be perfectly adequate as a backup spring line in calm weather but unacceptable as your only anchor rode or towing bridle. That distinction matters. The practical skill is not merely tying something together; it is making a correct judgment under pressure. If you build a proper kit, practice a short splice, learn whipping, carry spare lines, and inspect chafe points routinely, you will solve rope failures faster and prevent many of them entirely. Review your gear today, replace suspect lines, and treat rope care as a frontline part of boat maintenance and repairs.
Frequently Asked Questions
Can a broken or snapped boat rope be safely repaired, or should it always be replaced?
A snapped boat rope can sometimes be repaired for temporary or reduced-duty use, but it should not automatically be trusted for the same critical job it handled before it failed. The right decision depends on the line’s purpose, the type of damage, the rope material, and how much strength has been lost. For example, a dock line with a clean break in otherwise healthy double-braid nylon may be repairable with a proper splice if you have the skills and tools, but an anchor rode, mooring line, or tow line that failed under heavy load deserves much closer scrutiny. If the rope shows signs of widespread abrasion, melted fibers, hard glazing, UV brittleness, chemical damage, or internal core damage, replacement is usually the safer choice.
As a rule, emergency repairs are best viewed as a way to regain control of the situation, not as a guarantee of full original performance. Knots and short-term lash-ups can restore function quickly, but they usually reduce rope strength significantly compared with an intact line. Even a well-made splice can leave you with a shorter line and may not be appropriate if the rope is already aged or compromised elsewhere. If the repaired line will be used anywhere near people, propellers, strong current, surf, or high shock loads, the conservative move is to retire it from critical service and install a new one.
A good practical approach is to separate line use into three categories: critical, moderate, and light duty. Critical uses include towing, anchoring in exposed conditions, mooring, and heavy docking in wind or current. Moderate uses might include fender lines, light tie-offs, or backup lines. Light duty includes utility tasks around the boat. If a line has failed once, many skippers demote it rather than return it to its original job. That is often the smartest and safest choice, especially offshore or in changing weather.
What is the best way to repair a snapped boat rope in an emergency while on the water?
In an on-the-water emergency, the best repair is the one that is quick, secure, and appropriate for the rope’s immediate job. Start by taking the load off the damaged line if possible. Secure the boat with a spare dock line, backup line, cleat hitch, anchor bridle, or temporary tie-off before attempting repairs. Never work on a rope that is still heavily loaded, because lines under tension can snap back violently and cause serious injury. Once the line is safe to handle, inspect the break. A clean snap in synthetic rope may allow for a temporary rejoin using a strong bend or knot, while a frayed, heat-damaged, or flattened section may need to be cut back to sound material first.
For many emergency situations, tying the two ends together is the fastest option. A double sheet bend or fisherman’s-style joining knot may be used depending on rope size and type, but any knot used to rejoin line should be tightened carefully, dressed cleanly, and tested under light load before relying on it. Keep in mind that knots weaken rope, sometimes substantially, so this should be treated as a temporary measure. If the line is braided and you have time, tools, and experience, a proper splice is usually a better long-term repair than a knot because it preserves more strength and runs more cleanly through fairleads and chocks. However, a poor splice is worse than a well-tied temporary knot, so skill matters.
Once the rope is rejoined, reduce the strain on it. Reposition the boat, add spring lines, rig chafe protection, use additional fenders, or deploy a second line in parallel. If you are anchoring, consider lowering scope demands by resetting in a more sheltered location if conditions allow. If you are towing, the safer answer is often to switch to a spare tow line rather than trust a repaired one. Emergency repair is only part of the solution; load management is what keeps the temporary fix from failing again.
Which repair method is strongest for boat rope: a knot, a splice, whipping, or heat sealing?
For most boat ropes, a proper splice is the strongest and most reliable repair method when it is suitable for the rope’s construction and done correctly. Splices work by reweaving or burying rope strands so the load is distributed more smoothly than it is in a knot, which creates tighter bends and localized stress points. That is why eye splices are preferred for many dock lines and mooring lines, and why line manufacturers often publish specific splice instructions for three-strand, double-braid, and hollow-braid rope. If preserving as much strength as possible matters, a correctly executed splice is typically the best answer.
Knots are valuable because they are fast, practical, and require no special tools, but they generally reduce rope strength more than a splice. They are ideal for emergency use, short-term reconfiguration, and situations where speed matters more than maximum retained strength. That said, not all knots behave equally well in all rope materials. Slippery modern synthetics, especially some polyethylene-based ropes, may require very specific knots or stopper backups to hold securely. Nylon and polyester are often more forgiving, but every knot must still be dressed and set properly.
Whipping and heat sealing serve different purposes and should not be confused with structural repairs. Whipping is used to secure rope ends and prevent fraying, especially on twisted rope, and it is an excellent finishing step after cutting damaged material away. Heat sealing can fuse the ends of many synthetic ropes to reduce unraveling, but it does not restore strength to a broken line and can actually damage fibers if overdone. On braided ropes, melted ends alone are often not enough to stop cover slippage, so whipping or proper finishing is still recommended. In short, use a splice when possible for strength, a knot when you need a fast temporary repair, and whipping or heat sealing only to finish and protect the ends.
How do I know if the damaged rope should be cut back and repaired, or completely discarded?
The key is to evaluate both the damaged section and the condition of the rest of the line. If the problem is isolated to one short area and the remaining rope is still supple, evenly colored, and free of deep abrasion or stiffness, you may be able to cut back to healthy material and repair or repurpose the line. But if the line has multiple worn spots, severe chafe, powdery fibers from UV exposure, flattened sections from overloading, melted glazing from friction, or contamination from fuel, oil, or chemicals, it is usually no longer dependable. Damage inside the rope can also be hidden. Double-braid lines may look acceptable outside while the core has been overloaded or broken internally, so any unusual soft spots, lumps, or inconsistent diameter are warning signs.
Pay close attention to where the rope failed. Breaks near a cleat hitch, chock, fairlead, splice, or knot often indicate chafe concentration, repeated shock loading, or poor rigging rather than a random event. That means the line may have been stressed beyond safe limits for some time. If the rope has already been shortened by previous repairs, it may no longer provide proper scope, stretch, or docking geometry. A technically repairable line that is now too short for its original purpose is effectively no longer fit for that job.
When in doubt, think in terms of consequences rather than possibilities. If the line fails again, what happens next? A drifting boat, lost anchor, collision at the dock, or snapped tow line can create risks that far outweigh the cost of replacing rope. Many experienced boaters keep older but still usable lines for backup, fenders, lashings, or utility work and reserve newer, fully trusted lines for anchoring, docking, and towing. That is a sensible way to manage both safety and budget.
What tools and supplies should I keep onboard to repair a broken boat rope properly?
A well-prepared rope repair kit does not need to be elaborate, but it should match the types of line your boat carries. At a minimum, keep a sharp rigging knife or serrated rope knife, a marlinspike or fid set sized for your rope diameters, whipping twine, a sailmaker’s needle, tape, a lighter or hot knife for synthetic rope ends where appropriate, and heavy-duty scissors or cutters. A pair of gloves is also important, especially when handling salt-stiffened or heavily loaded line. If your boat uses double-braid dock lines or anchor snubbers, carry the correct fid for those constructions rather than relying on improvised tools, because proper splicing becomes much easier and more reliable with the right equipment.
It also helps to carry spare line in useful lengths, not just random leftovers. A few pre-cut utility lines, an extra dock line, and a spare length suitable for towing or anchoring emergencies can solve a problem faster and more safely than trying to rebuild a badly damaged rope under pressure. Chafe gear is another smart addition. Tubular webbing, reinforced hose, leather, or purpose-made chafe sleeves can extend the life of a repaired or replacement line and may prevent the next failure. Small shackles, thimbles, and strong tape can also help you rig temporary solutions cleanly.
Just as important as the gear is knowing how to use it before an emergency happens. Practice making an