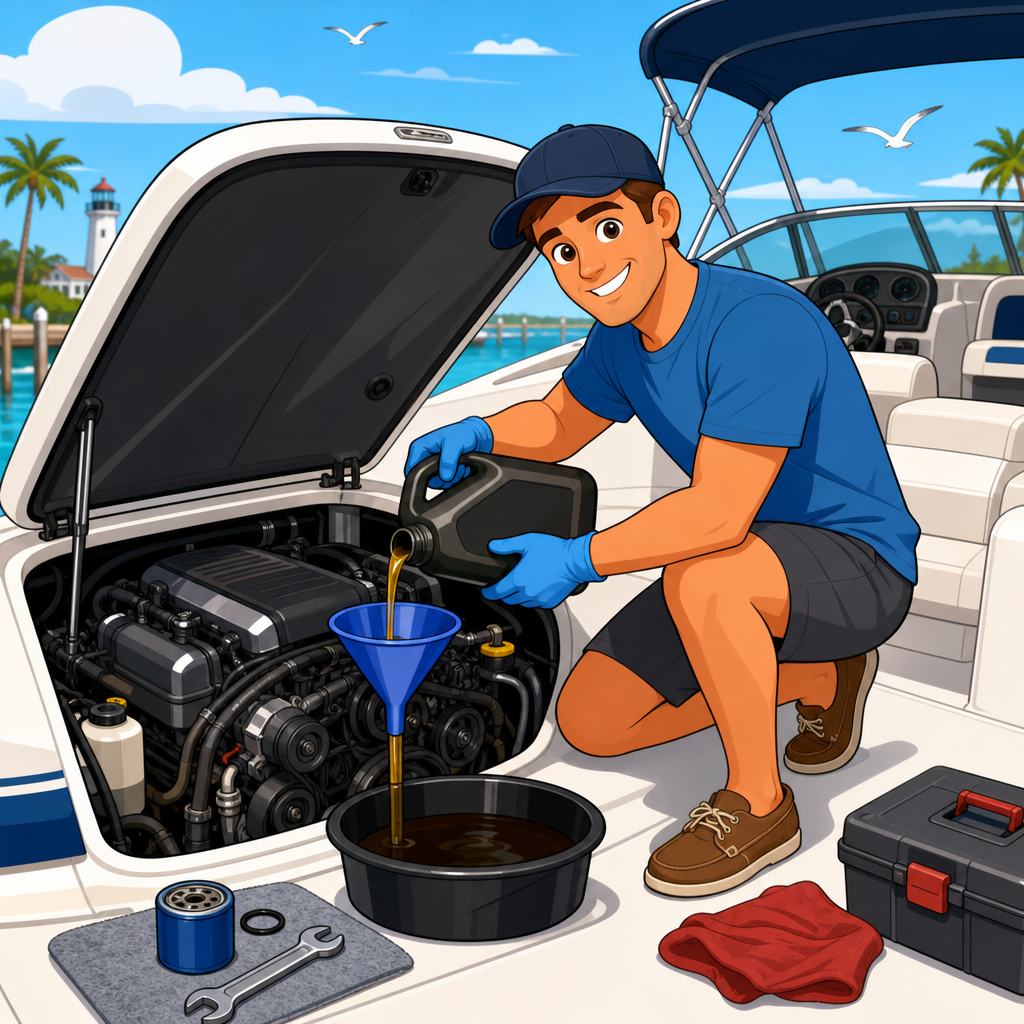
Changing your boat’s engine oil is one of the highest-value maintenance tasks you can do yourself, and it sits at the center of smart engine care and troubleshooting. Clean oil reduces friction, carries heat away from bearings and pistons, suspends contaminants, and helps prevent corrosion inside an engine that often works hard in humid, salty conditions. When oil breaks down or becomes diluted with fuel, soot, or water, wear accelerates fast. I have seen otherwise healthy marine engines develop noisy valvetrains, low oil pressure, and expensive bearing damage simply because owners stretched oil changes too long or used the wrong procedure.
In practical terms, boat engine oil service means more than draining old oil and pouring in new fluid. It includes choosing the right marine engine oil viscosity and specification, warming the engine safely, extracting oil completely, replacing the oil filter correctly, checking for fuel or water contamination, disposing of used oil responsibly, and documenting engine hours. For inboards, sterndrives, and many four-stroke outboards, the exact access points differ, but the maintenance logic is the same: remove contaminants, restore lubrication, verify normal operation, and use the service as a diagnostic checkpoint for broader engine health.
This article is the hub for engine care and troubleshooting within boat maintenance and repairs. If you maintain your own vessel, oil changes connect directly to related jobs such as fuel filter replacement, impeller inspection, spark plug service, lower-unit gear lube checks, cooling system flushing, battery testing, and winterization. If your engine is already showing symptoms like metal in the oil, milky residue, chronic consumption, overheating, rough running, or an oil pressure alarm, the oil change becomes both maintenance and diagnosis. Done properly, this job saves money, extends engine life, and gives you an early warning system before a small problem turns into a ruined season.
What You Need Before You Start
Professional results come from setup, not speed. Before I begin any boat engine oil change, I gather the engine manual, correct oil quantity, OEM or premium aftermarket filter, absorbent pads, nitrile gloves, a filter wrench, an extraction pump or drain system, a funnel, a torque reference if the manufacturer provides one, and approved containers for used oil. On most marine engines, the manual is the final authority because fill capacities and oil grades vary by engine family and sometimes by operating temperature range. For example, many gasoline inboards call for FC-W rated 25W-40 marine oil, while some diesel engines require a heavier multigrade that meets the builder’s API and ACEA requirements.
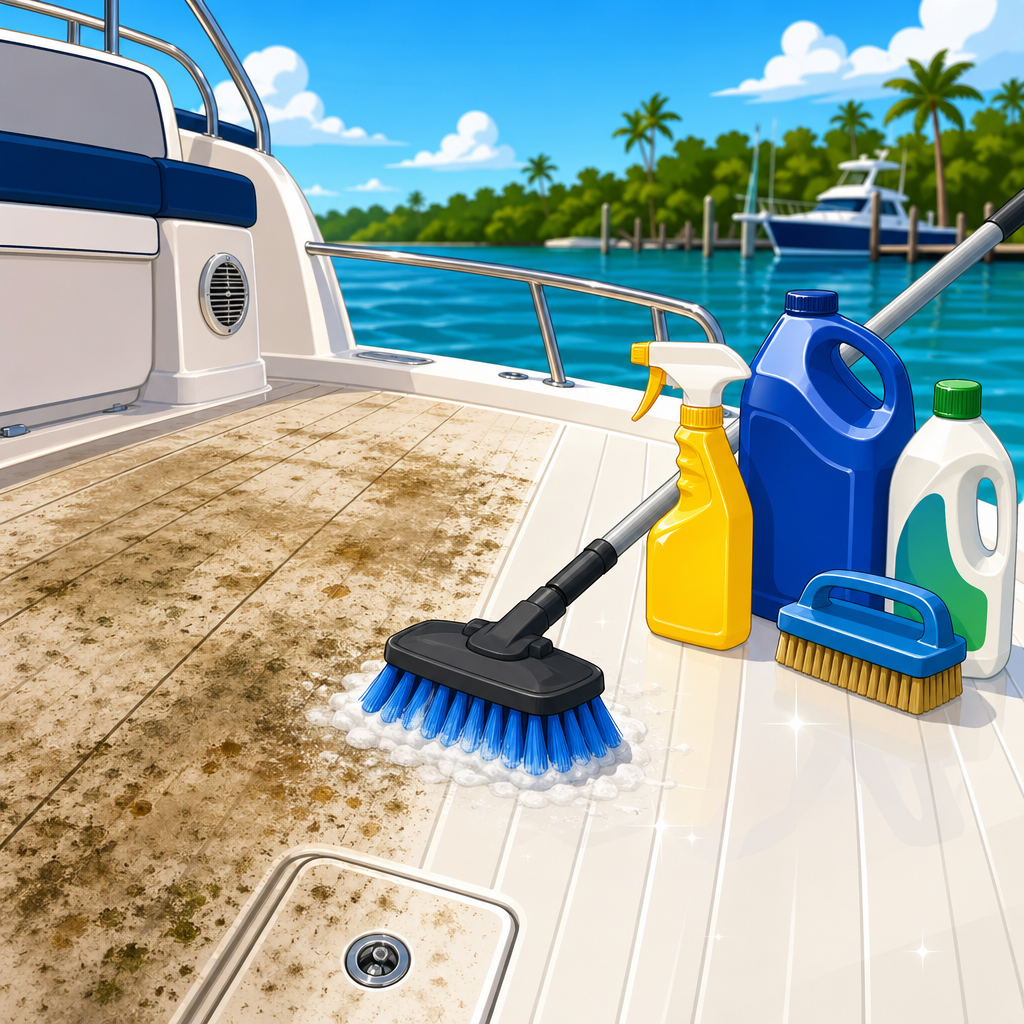
The work area matters too. Boat bilges trap spills, and even a small mess can create odor, fire risk, and environmental liability. Lay absorbent pads under the filter and around the extraction point. Make sure the boat is level or close to level so the dipstick reading is trustworthy. If you are on a trailer, chock the wheels. If you are in the water, secure the boat and avoid doing the job where wake action makes handling hot oil unsafe. Ventilate the engine compartment thoroughly before starting and after shutting down, especially on gasoline boats, where vapor accumulation can become hazardous.
It also helps to understand your engine type before touching a wrench. Outboards usually provide easier access and lower oil volumes, while inboards and sterndrives may route oil through remote filters, coolers, and tight bilge spaces that leave more old oil behind if you rush. Diesel engines often hold substantially more oil and produce darker used oil quickly, which is normal; color alone does not indicate failure. Knowing whether your engine uses a cartridge or spin-on filter, a sump drain hose, or a dipstick-tube extractor will determine your method and the tools you need.
Step-by-Step: How to Change Your Boat’s Engine Oil
The correct sequence is simple: warm, shut down, extract, replace filter, refill, verify, and inspect. Warm the engine to normal operating temperature so contaminants stay suspended and the oil flows. Five to ten minutes at idle or a short run on muffs for an outboard is usually enough, but follow the manufacturer’s guidance and never run an engine without proper cooling water. Once warm, shut the engine off, remove the key, and give the oil a minute to drain back into the sump. Open the engine hatch and ventilate before proceeding.
Next, remove the old oil. Many boat owners use a manual or electric extraction pump through the dipstick tube. Others use a built-in sump drain hose routed to the bilge or drain plug area. Extract until flow stops, then reposition the suction tube if possible to capture trapped oil in low spots. On some engines I can recover an extra half quart by changing the tube angle or waiting several minutes and making a second pass. Transfer the used oil immediately into a sealed container. A complete extraction matters because dirty residual oil dilutes the fresh fill and shortens its service life.
After the sump is empty, replace the oil filter. Spin-on filters should be loosened carefully with a strap or cup wrench while absorbent pads catch drips. Before installing the new filter, confirm the old gasket came off with the old filter; a stuck double gasket causes leaks and sudden oil loss. Lightly coat the new gasket with clean oil. If the filter mounts vertically, pre-filling it can reduce dry-start time, though some manufacturers discourage full pre-fill where contamination risk is high or access is awkward. Install by hand until the gasket contacts the base, then tighten according to the filter instructions, typically three-quarters of a turn more.
Refill with the specified oil grade using a clean funnel. Add slightly less than the stated capacity at first, wait a minute, and check the dipstick. Overfilling is a common mistake. Excess oil can foam, increase crankcase pressure, and sometimes push oil into the intake system. Once the level reaches the safe range, reinstall the fill cap, start the engine, and let it idle while watching for the oil pressure light to go out promptly. Inspect around the filter and drain point for leaks. Shut down, wait several minutes, then recheck and top up to the correct mark. Finally, record the date, engine hours, oil type, filter part number, and any observations.
Oil Selection, Service Intervals, and Recordkeeping
Choosing the right oil is not guesswork. Marine gasoline four-stroke engines commonly use oils carrying NMMA FC-W certification because those formulas are built for the sustained loads, corrosion exposure, and higher operating temperatures found in boats. Automotive oils can meet some viscosity targets, but they are not always optimized for marine service. Diesel engines are even more specification-sensitive; many require oil that meets explicit API service categories and engine-builder approvals tied to emission systems, turbocharger protection, and soot handling. If your manual lists multiple viscosities, select based on expected ambient temperature and the engine’s condition, not on internet folklore.
Oil change intervals depend on engine type, duty cycle, and storage conditions. A widely used benchmark is every 100 engine hours or at least once per season for many four-stroke outboards and gasoline sterndrive or inboard engines, but always verify the factory interval. Boats used for trolling, repeated short runs, heavy towing, or long idle periods may need shorter intervals because oil sees more moisture and fuel dilution. Diesel operators often rely on oil analysis to fine-tune intervals. In my experience, owners who change oil before winter layup reduce internal corrosion risk because the engine sits with cleaner, less acidic oil through the off-season.
Detailed records turn routine service into a troubleshooting asset. Log engine hours, oil brand, viscosity, filter number, and any findings such as fuel smell, glitter, rising oil level, or low pressure alarms. A trend matters more than a single event. If one engine in a twin setup begins consuming more oil than the other, or if pressure at hot idle steadily drops over three service cycles, that pattern points to developing wear, dilution, or sensor issues. Good records also strengthen resale value and support warranty discussions because they show consistent, manufacturer-aligned maintenance rather than vague owner memory.
| Engine type | Typical oil guidance | Common interval baseline | What to watch during service |
|---|---|---|---|
| Four-stroke outboard | Marine-rated FC-W oil in specified viscosity | 100 hours or annually | Milky oil, fuel smell, metal on drain, prop-related overload history |
| Gas inboard or sterndrive | Builder-specified marine multigrade, often 25W-40 | 100 hours or annually | Bilge leaks, filter gasket issues, overheating, low hot-idle pressure |
| Marine diesel | API and builder-approved heavy-duty oil | Hours-based, sometimes analysis-supported | Soot loading, coolant contamination, rising oil level, turbo health |
Using Oil Changes to Diagnose Engine Problems
An oil change is one of the best times to troubleshoot your engine because the evidence is literally in your hands. Start with appearance and smell. Black oil in a diesel is not automatically a concern, but thick sludge, a sharp fuel odor, or a level that has risen since the last check suggests fuel dilution from injector problems, excessive idling, or repeated cold starts. Milky tan oil points toward water intrusion or coolant contamination, depending on engine design. On raw-water-cooled gasoline engines, manifold or head gasket issues can sometimes introduce water that quickly turns lubrication into an emulsion.
Pay close attention to metal. A few fine specks in drained oil may be normal after break-in or from residual debris, but visible glitter, magnetic particles, or flakes trapped in the filter warrant investigation. Cutting open the oil filter with a proper filter cutter is standard practice in many professional shops because it reveals bearing material, ferrous fragments, and carbon loading that the drain stream can hide. Bronze or copper tones can indicate bearing wear. Bright steel suggests contact between hard parts. If you find substantial metal, do not simply refill and keep boating; pressure-test, inspect, and diagnose before a minor issue becomes a seized engine.
Oil pressure behavior adds another layer. A pressure warning at startup that clears instantly may be less concerning than a hot-idle alarm after a long run. The causes can range from low oil level and incorrect viscosity to a weak sender, restricted pickup, worn bearings, or overheating that thins the oil excessively. I always compare pressure trends with temperature data and recent service history. If the engine just had an oil change and pressure is low, first confirm the filter is correct, the oil level is accurate, and the old filter gasket is not doubled. Then move to sender testing and mechanical gauge verification before assuming internal damage.
Oil consumption deserves equal attention. Blue smoke, oily residue in the intake, fouled spark plugs, and the need to add oil between services may point to worn rings, valve guide seals, prolonged high-rpm operation, or crankcase ventilation issues. In sterndrives and inboards, chronic overfilling can mimic consumption problems by forcing oil where it does not belong. This hub article links conceptually to deeper jobs in engine care: compression testing, leak-down testing, cooling system diagnosis, spark and fuel checks, crankcase ventilation inspection, and sensor verification. The oil service tells you where to look next, which is why disciplined observation during this task pays off far beyond lubrication alone.
Common Mistakes, Environmental Rules, and Related Engine Care
The most common mistakes are avoidable. Owners overfill, use automotive oil without checking marine specifications, install low-quality filters, skip warming the engine, fail to verify the old gasket came off, or ignore small leaks after restart. Another frequent error is changing engine oil while neglecting other fluids and wear items that affect reliability just as much. A complete engine care routine should include lower-unit or gearcase lubricant checks, fuel-water separator replacement, raw-water impeller inspection on applicable engines, coolant checks on closed systems, belt inspection, battery and charging tests, and regular review of hoses, clamps, and wiring. Troubleshooting becomes easier when the entire system is maintained on schedule.
Environmental compliance matters as much as mechanical correctness. Used oil is a regulated waste stream in many areas, and discharging oil into the bilge or marina can trigger fines and cleanup costs. Store old oil in clearly labeled containers with tight lids, bag used filters if local rules require it, and take both to an approved recycling facility or service center. Wipe spills immediately with absorbent pads, not detergent and water, which only spreads contamination. If your boat sits in a shared marina, check local yard rules before doing service onboard. Professional habits protect waterways and preserve access for owners who prefer to maintain their own boats.
When should you stop and call a marine technician? If the engine shows persistent low oil pressure, repeated contamination, heavy metal in the filter, severe smoke, knocking, or unexplained oil level rise, deeper diagnosis is needed. For everyone else, build this job into your routine. Use the manual, buy the right parts, log every service, and treat each oil change as a snapshot of engine health. That approach is how you change your boat’s engine oil like a pro: not just by replacing fluid, but by protecting performance, catching trouble early, and supporting every other task in your engine care and troubleshooting plan. Start with your next scheduled oil change and turn it into the foundation of better boat maintenance.
Frequently Asked Questions
How often should you change your boat’s engine oil?
For most boats, the safest rule is to change the engine oil and filter at least once every 100 hours of operation or once per season, whichever comes first. That said, the correct interval always depends on the engine manufacturer’s recommendations, how the boat is used, and the conditions it operates in. A boat that spends long days trolling at low speed, idles frequently, makes lots of short trips, or runs in hot, humid, or salty environments may need more frequent oil changes than one used lightly in ideal conditions. Oil in a marine engine has a tough job: it lubricates moving parts, helps cool internal components, suspends combustion byproducts, and protects against rust in an environment where moisture is always a concern. Over time, that oil becomes contaminated with soot, fuel, acids, and sometimes water, and once that happens, it cannot protect the engine as effectively. If your oil looks unusually thin, smells strongly of fuel, appears milky, or darkens very quickly after a change, treat that as a warning sign and investigate further. Staying ahead of the schedule is far cheaper than dealing with accelerated bearing wear, corrosion, or internal engine damage later.
What supplies and tools do you need to change boat engine oil the right way?
At a minimum, you will need the correct marine-grade engine oil in the proper viscosity, a new oil filter that matches your engine, an oil extractor pump or drain system appropriate for your setup, a filter wrench, a funnel, absorbent pads or shop towels, gloves, and a sealed container for used oil. It also helps to have a socket set or wrench set, a flashlight, a rag for cleaning the dipstick and filter mounting surface, and a torque reference if your engine manufacturer specifies one for the drain plug or filter. Before you begin, confirm your engine’s exact oil capacity and filter part number in the owner’s manual because overfilling or using the wrong oil can create serious problems. Many marine engines are installed in tight engine compartments where access is limited, so an extraction pump is often the cleanest and most practical method. Keep absorbent pads under the filter area before loosening anything, because even a careful oil change can get messy in a bilge. If your boat has twin engines, gather enough oil and filters for both and label your waste containers clearly. Using quality supplies matters here. A good filter with the correct bypass and anti-drainback characteristics, combined with the right oil formulation, gives your engine much better protection than generic substitutes.
Should you warm up the engine before changing the oil?
Yes, in most cases you should warm the engine first, because warm oil flows more easily and carries more suspended contaminants out with it. Letting the engine reach normal operating temperature for a short period helps the oil thin enough to be extracted or drained more completely, which means you remove more of the dirty oil instead of leaving a heavy residue behind in the pan. The key is warm, not dangerously hot. After shutoff, give the engine a few minutes so you can work safely without risking burns from hot components. Make sure the boat is secure, properly ventilated, and never run the engine in an unsafe enclosed space. Once the engine is off, remove the dipstick or oil fill cap as directed for your setup, insert the extractor tube fully if you are pumping oil out, and remove as much old oil as possible before changing the filter. If your engine uses a drain hose or drain plug, follow the manufacturer’s procedure and take extra care to contain every drop. Skipping the warm-up step can make the oil change less effective, especially in cooler weather when oil is thicker and slower to evacuate. A proper warm drain is one of those small professional habits that improves the overall quality of the job.
What are the biggest mistakes people make when changing boat engine oil themselves?
The most common mistakes are using the wrong oil, overfilling or underfilling the crankcase, failing to replace the filter, leaving the old filter gasket stuck to the mounting surface, not cleaning up spills, and forgetting to check for leaks after startup. Another major error is treating a boat engine like an automotive engine without accounting for marine operating conditions. Marine engines often work under heavier sustained loads, face higher moisture exposure, and may have manufacturer-specific oil requirements that should not be ignored. One mistake that causes a surprising amount of trouble is rushing the refill. After adding new oil, always wait a few minutes, check the dipstick carefully, and top off gradually rather than pouring in the full estimated capacity all at once. Too much oil can foam, increase crankcase pressure, and reduce lubrication quality. People also overlook signs of deeper trouble during an oil change. Milky oil may suggest water intrusion. A gasoline smell can point to fuel dilution. Metal flakes can indicate internal wear. If the old oil level was mysteriously higher than expected, that is not something to shrug off. Finally, many DIYers forget to run the engine briefly after the change, shut it down, let the oil settle, and then recheck the level. That final verification step is what separates a basic oil change from a truly professional one.
How can you tell if old engine oil is pointing to a bigger problem?
Used oil can reveal a lot about the health of your boat engine if you know what to look for. Dark oil by itself is not automatically a problem, because oil naturally darkens as it suspends normal combustion contaminants. What matters more is texture, smell, consistency, and any visible contamination. If the oil looks milky or creamy, water may be entering the crankcase through condensation, a failing gasket, a cracked component, or another cooling-system-related issue. If it smells strongly of fuel or feels unusually thin between your fingers, fuel dilution may be present, which can happen from excessive idling, poor combustion, injector problems, or other engine issues. Gritty particles or shiny metallic debris are more serious and may indicate abnormal internal wear involving bearings, rings, or valvetrain components. Also pay attention to how much oil comes out. If the engine seems to be consuming oil quickly between changes, or if the oil level rises on its own, that is a clue worth investigating. A smart owner does not just change the oil and move on. They use each oil change as a mini inspection. Check the filter for metal, inspect the bilge for leaks, note the oil color and smell, and keep records of hours, oil type, and anything unusual. That habit helps you catch problems early, before a manageable repair turns into a costly engine failure.