A soft or rotted boat deck is more than an annoyance underfoot; it is a structural warning sign that moisture has breached the skin, weakened the core, and started undermining safety, resale value, and the long-term integrity of the boat. In practical terms, a soft deck means the fiberglass skin no longer has firm support from the plywood, balsa, or foam core beneath it, so the surface flexes when walked on. A rotted deck usually points to prolonged water intrusion through failed bedding around hardware, cracked gelcoat, unsealed fastener holes, or neglected fittings. I have repaired decks on runabouts, center consoles, small cruisers, and sailboats, and the pattern is consistent: owners often notice a little flex near a seat base or hatch, assume it is cosmetic, and only later discover extensive wet core spreading far beyond the original soft spot.
This topic sits at the center of deck and upholstery maintenance because the deck supports consoles, seats, pedestals, leaning posts, hatches, carpeting, snap-in flooring, vinyl flooring, and the fasteners that hold upholstery structures in place. When the deck fails, upholstery problems usually follow. Seat bases loosen, screw holes wallow out, moisture gets trapped under marine carpet, and mold forms where wet foam cushions meet poor ventilation. A proper repair therefore is not just about replacing rotten wood. It means diagnosing the source of water, restoring stiffness, protecting the laminate, rebedding hardware correctly, and planning follow-up care for adjacent surfaces and furnishings. Boat owners searching for how to repair a boat’s soft or rotted deck usually want three answers immediately: what causes it, can it be fixed without replacing the whole deck, and how much repair is actually required. The short answer is yes, many soft decks can be repaired, but the right method depends on how far the damage extends and what material the deck was built with.
Understanding construction matters before any saw touches the deck. Many production boats use a fiberglass top skin bonded over a core material, often marine plywood in older boats and balsa or foam in some composite builds. The core provides compressive strength and stiffness while keeping weight manageable. If water enters and stays trapped, plywood decays, balsa turns mushy, and bond lines fail. On a solid fiberglass deck without core, softness may come from laminate delamination rather than rot, requiring a different approach. This hub article explains how to inspect the problem, choose between injection repair and full replacement, complete the job with accepted materials and methods, and tie deck repairs back to upholstery maintenance so the surrounding interior and exterior finishes last longer.
Diagnose the Damage Before You Cut
The first rule in deck repair is simple: map the damage completely before deciding on a method. Pressing with your foot is only the starting point. I use a plastic mallet or the handle of a screwdriver to tap across the deck and listen for the difference between crisp, sharp sound over sound laminate and dull thuds over wet or detached core. A moisture meter can help, especially on cored fiberglass, but readings can be distorted by metal backing plates, wiring, and laminate thickness, so use it as one clue rather than a final verdict. If the boat has carpet, vinyl, EVA foam, or glued flooring, lift enough of it to inspect the substrate directly. Many soft spots spread under covering materials long before they show on the surface.
Next, identify the water entry point. Common failure areas include pedestal seat bases, console fasteners, T-top mounts, cleats, rod holders, hinges, rail stanchions, and poorly sealed deck plates. Any screw driven into core without sealing the exposed core edges becomes a straw for water. Stress cracks around hardware are another giveaway. On some boats, water also enters from above through hatch gutters and runs laterally within the core. On others, wet upholstery contributes indirectly by trapping moisture against fastener penetrations. If you repair the deck but ignore the leak path, the new core will fail again. This is why serious deck work always includes rebedding hardware with butyl tape or marine sealant and isolating fastener holes from core where practical.
The final part of diagnosis is determining extent and structure. Drill a few small inspection holes in discreet areas from above, using tape on the bit as a depth stop so you do not punch through the bottom skin. Dry, light-colored shavings from plywood indicate healthy core; dark, wet, or pulpy material confirms damage. If the deck supports major loads, such as under a leaning post, helm seat, or mast step on a sailboat, assume less margin for patch repairs. Large structural areas usually need full cut-out and core replacement, not cosmetic stiffening.
Choose the Right Repair Method
Boat owners often ask whether a soft deck can be fixed by injecting epoxy. Sometimes it can, but only in limited conditions. If the core is slightly degraded yet mostly intact, and the top and bottom skins remain well bonded, a low-viscosity epoxy restoration method may restore stiffness in a small area. This works best on isolated soft spots caused by localized moisture intrusion caught early. It does not reverse true rot, rebuild missing core, or dry heavily saturated laminate. I have seen injection repairs hold around small seat base areas on trailer boats, but I have also torn out decks where earlier injections merely locked moisture inside and delayed the inevitable.
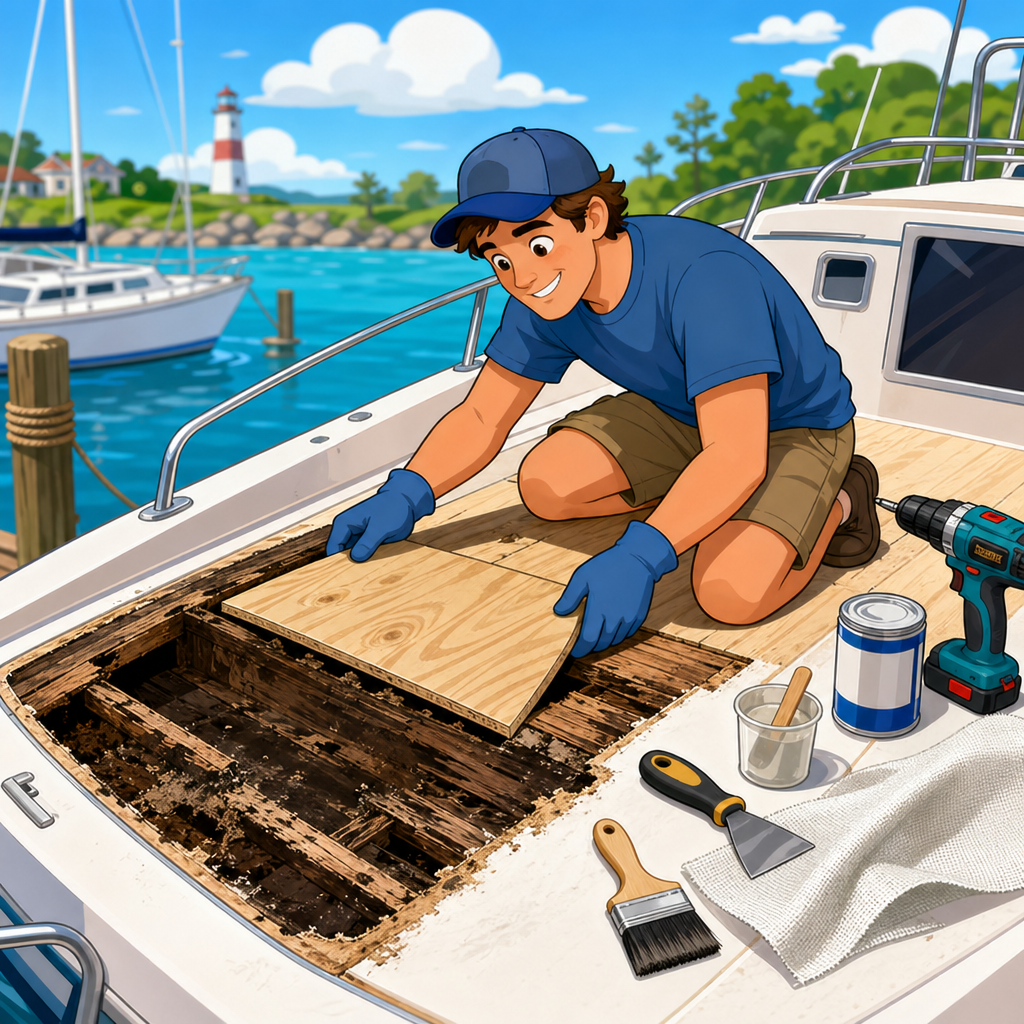
Full replacement is the correct repair when the core is rotten, crushed, detached, or wet across a broad section. That means cutting the top skin, removing the damaged core, drying and cleaning the underside of the fiberglass, bonding in new core, laminating the skin back, fairing, and refinishing. The replacement core may be marine plywood, end-grain balsa where originally specified, or composite panels such as Coosa board or foam core, depending on the boat’s design and the loads involved. Marine plywood remains common because it offers excellent compression strength under hardware and seating, but it must be fully encapsulated in epoxy or polyester-compatible laminate and protected at every penetration. Composite boards resist rot but cost more and may require different fastening strategies because screws can have lower holding power without proper inserts or backing plates.
| Repair option | Best use case | Main advantage | Main limitation |
|---|---|---|---|
| Epoxy injection | Small, early-stage soft spot with mostly intact core | Minimal cutting and faster cosmetic recovery | Will not fix rotten or missing core |
| Partial deck replacement | Localized wet or rotted area with clear boundaries | Restores structure without replacing the entire deck | Requires careful bonding and finish matching |
| Full section replacement | Large structural damage or widespread moisture | Most reliable long-term solution | Highest labor, material, and finish work |
Material compatibility matters. Polyester resin is common in production fiberglass boats, but many repairers prefer epoxy for secondary bonding because it adheres better to cured laminate and wood. Use the laminate schedule recommended by the core and resin manufacturer, and check whether the repair area needs biaxial cloth, chopped strand mat, woven roving, or a combination. For most deck repairs, 1708 biaxial fiberglass is a standard choice because it builds strength efficiently and conforms well. Follow manufacturer mix ratios exactly. Bad resin chemistry creates weak repairs faster than any other mistake I see from first-time DIY work.
How to Remove and Replace a Rotted Deck Section
Start by clearing the workspace completely. Remove seats, pedestals, hatches, trim, flooring, and any upholstery attached to the repair zone. Label hardware and backing plates so reassembly is straightforward. If the boat has wiring, fuel lines, steering hoses, or control cables under the deck, expose and protect them before cutting. Set a circular saw or oscillating tool to the exact depth of the top skin only. You want to preserve the bottom skin whenever possible because it acts as the backing for the new core. Cut the perimeter in straight lines with rounded corners to avoid stress risers, then lift the top skin carefully. If it comes off in one piece and remains sound, you may be able to reuse it as the cap.
Remove all damaged core back to clean, dry, solid material. This is not the place for optimism. If the edge still looks dark, punky, or damp, keep going. Use a scraper, chisel, multitool, and vacuum to get the bottom skin clean. Then dry the cavity thoroughly. In a shop, I often use heat lamps, dehumidification, and time rather than trying to force the process. Moisture trapped under new laminate can cause bonding failure, print-through, and recurring softness. Once dry, grind the underside of the removed skin and the deck perimeter with the correct grit to create a bonding surface. Wear a respirator; fiberglass dust is hazardous.
Bed the new core into thickened epoxy or other approved bonding compound so there are no voids. Weight or clamp it evenly. If using plywood, precoat all faces and edges before installation. If the deck includes multiple layers or stepped thickness, reproduce the original structure exactly. After the core bonds, laminate the top skin back in place or glass over with new fiberglass cloth if the original cap cannot be reused. Stagger seams, overlap onto the surrounding deck, and consolidate the laminate with a roller to remove air pockets. Fair the surface with an appropriate filler, sand it smooth, and finish with gelcoat, non-skid paint, molded texture, or marine flooring to match the rest of the deck.
Protect Hardware, Flooring, and Upholstery After the Structural Repair
The deck repair is only successful when the surrounding components are reinstalled in a way that prevents another moisture path. Every fastener hole in a cored deck should be sealed. The professional method is to overdrill the hole, remove a ring of core, fill the cavity with thickened epoxy, and then redrill the pilot hole through the cured epoxy plug. This isolates the core from future leaks. Use backing plates under heavily loaded hardware such as pedestal seats, leaning posts, and table mounts. Bedding compounds matter too. Butyl tape works exceptionally well for many deck fittings because it remains flexible and serviceable, while polyurethane or polysulfide sealants are useful where stronger adhesion or fuel resistance is required.
Floor coverings should go back only after the deck is fully cured and dry. Marine carpet can hide leaks and keep moisture in contact with the deck, so if you reinstall it, use snaps or adhesives suited to the substrate and maintain ventilation. EVA foam flooring is popular for comfort and traction, but it also masks early warning signs of developing softness. Inspect under removable sections regularly. Vinyl flooring is easier to clean and can be a smart choice on fishing boats where upholstery and deck maintenance must balance washdown, comfort, and durability. Around seat bases and upholstered modules, avoid trapping wet foam or canvas directly against the deck. Mildew on upholstery often starts where water lingers below the visible seating surface.
This is also the point to inspect related deck and upholstery maintenance items across the boat. Check hatch seals, gutter drains, cockpit scuppers, seat pedestal bases, cooler mounts, livewell lids, and screw penetrations under bolsters. Clean and condition vinyl seating with a marine-grade protectant, but fix the structural mounting first. No amount of upholstery cleaning compensates for a weak deck beneath the furniture. As a hub topic, this is where owners should branch into focused maintenance tasks: rebedding deck hardware, replacing snap-in carpet, restoring non-skid, repairing vinyl seat seams, drying foam cushions, and preventing mildew in storage.
Common Mistakes, Costs, and When to Hire a Pro
The most common deck repair mistakes are underestimating the damage, sealing in moisture, using the wrong resin, and reinstalling hardware without isolating the core. Another frequent problem is chasing appearance before structure. A shiny coat of paint over a flexible deck still leaves an unsafe boat. Some owners also replace plywood with composite board without recalculating stiffness or fastening needs. Material choice should reflect span, support spacing, compression loads, and the way the original builder engineered the panel. On larger boats, particularly where stringers, bulkheads, or fuel tanks tie into the deck, a repair can become a structural project well beyond surface carpentry.
Costs vary widely by size and finish level. A small DIY localized repair may run a few hundred dollars in epoxy, fiberglass, fillers, abrasives, and coatings, excluding tools. A professional repair for a moderate cockpit section can easily reach several thousand dollars because labor dominates the job: demolition, drying, glass work, fairing, texture matching, and reinstallation all take time. If the deck supports critical equipment, if the wet area extends into stringers or transom structures, or if you cannot confidently match the laminate schedule, hire a qualified fiberglass repair yard. Ask what core material they recommend, how they isolate hardware penetrations, whether they use moisture readings during diagnosis, and how they will reproduce the original non-skid or finish.
A repaired deck should feel solid, sound crisp when tapped, hold hardware firmly, and stay dry because the root cause was corrected. The lasting benefit is not just better footing. You restore structural confidence, protect upholstery investments, prevent mold and fastener loosening, and preserve the value of the boat. If your deck feels spongy anywhere, do not wait for the next season. Inspect it, map it, and fix the leak path first. Then choose the repair method that matches the real damage, not the easiest shortcut. That disciplined approach is what turns a temporary patch into a durable boat maintenance and repairs solution.
Frequently Asked Questions
What causes a boat deck to become soft or rotted in the first place?
A soft or rotted boat deck usually starts with one problem: water getting where it should not. Most boat decks are built with a fiberglass skin over a core material such as plywood, balsa, or foam. That core is what gives the deck its stiffness and strength. When moisture enters through poorly sealed hardware, cracked caulking, stress fractures, unsealed screw holes, old deck fittings, hatch openings, rail bases, or delaminated fiberglass, it can soak into the core over time. Once that happens, the core loses its structural integrity. In wood-based cores, this often means rot, decay, and compression. In balsa or foam cores, it can mean crushing, separation, or widespread delamination.
What makes the problem especially serious is that the fiberglass surface may still look acceptable long after the core underneath has begun to fail. The outer skin can hide internal damage until you notice flexing underfoot, spongy areas, discoloration, cracking, or water weeping from fastener holes. In many cases, the damage spreads gradually because every rainstorm, washdown, or splash introduces more moisture into the compromised area. Left alone, what began as a small leak around a cleat or stanchion can turn into a much larger structural repair. That is why soft spots should be treated as a warning sign, not just a cosmetic inconvenience.
How can I tell whether my boat deck needs a minor repair or a full core replacement?
The difference comes down to how far the damage has spread and whether the deck core is still structurally sound. A minor repair may be possible if the soft area is very small, clearly localized, and caused by a limited issue that has not led to widespread rot or delamination. For example, if a small section around a fastener has gotten damp but the surrounding deck remains solid, you may be able to dry, reinforce, or locally repair that spot. However, if the deck feels soft over a broad area, flexes noticeably when walked on, has visible cracking, or shows signs that water has migrated beyond the original entry point, a more extensive repair is usually necessary.
To assess the extent of the problem, boat owners often start with a physical inspection. Tapping the deck with a plastic or phenolic hammer can reveal changes in sound, with solid areas producing a sharper note and damaged sections sounding dull or hollow. Moisture meters can help identify wet core material, although results can be affected by construction type and laminate thickness. Drilling small inspection holes from below or in inconspicuous locations can also confirm whether the core is dry, damp, crushed, or rotten. If the core comes out dark, wet, crumbly, or compressed, replacement is typically the right solution. In general, if the deck has lost strength rather than just surface finish, patching the top alone is not enough. The goal is not just to make the deck look better, but to restore its original stiffness and safety.
Can I repair a soft or rotted boat deck myself, or should I hire a professional?
Many boat owners can handle a deck repair themselves if they have moderate fiberglass skills, the right tools, enough workspace, and the patience to follow proper structural repair steps. A typical repair may involve removing hardware, cutting away the top skin or accessing the damage from below, removing the wet or rotten core, drying the area thoroughly, bonding in new core material, laminating fiberglass, fairing the surface, and reinstalling fittings with correct bedding techniques. None of those steps are impossible for a careful do-it-yourselfer, but they do require attention to detail. Mistakes in resin selection, bonding, laminate schedule, surface preparation, or sealing can lead to recurring leaks or a deck that still lacks proper strength.
Hiring a professional is often the smarter choice when the damaged area is large, located in a high-load section, tied into complex deck geometry, or near critical fittings such as chainplates, mast steps, windlasses, pedestal mounts, or structural bulkheads. It is also worth considering expert help if the underside access is limited, the deck has molded non-skid that you want to preserve, or the moisture intrusion may have spread into adjoining structures. A professional repair is usually more expensive up front, but it can save time and prevent costly rework. The best approach is to be honest about your skill level. If you are comfortable with fiberglass layup, grinding, fairing, and careful measurement, a localized repair may be manageable. If not, bringing in a marine repair specialist can protect both the boat and your budget in the long run.
What is the proper process for repairing a soft or rotted deck so the problem does not come back?
A lasting repair starts with finding and eliminating the source of water intrusion. If you repair the deck but do not address the leaking hardware, failed bedding, or cracked laminate that caused the damage, the new core can be compromised again. Once the leak source is identified, the damaged section must be opened up enough to remove all wet, rotten, crushed, or debonded core material. This is one of the most important parts of the job. Leaving even a small amount of decayed core behind can undermine the bond and allow the damage to continue spreading. The remaining laminate should be inspected carefully, then cleaned, ground, and prepared so the new materials can bond properly.
After the damaged core is removed, the area needs to be thoroughly dried before rebuilding. Depending on the construction and moisture level, this may take time. The replacement core should match the boat’s original structural needs, whether that means marine plywood, end-grain balsa, or an appropriate foam core. It must be bonded securely with the correct marine-grade resin and adhesive system, ensuring full contact without voids. New fiberglass laminate is then applied to restore the skin’s stiffness and load-carrying ability. After curing, the surface is faired and refinished, and any non-skid texture is recreated if needed. Finally, all removed hardware must be reinstalled using proper bedding compounds and best practices, including sealing fastener penetrations and, where appropriate, overdrilling and epoxy-sealing holes before redrilling. A repair that follows these steps does more than cover up soft spots; it restores structure and helps prevent repeat moisture intrusion.
How much does it cost to repair a soft or rotted boat deck, and what factors affect the price?
The cost can vary widely depending on the size of the damaged area, the deck construction, the extent of moisture intrusion, the materials used, and whether the repair is done by the owner or a marine professional. A small, localized repair may cost relatively little in materials if you do it yourself, especially if the damage is caught early and limited to one section around a fitting. However, once the damage expands into a larger core replacement project, costs rise quickly. Professional labor is often the biggest factor because proper deck repair is time-intensive. Technicians may need to remove hardware, protect surrounding finishes, cut and grind fiberglass, replace core material, rebuild laminates, match non-skid patterns, and refinish the area so it blends with the rest of the boat.
Several details can push the price higher. Repairs in structurally important areas require more careful engineering and reinforcement. Boats with teak overlays, complex molded surfaces, or difficult underside access can take much longer to repair. If the leak has affected nearby bulkheads, cabin tops, or support structures, the scope can expand beyond the deck alone. Cosmetic expectations also matter. A basic structurally sound repair is one thing; a near-invisible repair that matches gelcoat color and molded texture is another. The most cost-effective strategy is early detection. Fixing a soft spot when it first appears is almost always less expensive than waiting until the damage spreads and the entire section must be rebuilt. If you suspect deck rot, getting the area inspected promptly can help you understand the true scope before the repair becomes much more involved.