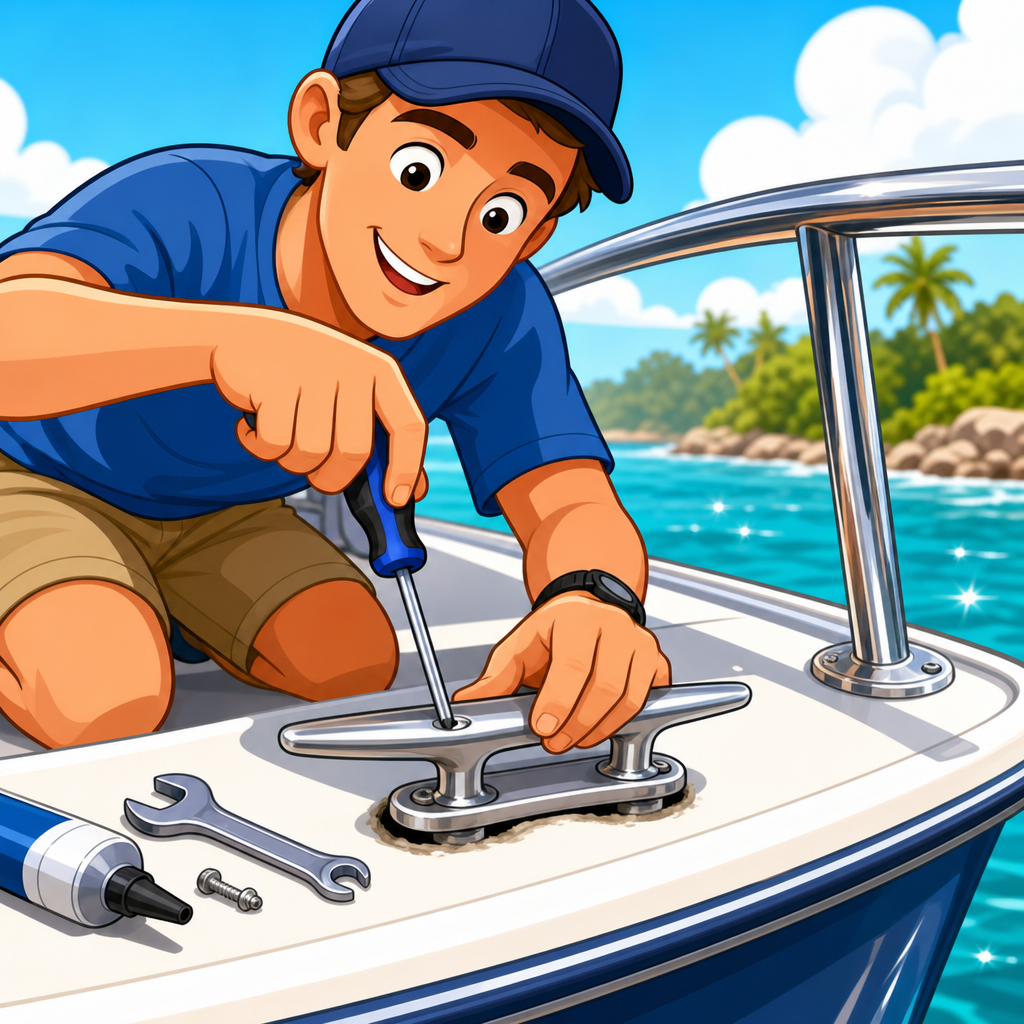
A loose boat cleat or rail can turn from a minor annoyance into a serious safety problem in minutes, especially when docking, anchoring, or moving around on deck in rough water. In practical terms, a cleat is the deck fitting that takes mooring and anchor loads, while a rail is the handhold or perimeter support that helps passengers balance and gives crew a secure point to lean against. When either fitting starts to wobble, flex, or pull away from the deck, the fasteners beneath it are usually backing out, the core material may be compressed or wet, or the bedding compound has failed and allowed movement. I have dealt with this issue at ramps, fuel docks, and moorings, and the pattern is always the same: a “small” bit of play quickly becomes enlarged holes, cracked gelcoat, water intrusion, and a much harder repair later. That is why securing a loose boat cleat or rail quickly matters. This guide serves as a central resource for emergency boat repairs and quick fixes, showing what you can do immediately, what tools and materials work, which temporary methods are safe, and when a short-term repair must be followed by a full structural fix.
Why a Loose Cleat or Rail Is an Immediate Safety Issue
A loose cleat is not just inconvenient; it is a high-load attachment point that can fail under shock loading. Dock lines tighten suddenly in wake, wind, and current, and those loads are transmitted through the cleat base into the deck laminate or backing plate. If the hardware is moving, load is no longer distributed correctly. Instead, it concentrates at the edges of elongated holes or at weakened fasteners. I have seen a four-bolt cleat effectively become a one-bolt cleat because three fasteners had lost grip in wet coring. Rails create a different but equally important risk. People trust rails instinctively. If a passenger grabs a loose rail while boarding, bracing underway, or recovering after a slip, the rail can shift, strip out, or rip free, causing a fall. On cabin cruisers and center consoles, this often happens near walkways where there is little room to recover balance.
The secondary issue is water intrusion. Once movement begins, sealant shears and tiny gaps open around fasteners. Every washdown, rain shower, or boarding wave can drive water below the fitting. On cored decks, especially plywood or balsa cores, repeated moisture exposure leads to rot, compression, and delamination. What could have been tightened in ten minutes may later require overdrilling, core replacement, epoxy rebuilding, and rebedding. Quick action therefore serves two goals: prevent immediate failure and stop the damage from spreading. If you manage emergency boat repairs regularly, cleats and rails belong near the top of the priority list because they combine load, safety, and water ingress in one fitting.
First Response: Inspect Before You Tighten
The fastest correct repair starts with a short inspection, not with blindly turning a wrench. First, test the movement. Is the fitting rotating, lifting vertically, or shifting side to side? Rotation often points to loose nuts or screws. Vertical lift suggests failed bedding, crushed core, or missing backing support. Side movement usually means elongated holes or stripped threads. Next, look for surrounding signs: cracked gelcoat around the base, rust streaks from stainless fasteners reacting in low-oxygen wet areas, soft deck underfoot, or staining inside the cabin liner. If the fitting is accessible from below, inspect washers, nuts, backing plates, and the underside laminate. A proper through-bolted cleat with a backing plate usually loosens gradually and can often be stabilized quickly. A rail mounted with undersized sheet-metal screws into thin fiberglass often needs a more cautious temporary fix because there may be little material left to hold.
Then identify the hardware and substrate. Many production boats use 316 stainless fasteners, but sizes vary widely, and threads may be coarse or fine depending on whether machine screws or bolts were used. Cleats should be through-bolted whenever possible. Rails may be through-bolted, tapped into aluminum plates, or fastened with screws into fiberglass. You need to know which system you have before deciding on a quick fix. If a fastener spins without tightening, stop. That usually means the backing nut is loose, the insert has failed, or the hole is stripped. Continuing to force it can worsen the damage. Also isolate the load immediately: move dock lines to another cleat, reduce line tension, and tell everyone not to use the suspect rail until it is secured.
Tools and Materials That Work for Fast, Reliable Temporary Repairs
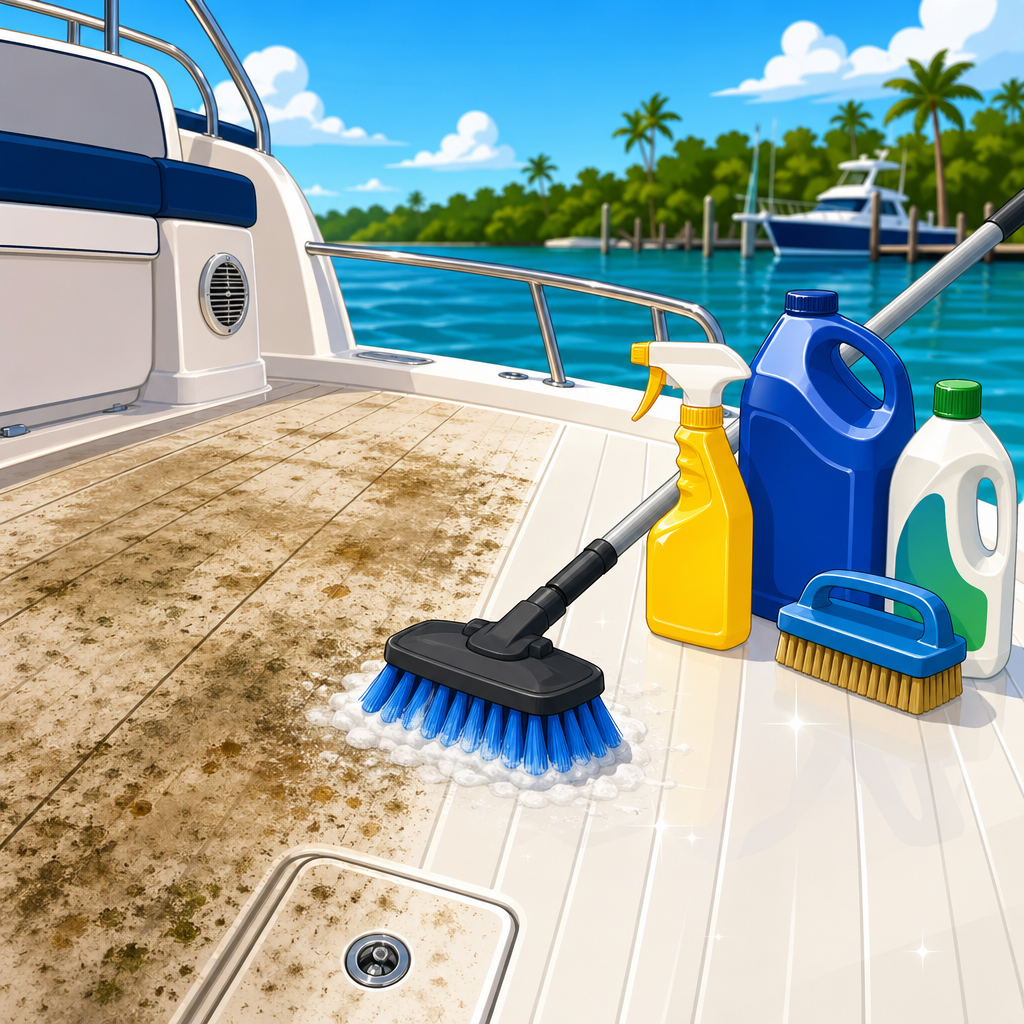
For emergency boat repairs, a compact kit solves most loose-hardware problems faster than improvisation. The core items are a screwdriver set, socket set, open-end wrenches, locking pliers, a cordless drill, drill bits, fender washers, nylock nuts, butyl tape or marine sealant, backing material, blue threadlocker, cleaning solvent, rags, and a flashlight or headlamp. I also keep stainless machine screws and bolts in common marine sizes, usually #10, 1/4-inch, and 5/16-inch, plus matching washers and nuts. For rails, finish washers can help spread load neatly on top surfaces. For a temporary interior backing plate, a piece of aluminum flat bar or marine-grade plywood can work if it is sealed and used only until a permanent repair is made. If access is poor, a telescoping magnet and painter’s tape save time when positioning washers and nuts behind liners.
Material choice matters. Butyl tape is excellent for quick rebedding because it seals well, stays workable, and does not harden like some polyurethane sealants. Polyurethane products such as 3M 4200 can be appropriate when you need a stronger semi-permanent bedding bond, but they are slower to cure and messier during an urgent repair. Avoid relying on household silicone as a structural solution. It may stop drips briefly, but it has poor long-term adhesion on many marine surfaces and complicates later rebedding. For stripped screw holes in noncritical light-load trim, epoxy thickened with filler can be useful, but for cleats and handrails under real loads, mechanical fastening is the standard. The American Boat and Yacht Council emphasizes properly sized, corrosion-resistant fasteners and adequate backing for deck hardware because load distribution, not adhesive alone, keeps fittings secure.
Quick Fix Methods for Loose Cleats and Rails
The right fast emergency repair depends on how the fitting was installed and what failed. Use this comparison to choose the safest short-term approach.
| Problem | Best quick fix | Why it works | Limitations |
|---|---|---|---|
| Through-bolted cleat with loose nuts | Retighten nuts, add fender washers or backing plate, rebed base | Restores clamp load and spreads force | Will not cure rotten or crushed core |
| Rail fastened with stripped screws | Replace with larger through-bolts and washers if backside access exists | Converts weak screw mount into stronger mechanical fastening | Needs interior access and correct drill sizing |
| Elongated holes with minor deck damage | Install larger hardware with backing and fresh bedding | Captures solid material beyond worn hole edges | Only temporary if laminate is soft |
| Soft deck or wet core around fitting | Unload fitting, add external load-sharing only for transit, plan structural repair | Prevents immediate pull-out while minimizing force | Not safe for normal docking or heavy use |
If the cleat is through-bolted and merely loose, the fastest proper action is to remove tension from the lines, hold the bolt heads from above, and tighten the nuts below evenly. If the washers are tiny, replace them with fender washers or a backing plate to spread the load. If the base has lifted enough to break its seal, back the hardware off, clean the mating surface, apply butyl tape or sealant, and retighten until snug. Do not overtighten and crush the laminate. For rails, I prefer converting screws to through-bolts whenever backside access is available. Even a short section of aluminum backing bar under two stanchion feet can transform a weak rail into a stable temporary repair. If access is impossible, you may be limited to a reduced-load fix until the liner or trim can be removed.
When holes are enlarged, upsizing hardware can work as a temporary measure if the surrounding laminate is still firm. Drill cleanly, dry-fit first, and use washers large enough to bridge undamaged material. If the deck is soft, however, recognize the limit of a quick fix. Tightening against a compromised core often creates the illusion of security while continuing to crush material underneath. In that case, the correct emergency move is load management: reroute lines, use another cleat, forbid use of the rail, and secure the fitting only enough to prevent further movement during transit. Emergency boat repairs are about preserving safety and preventing escalation, not pretending a damaged structure is restored when it is not.
Step-by-Step Emergency Repair Process
Start by unloading the fitting. Shift dock lines to another cleat, add spring lines elsewhere, or move the boat so the damaged hardware is not carrying force. For a rail, mark it out of service. Next, gain access from below if possible and photograph the hardware before disassembly. Remove one fastener at a time unless the fitting is visibly lifting; this keeps alignment manageable. Check for wet or dark core material around each hole, corrosion on the shank, and crushed laminate under washers. Clean away old sealant using a plastic scraper and solvent that is safe for gelcoat. Dry the area thoroughly. If there is standing moisture in the hole, absorb it and allow airflow before rebedding. Then test-fit replacement bolts, washers, and any backing plate so you know everything seats properly before applying sealant.
Apply a sealing layer under the fitting base and around the fastener shanks. Reinstall the hardware and tighten progressively in a crisscross pattern for multi-bolt cleats. The goal is even compression, not maximum torque. Watch the sealant squeeze-out; uniform squeeze indicates the base is bedding evenly. Inside, ensure the backing plate or washers sit flat and do not bridge over curved liner surfaces. After initial tightening, wait a short period and retighten lightly as bedding settles. Then test the fitting by hand only. A rail should not rock when pushed and pulled. A cleat should remain stable under modest line tension, but avoid shock loads until you are certain the repair is holding. Finally, inspect again after the next trip or weather event. Many “fixed” fittings loosen because installers skip that follow-up check.
Common Mistakes, Warning Signs, and When to Stop
The biggest mistake is treating all loose hardware as a tightening problem. If the substrate is failing, more torque usually causes more damage. Another common error is using wood screws where machine bolts and backing are required. I frequently find oversized screws forced into enlarged holes with sealant packed around them; that may look tidy for a week, but it is not a dependable marine repair. Mixing metals is another issue. Stainless fasteners against untreated mild steel backing or corroded aluminum can create galvanic problems in wet, salty environments. Also avoid sealing over cracks without inspecting underneath. Gelcoat cracking around a cleat often means the laminate has been flexing under load for some time.
Stop and downgrade the repair to “transit only” if you find wet, rotten, or crushed core; spider cracking radiating outward; a backing plate that has bent the underside of the deck; or bolts that pull through with very little effort. These are signs of structural degradation, not loose hardware alone. In those cases, a permanent repair may require overdrilling the holes, removing damaged core, drying the area, filling with thickened epoxy, redrilling proper fastener holes, and rebedding the fitting over a substantial backing plate. That is beyond a dockside quick fix, but recognizing the boundary is what keeps emergency repairs honest and safe. As a hub within Boat Maintenance & Repairs, this topic connects directly to related jobs such as stopping deck leaks, replacing marine sealant, repairing cracked fiberglass around hardware, choosing backing plates, and troubleshooting corrosion at deck fittings. If you use this guide to stabilize a loose cleat or rail quickly, make the next step a scheduled permanent repair. Fast action protects the boat today; correct rebuilding preserves strength, resale value, and safety for every trip ahead. Inspect your deck hardware this week, tighten what is sound, and rebuild what is not before the next hard docking tests it for you.
Frequently Asked Questions
What should I do first if I notice a boat cleat or rail is loose?
The first step is to reduce load on the fitting immediately. If it is a cleat, do not keep tying dock lines, anchor rode, or spring lines to it until you know how bad the problem is. Shift the load to another secure cleat, a piling, or a properly backed strong point if one is available. If it is a rail, tell everyone on board not to grab, lean on, or step against it until you have checked it. A loose rail may still look usable, but once the fasteners beneath it begin to move, the fitting can fail suddenly under body weight or wave impact.
Next, inspect the area closely. Look for wobble, gaps under the base, cracked sealant, rust streaks, soft deck material, enlarged bolt holes, or signs that the backing hardware underneath has shifted. On many boats, the real issue is below the surface: nuts may have backed off, washers may be too small, the backing plate may be missing, or moisture may have weakened the deck core around the mounting holes. If you can access the underside, put one hand on the fitting and have someone gently move it while you watch the hardware below. That often tells you whether the problem is simply loose fasteners or something more serious like deck compression or core damage.
If conditions require a quick fix, such as while docking or preparing to leave a mooring, tighten only what you can confirm is structurally sound. Do not just crank down on the fasteners harder and assume the problem is solved. Over-tightening can crush a cored deck, strip threads, or crack the base of the cleat or rail. A safe short-term response is to remove the load, inspect, snug the hardware evenly, and test for movement. If the fitting still flexes after tightening, treat it as unreliable and plan a proper repair before using it normally again.
Can I quickly tighten a loose cleat or rail myself, or does it need professional repair?
In many cases, you can perform a quick stabilization yourself if the issue is limited to hardware that has simply loosened over time. If the cleat or rail is through-bolted, the nuts are accessible, the bolts are not badly corroded, and the surrounding deck feels firm and dry, tightening the hardware evenly may restore solid support for the short term. This is especially true if the fitting has not pulled up enough to damage the bedding or elongate the mounting holes. Basic tools, a second person to hold the bolt head, and a careful approach are often enough to stop the wobble until you can schedule a full rebedding.
However, there are clear signs that the repair should go beyond a simple tightening job. If the bolts spin in place, if the base rocks even after the fasteners are snug, if you see water intrusion, brown stains, crushed fiberglass, cracks around the mounting area, or soft deck material, the problem is no longer just loose hardware. The fitting may have damaged the deck laminate or saturated the core, and tightening it further will not restore strength. In those cases, a more complete repair is needed, often involving removal of the fitting, inspection of the deck, replacement of fasteners, proper backing plates, and fresh marine sealant.
A professional is a smart choice when the fitting carries high loads, such as a primary mooring cleat, anchor cleat, or heavily used bow or stern rail. These are not cosmetic parts. They are safety-critical hardware. If there is any uncertainty about the deck structure beneath them, the cost of a proper repair is small compared with the risk of a cleat ripping out during docking or a rail giving way when someone depends on it for balance in rough water. A quick DIY tightening is acceptable only when inspection supports it; anything beyond that deserves a full, structurally sound repair.
What usually causes a boat cleat or rail to become loose in the first place?
The most common cause is repeated stress working against the fasteners over time. Cleats absorb constant shock loads from docking, mooring, towing, and anchoring. Rails are repeatedly pulled, leaned on, and twisted as people move around the boat. Even a well-installed fitting experiences vibration, flexing, and expansion and contraction from temperature changes. Over months and years, those forces can gradually loosen nuts, compress bedding material, and allow small amounts of movement that get worse every time the fitting is used.
Another frequent cause is poor installation or inadequate backing. A cleat or rail should be through-bolted with appropriate washers or, ideally, a backing plate that spreads the load across a wider section of deck. If the fitting was mounted with undersized washers, weak screws instead of bolts, or no proper reinforcement beneath the deck, the hardware can start to pull into the fiberglass or crush the core below. Once that happens, the fitting may feel tight for a while but still shift under load because the structure around it is failing, not just the hardware.
Water intrusion is also a major factor. When the bedding seal around the base breaks down, water can enter the mounting holes and soak the deck core. On cored fiberglass boats, that trapped moisture can rot wood core or weaken other core materials, leaving the area soft and unable to hold compression. Corrosion can make things worse by weakening bolts, nuts, washers, and backing plates, especially in saltwater environments. In short, looseness usually comes from a combination of age, load, imperfect sealing, and structural fatigue beneath the fitting rather than one single event.
What is the fastest safe temporary fix before I do a permanent repair?
The fastest safe temporary fix is to reduce or reroute the load, inspect the mounting hardware, and snug the fasteners evenly if the deck and hardware are still sound. For a loose cleat, move dock lines or anchor loads to another properly secured cleat if possible. For a loose rail, mark it as off-limits and prevent anyone from using it as a handhold. Then access the underside, if available, and check whether the nuts have backed off. If all the hardware appears intact and the deck around the fitting is not cracked or soft, tighten the fasteners gradually in an even pattern. This often eliminates minor wobble caused by vibration and settling.
If the fitting needs to remain in place temporarily but still has slight movement, a short-term stabilization can include removing the fitting when time allows, cleaning the base, and rebedding it with marine sealant before reinstalling with proper washers or a backing plate. That said, sealant is not a structural adhesive substitute for a damaged deck. It keeps water out and helps create a stable interface, but it does not make a failing mounting area strong again. Avoid shortcuts like driving in larger screws, packing the hole with random household caulk, or relying on threadlocker alone to hold a cleat or rail that is already moving under load.
The key phrase is temporary fix. A fitting that carries mooring loads or supports people should not stay in service long if there is any sign of deck damage, stripped hardware, or water intrusion. A temporary fix is only acceptable to get you safely through an immediate situation, such as docking, trailering, or preventing further water entry. After that, the right next step is removal, inspection, rebedding, and replacement of any compromised fasteners or backing components so the fitting can be trusted again.
How can I permanently fix a loose boat cleat or rail and prevent it from happening again?
A permanent fix starts with removing the fitting completely instead of trying to solve everything from the top side. Once the cleat or rail is off, inspect the base, fasteners, and mounting holes carefully. Replace any corroded or bent bolts, nuts, and washers with marine-grade hardware of the correct size and material. Check the deck around the holes for cracking, elongation, compression, or moisture damage. If the substrate is soft or the holes are wallowed out, the area may need to be dried, repaired, and reinforced before the fitting goes back on. Reinstalling hardware into damaged structure only hides the problem temporarily.
Proper backing is one of the biggest upgrades you can make. A quality backing plate spreads loads far better than small washers alone, especially for cleats that take high shock loads and rails that experience side loading. Pair that with fresh marine sealant under the fitting base and around the fastener penetrations to keep water out of the deck. Tighten the hardware evenly so the fitting seats firmly without crushing the laminate or squeezing out all the sealant. After curing, test the fitting under moderate load and recheck it for movement. This approach addresses both structural support and water protection, which is what long-term reliability depends on.
To prevent repeat problems, inspect cleats and rails regularly as part of routine maintenance. Put a hand on each fitting and try to move it. Look below deck for backing plates, rust, moisture stains, and loosening nuts. Rebed fittings when sealant ages out, and do not ignore small wobble because that is usually the early warning sign. Also use the hardware appropriately: avoid shock-loading cleats, use proper line handling when docking, and remind passengers not to treat rails like ladders or lifting points unless they were designed for that kind of load. A cleat or rail that is installed correctly, sealed well, and inspected regularly