Anti-fouling paint is the protective coating that helps a boat hull resist the buildup of algae, slime, barnacles, mussels, and other marine growth that increases drag, fuel burn, and maintenance costs. In practical boat maintenance, proper use means more than opening a can and rolling it on. It includes choosing the right anti-fouling paint, preparing the hull correctly, applying the coating at the right film thickness, respecting launch windows, and inspecting results over time. As the hub page for hull cleaning and protection, this guide explains the full process and shows where owners commonly make mistakes.
Hull fouling starts quickly. In warm, nutrient-rich water, a clean bottom can develop a biofilm within days, then weed and hard growth soon after. That matters because even light slime measurably increases resistance through the water, while heavy fouling can cut speed, strain the engine, and affect handling. I have seen boats lose several knots simply because the bottom was painted too thinly or the wrong product was chosen for local conditions. Proper anti-fouling paint use protects performance, preserves gelcoat or primer systems underneath, and reduces how often the hull needs aggressive cleaning.
Key terms help simplify the topic. Anti-fouling paint is a biocidal or fouling-release coating designed to discourage marine organisms from attaching to the hull. Ablative paint gradually wears away in service, exposing fresh biocide. Hard modified-epoxy paint forms a tougher film that withstands scrubbing but can build up over time. A tie coat is an intermediary layer used when changing coating types or improving compatibility. Barrier coat usually refers to an epoxy system applied to protect fiberglass hulls from water intrusion and osmotic blistering. Understanding these terms makes product labels, yard recommendations, and maintenance schedules much easier to follow.
This subject also sits at the center of broader hull cleaning and protection. Owners researching anti-fouling paint usually need answers to related questions: how to wash and decontaminate a hull, when to sand, when to strip old paint, how to patch bare spots, how zincs interact with the bottom, and how often a diver should clean the hull after launch. The right approach depends on boat type, storage pattern, water temperature, salinity, and local environmental rules. A trailer boat used on weekends has different needs from a sailboat living year-round in a marina, and a freshwater lake demands different chemistry than a saltwater harbor.
Choose the right anti-fouling paint for the boat, water, and usage pattern
The first step is choosing the correct coating system. There is no single best anti-fouling paint for every hull. The right choice depends on hull material, cruising speed, haul-out schedule, and how dirty the home waters are. Aluminum hulls and outdrives require copper-free products because copper-based coatings can accelerate galvanic corrosion. Fiberglass hulls can use a broader range of paints, including cuprous oxide ablatives and hard paints, provided the primer and previous coating are compatible. Racing sailboats often favor smoother hard paints for burnishing, while cruising boats usually benefit from ablatives because they refresh as the hull moves through the water.
Water conditions matter as much as boat type. In high-fouling regions such as the Gulf Coast, Chesapeake Bay in summer, or tropical marinas, a multi-season ablative with strong slime resistance often performs better than an economy seasonal product. In colder northern waters with shorter seasons, a single-season paint may be entirely adequate. Freshwater can reduce barnacle pressure but not eliminate slime, and some products are formulated specifically for lake use. Manufacturers including Pettit, Interlux, Hempel, and Sea Hawk publish compatibility charts and regional recommendations; those documents are more reliable than dockside folklore because they tie chemistry, film thickness, and immersion limits together.
The practical question boat owners ask is simple: should you use ablative or hard anti-fouling paint? Ablative paint is usually best for cruising boats that stay in the water because it wears away gradually, reducing long-term buildup and exposing fresh biocide. Hard paint is usually best when the hull will be scrubbed frequently by divers, when a very smooth racing finish is needed, or when the boat runs fast enough that some soft ablatives may erode too quickly. The tradeoff is maintenance burden. Hard paint often requires periodic sanding or stripping after layers accumulate, while ablative coatings can lose effectiveness if the boat sits idle for extended periods and the surface becomes inactive.
Compatibility cannot be guessed. Before recoating, identify what is currently on the hull. If the existing paint is unknown, use the manufacturer’s decision tree, a solvent rub test, or conservative surface prep plus a tie coat approved by the new paint maker. Applying a solvent-heavy hard paint over an incompatible soft coating can cause lifting, poor adhesion, or premature failure. I have had the best long-term results by treating compatibility as a system decision, not a paint-can decision: substrate, barrier coat, primer, old anti-foul, tie coat, and new anti-foul all have to work together.
Prepare the hull surface correctly before any paint is opened
Most anti-fouling paint failures begin with poor preparation, not bad product chemistry. A hull should be pressure washed immediately after haul-out while marine growth is still wet and easier to remove. Then inspect for blisters, peeling paint, impact damage, exposed laminate, corrosion, and failed fairing. If the old coating is sound, many repaints only require cleaning, de-waxing if needed, and abrasion to create a mechanical key. If the hull has heavy paint buildup, widespread flaking, or multiple incompatible layers, full stripping may be more efficient than repeated patchwork. The goal is a stable, clean, dull surface that gives the new coating something reliable to grip.
Surface contaminants are easy to underestimate. Wax, oil, salt residue, amine blush from epoxy repairs, and even sanding dust can interfere with adhesion. On fiberglass, wash first, then use the solvent or proprietary surface prep specified by the coating manufacturer. On metal hulls, contamination control is even stricter because corrosion can begin quickly after blasting or aggressive sanding. If bare fiberglass is exposed, this is the time to decide whether an epoxy barrier coat is needed before anti-fouling. For older boats with recurring osmotic blister repairs, a properly applied barrier system can protect the hull and create a more uniform foundation for future bottom paint maintenance.
Preparation also means sanding safely and legally. Old anti-fouling coatings may contain copper and, on older hulls, other toxic compounds. Dry sanding creates hazardous dust that should be controlled with vacuum extraction, tarps, protective clothing, gloves, and a respirator rated for particulates and organic vapors as appropriate. Many yards require dustless sanding and prohibit debris from reaching the ground or water. These rules are not red tape; they protect workers, marinas, and nearby ecosystems. Careful masking matters too. Tape the waterline cleanly, protect transducers and underwater metals according to manufacturer guidance, and never paint sacrificial zinc or aluminum anodes.
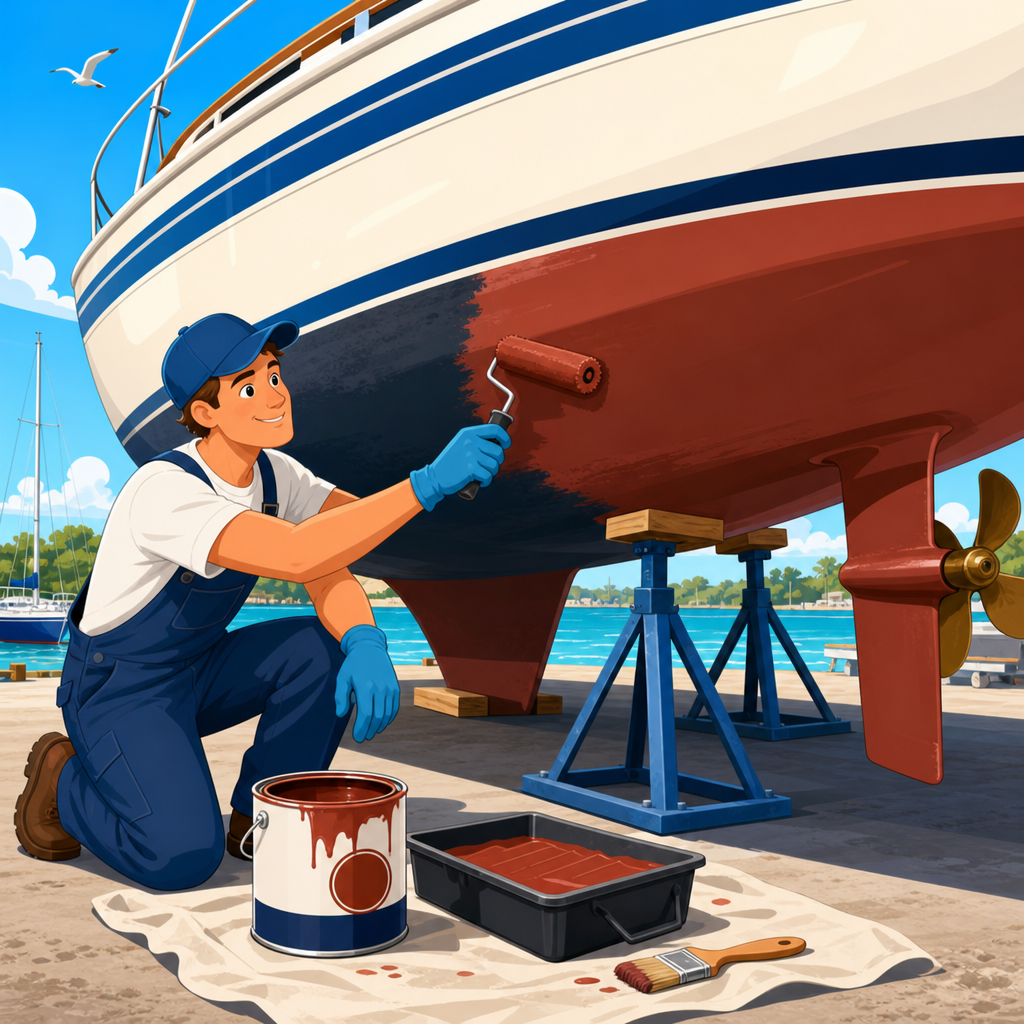
Apply anti-fouling paint at the correct thickness and within the launch window
Application quality determines whether a bottom paint system lasts a season or disappoints after a month. Stir anti-fouling paint thoroughly because heavy biocides settle hard at the bottom of the can. A weak mix at the start and concentrated sludge at the end produces uneven protection across the hull. Use the roller nap recommended on the label, maintain wet film consistency, and pay attention to coverage rates in square feet per gallon. Those rates are not suggestions. If a gallon is stretched too far, the paint film ends up thin and the biocide loading at the surface is insufficient. Extra coats should go on leading edges, waterline areas, rudders, and keels where wear and turbulence are greatest.
Temperature, humidity, and recoat intervals matter just as much. Every product has a minimum and maximum overcoating window and, in many cases, a launch window. Some paints can stay out of the water for months after curing, while others should be launched within a limited period for best performance. Missing that window can reduce effectiveness. In my experience, owners often focus on drying time to touch and ignore full cure requirements, especially in cool weather. That creates roller marks, poor adhesion between coats, or a soft film that damages easily during launching. Read the technical data sheet, not just the front label, and follow the numbers exactly.
| Application factor | Best practice | Why it matters |
|---|---|---|
| Mixing | Stir until solids are fully suspended; re-stir during use | Ensures even biocide distribution and consistent protection |
| Film thickness | Follow published coverage rate and coat count | Too thin reduces service life; too thick can crack or waste paint |
| High-wear areas | Add an extra coat at waterline, bow, keel, and rudder | These zones erode faster from flow, cleaning, and docking |
| Recoat timing | Apply next coat within the technical sheet window | Improves adhesion and cure consistency |
| Launch timing | Launch within the product’s allowed immersion window | Maximizes anti-fouling effectiveness after curing |
Coverage planning saves money and avoids half-finished jobs. Calculate underwater surface area realistically, then buy enough paint for the specified number of coats plus extra for wear zones and future touch-up. A common formula estimates bottom area from length, beam, and hull shape factor, but manufacturer calculators are better when available. Do not forget jack stand patches, through-hull surrounds, and the boot stripe edge. If changing color, use a contrasting undercoat or first coat so wear patterns are easy to see during the season. That visual cue helps owners know when the coating is ablating normally and when the hull is approaching repaint time.
Maintain the painted hull through cleaning, inspections, and timely touch-ups
Fresh anti-fouling paint is not a set-and-forget solution. Hull cleaning and protection continue after launch. In-water inspection frequency depends on fouling pressure, but most kept-in-water boats benefit from regular checks, either by the owner while diving or by a professional hull cleaner. Light slime should be removed gently before it turns into stubborn growth that requires aggressive scrubbing. Over-cleaning can shorten paint life, especially with softer ablatives, so the cleaning method should match the coating type. Soft pads or cloth tools are usually safer than stiff brushes unless the paint manufacturer explicitly approves more aggressive cleaning.
Timing matters with underwater cleaning. If a diver waits until barnacles are fully established, removing them often damages the paint film and exposes primer or substrate. That creates a cycle of faster regrowth and more frequent touch-ups. Good records break that cycle. Note launch date, paint brand and color, number of coats, water conditions, and inspection results. After one season, patterns become clear. You may find the starboard waterline burns off first because of slip orientation, or that the boat needs monthly slime wiping during peak summer but little attention in spring. That operating history is more useful than generic claims on a product brochure.
Touch-up strategy should be deliberate. Small bare spots from trailering, grounding, or cleaning can often be feathered, spot-primed if required, and recoated without repainting the whole hull. But recurring wear in the same location points to a system issue: insufficient film thickness, missing extra coats on leading edges, incompatible cleaner tools, or excessive turbulence around transducers or trim tabs. During annual haul-out, inspect through-hulls, transducers, speed wheels, trim tabs, and propeller areas separately because many require specialized coatings. Standard anti-fouling paint should not be applied blindly to every underwater component; always confirm what each material and manufacturer allows.
Avoid the mistakes that shorten paint life and compromise hull protection
The most common anti-fouling paint mistakes are predictable. Owners paint over loose old coatings, skip surface cleaning, buy the cheapest product without considering local fouling pressure, apply too little paint, or ignore launch windows. Another frequent error is using copper paint on aluminum hulls, sterndrives, or outdrives, which can contribute to severe corrosion when the system is not designed for that metal. I also regularly see anodes painted over, which prevents them from working, and transducers coated with products that interfere with performance. These are avoidable errors that cost far more in repairs, fuel, and haul-outs than careful preparation ever does.
There are also strategic mistakes. Some owners repaint every year without asking whether the current system is actually performing well; others wait far too long and then blame the product instead of delayed maintenance. The better approach is evidence-based. Inspect, document, and adjust. If the boat is hauled each winter and the paint still has useful thickness, a refresher coat in high-wear zones may be enough. If heavy buildup is causing flaking, step back and reset the system with stripping or controlled removal. Hull cleaning and protection work best when the coating plan, washing routine, diver schedule, and haul-out inspection all support each other.
Properly using anti-fouling paint on a boat hull means treating bottom paint as a complete protection system, not a seasonal chore. Choose a coating that matches the hull material, local water, and operating profile. Prepare the surface until it is clean, stable, and compatible. Apply the paint at the specified thickness, within the correct recoat and launch windows, and reinforce high-wear areas. Then support that work with regular inspections, careful cleaning, and targeted touch-ups. Done correctly, anti-fouling paint preserves speed, reduces fuel consumption, lowers cleaning effort, and protects the hull beneath it.
As the core guide in hull cleaning and protection, this page should inform every related maintenance decision, from barrier coats and seasonal bottom prep to diver cleaning intervals and troubleshooting paint failure. If you are planning the next haul-out, start by identifying your current coating, downloading the technical data sheet for the new product, and mapping the entire job before you buy materials. That one step prevents most costly mistakes and leads to a cleaner, faster, better-protected boat all season.
Frequently Asked Questions
What does anti-fouling paint actually do, and why is proper application so important?
Anti-fouling paint is a specialized hull coating designed to reduce the attachment of marine growth such as algae, slime, barnacles, and mussels. When that growth builds up on a boat hull, it creates drag in the water, which can reduce speed, increase fuel consumption, strain the engine, and raise long-term maintenance costs. The paint works by creating a surface that discourages organisms from settling and attaching. Depending on the product type, it may slowly wear away to expose fresh biocide, or it may form a harder film that resists buildup in different operating conditions.
Proper application matters because anti-fouling paint only performs as well as the preparation and installation behind it. If the hull is dirty, glossy, damp, contaminated, or coated with an incompatible previous paint, the new coating may fail early through poor adhesion, uneven wear, or patchy protection. Applying too little paint can leave weak spots that foul quickly, while applying too much or ignoring recoat and launch timing can affect curing and performance. In other words, anti-fouling paint is not just a cosmetic product. It is a maintenance system, and getting the details right helps the boat stay cleaner, move more efficiently, and require less aggressive scraping and repair later on.
How do I choose the right anti-fouling paint for my boat and the water conditions where I use it?
Choosing the right anti-fouling paint starts with understanding how and where the boat is used. Water type matters greatly. Boats kept in saltwater usually face heavier fouling pressure than those in freshwater, and warm waters often promote faster marine growth than colder climates. A boat that sits in the slip for long periods may need a different coating than one used frequently, because some paints perform best when the boat is moving regularly through the water. Hull material also plays a role. Fiberglass, wood, steel, and aluminum can have different coating requirements, and some anti-fouling paints are not suitable for aluminum because of the risk of galvanic or chemical reaction.
You should also consider the existing paint on the hull. Not all anti-fouling products are compatible with one another, so before recoating, identify what is already on the boat if possible. In many cases, manufacturers provide compatibility charts, and when compatibility is uncertain, using a proper barrier or tie-coat primer may be necessary. Beyond compatibility, decide between common paint categories such as ablative, hard, or hybrid formulas. Ablative paints gradually wear away and can be a strong choice for many cruising boats because they continue exposing fresh active ingredients. Hard paints can be useful where a more durable film is preferred, such as for faster boats, trailered boats in some cases, or hulls that may be cleaned more aggressively by a diver. The best approach is to match the product to fouling severity, storage method, speed profile, maintenance routine, and manufacturer guidance rather than simply buying the most expensive can on the shelf.
What hull preparation steps should be completed before applying anti-fouling paint?
Hull preparation is one of the most important parts of the job, and it is often where long-term performance is won or lost. Start by washing the hull thoroughly to remove salt, dirt, grease, oxidation, and any loose contamination. If the boat has been hauled out with visible growth on the bottom, that growth needs to be completely removed before anything else happens. After cleaning, inspect the hull for flaking paint, blisters, repairs, cracks, or areas where the old coating is no longer sound. Anti-fouling paint should only be applied over a stable, properly prepared surface. If sections are peeling or badly built up, those areas may need scraping, sanding, or more extensive removal.
Next, dull the surface as required by the coating system. Many anti-fouling products need a sanded mechanical profile to adhere well, especially when going over old paint that is still sound but glossy. Dust must then be removed carefully, and the surface should be clean and dry before paint goes on. If the hull is bare fiberglass or if a barrier coat is needed for blister protection or compatibility, that primer or epoxy system should be applied first according to the manufacturer’s schedule. Pay special attention to environmental conditions during prep and painting. Excess humidity, condensation, extreme heat, or low temperatures can interfere with adhesion and curing. Good preparation also means masking the waterline accurately, protecting transducers and metal fittings as required, and planning enough time to complete the full coating schedule without rushing.
How many coats should be applied, and how can I make sure the paint goes on at the right thickness?
The correct number of coats depends on the product, the boat’s usage, and the manufacturer’s specifications, but in most cases anti-fouling paint should be applied as a measured coating system rather than by appearance alone. Many boat owners assume the hull is covered once the color looks uniform, but performance depends on achieving the proper film thickness. Too thin a coating may wear away early, especially at high-friction areas such as the bow, leading edges, waterline, keel, rudder, and around through-hulls. Too thick a coating can create unnecessary buildup over time and may cause drying or curing problems with some products.
The most reliable method is to calculate coverage based on the hull area and the spread rate listed on the paint label. That tells you how much paint should be used per coat. Stir the paint thoroughly, because anti-fouling ingredients settle heavily in the can, and continue mixing during application to maintain consistency. Use the recommended roller, brush, or spray setup, and pay close attention to specified recoat times between coats. Many experienced applicators also add an extra coat to high-wear zones and sometimes use a contrasting color underneath to make future wear easier to monitor. If the manufacturer references wet film thickness or dry film thickness, follow those numbers closely. Treating thickness as a specification rather than a guess is one of the best ways to get full service life from the coating.
When should the boat be launched after painting, and how should the results be monitored over time?
Launch timing is critical because anti-fouling paints do not all behave the same way after application. Some products allow relatively flexible launch windows, while others must be launched within a specific period after the final coat. If that window is missed, the paint may lose effectiveness or require additional surface preparation or another coat before the boat goes back in the water. This is why reading the technical data sheet matters just as much as reading the label on the can. Dry time, cure time, and launch interval can vary based on temperature, humidity, and the number of coats applied. Planning the haul-out, prep work, painting schedule, and launch date in advance helps prevent expensive delays and last-minute mistakes.
After launch, proper use of anti-fouling paint continues with inspection and recordkeeping. Check the hull periodically for slime accumulation, patchy fouling, unusual wear patterns, and early coating loss at high-abrasion areas. If the boat is kept in the water year-round, regular underwater inspections or diver reports can help identify whether the coating is performing as expected. It is also helpful to track where the boat is used, how often it runs, what cleaning methods are used, and how long the paint remains effective before fouling pressure noticeably increases. Those observations make future paint selection and maintenance planning much smarter. A well-applied anti-fouling system should not be forgotten once the boat is launched; it should be evaluated over time so the next haul-out can be handled even more efficiently and with better results.