Hull cleaning and protection are the foundation of fiberglass boat care because a clean, sealed hull runs faster, burns less fuel, resists osmotic blistering, and makes damage easier to spot before a small repair becomes a structural job. In boatyards and private marinas, I have seen owners focus on engines and electronics while ignoring the gelcoat below the rub rail, yet the hull is the part that lives in constant contact with water, sunlight, salt, grime, and impact. For a fiberglass boat, “hull cleaning” means removing salt, algae, scum lines, oxidation, stains, and marine growth without damaging gelcoat or paint. “Hull protection” means preserving that surface with waxes, polymer sealants, ceramic coatings, bottom paint systems, sacrificial barriers, and disciplined wash routines. This matters because surface condition directly affects performance, appearance, resale value, and repair costs. A neglected hull hides cracks, weakens finish layers, and allows contamination to interfere with later patching and fiberglass repair.
This hub explains the full maintenance cycle for fiberglass hulls and shows where patch and repair work fit into a smart cleaning and protection program. If you want to patch and repair a fiberglass boat hull properly, the first step is almost always preparation: wash the surface, strip contamination, identify whether damage is cosmetic or structural, and choose compatible materials. The same process that keeps a hull glossy also reveals spider cracks, dock rash, gouges, and water intrusion early. That is why hull cleaning and protection are not separate from fiberglass repair; they support it. Below, you will find the key maintenance stages, the tools that work, the mistakes that shorten coating life, and the practical standards that experienced boat owners and yard technicians follow to keep fiberglass hulls sound.
What Hull Cleaning and Protection Include
Comprehensive hull care covers everything above and below the waterline. Above the waterline, the goals are to remove salt crystals, soot, fish blood, sunscreen residue, tannin stains, and oxidation while preserving gelcoat thickness. Below the waterline, the goals shift to controlling fouling, protecting laminate from prolonged water exposure, and maintaining a fair surface that does not waste horsepower. On a fiberglass boat, the hull skin usually consists of gelcoat over fiberglass laminate, sometimes with barrier coat and antifouling paint on immersed sections. Each layer has a different job, so cleaning chemistry and repair methods must match the surface. A heavy acid cleaner that quickly removes rust streaks can also dull polished metal and harm fresh wax. A stiff brush that strips slime can also scar soft antifouling paint.
Protection is equally layered. Traditional carnauba-based marine wax adds gloss and short-term water beading, but polymer sealants generally last longer in intense sun. Ceramic marine coatings can extend hydrophobic performance, though they demand careful surface prep and cost more. Below the waterline, an epoxy barrier coat reduces water permeation risk, while ablative or hard antifouling paint manages marine growth based on boat speed, storage pattern, and local regulations. In practice, the best protection plan depends on where the boat lives. A trailered center console on a freshwater lake needs different care than a sailboat moored year-round in warm saltwater. Good hull maintenance starts by identifying environment, finish type, and usage pattern, then matching cleaners and protective systems to those realities.
Routine Washing, Decontamination, and Inspection
The most effective hull maintenance task is also the least glamorous: frequent washing. After every trip, rinse the hull with fresh water to remove salt and airborne contamination before it dries. Use a pH-neutral marine soap rather than household detergent, because dish soap strips wax and can accelerate dullness over time. Wash from the top down with a microfiber mitt or soft brush, then dry with a chamois or microfiber towel to reduce spotting. On white gelcoat, a weekly wipe-down often prevents the yellow-brown waterline stain that later requires stronger chemistry. In marinas with hard water, drying matters almost as much as washing because mineral deposits can etch and bond to the surface.
Decontamination goes beyond soap. Black streak remover, oxalic-acid stain removers, and dedicated rust removers are useful when tannins, exhaust residue, or anchor chain marks resist normal washing. Oxidation requires compound or polish rather than cleaner alone. I usually test the least aggressive method first: soap, then stain remover, then polish, then compound if needed. During this process, inspection should be deliberate. Look for crazing around cleats, chips at the bow stem, blisters below the waterline, impact cracks near chines, and soft spots that suggest laminate damage. Tap-testing with a plastic hammer can reveal a dull sound over delaminated areas. Many fiberglass hull repairs are discovered during cleaning because contamination masks the true edge and depth of damage when the boat is dirty.
How to Patch and Repair a Fiberglass Boat Hull Safely
Patching and repairing a fiberglass boat hull starts with correct diagnosis. Cosmetic damage affects gelcoat or the outer skin only; structural damage reaches laminate, core, or backing. Small dock chips, shallow gouges, and many spider cracks can often be repaired with gelcoat paste or fairing filler. Deeper punctures, impact fractures, and any damage with moisture, flex, or exposed fibers require fiberglass cloth or mat with resin, followed by fairing and finish work. Before repair, clean the area thoroughly with soap and water, remove wax with a dewaxing solvent such as acetone or a manufacturer-approved surface prep, and let the laminate dry completely. If the boat has been in the water, moisture meters can help confirm whether trapped water remains, especially around blisters or cored sections.
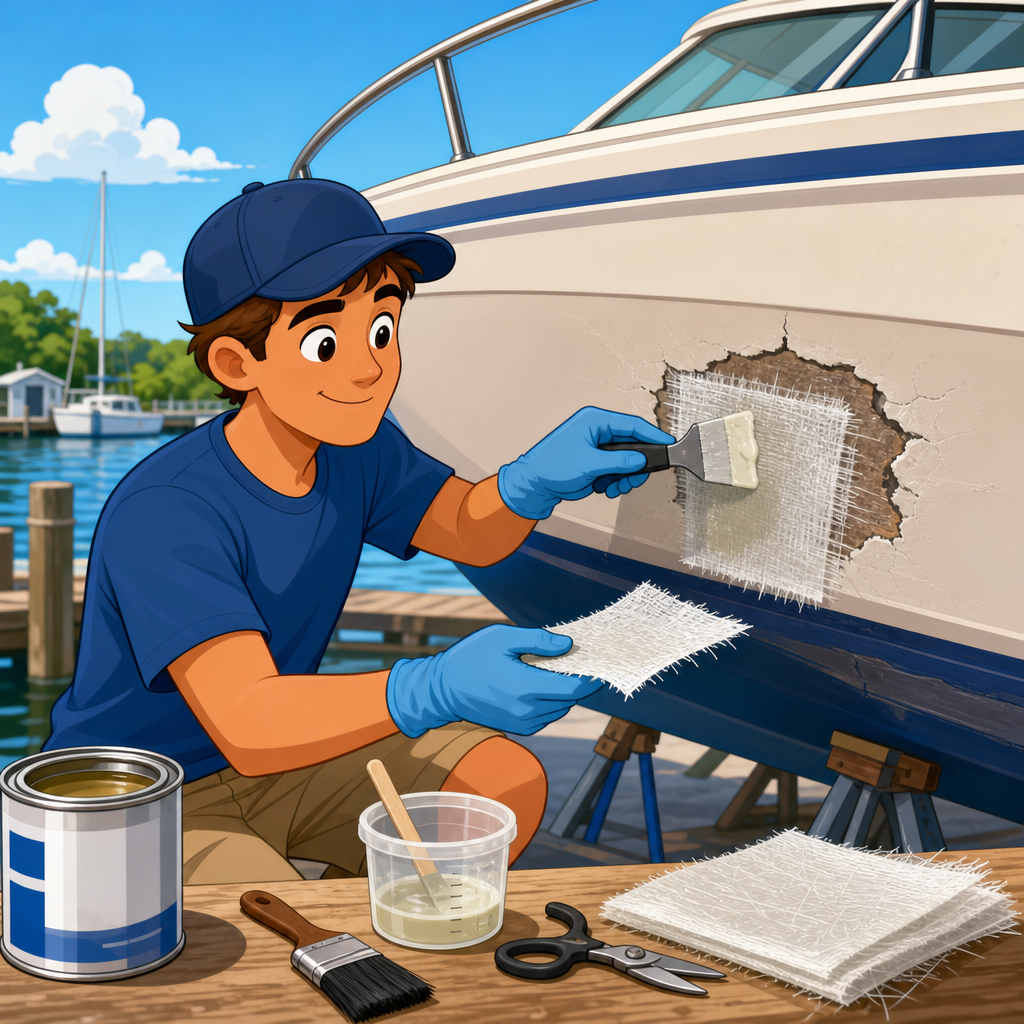
Grind damaged fiberglass to a shallow bevel, typically around 12:1 for structural laminate repairs, to create bonding area and avoid a hard edge. Polyester resin is common in production boats, but epoxy bonds more reliably in many repair situations; the tradeoff is that polyester gelcoat does not bond cleanly over uncured epoxy without the right tie-coat and full cure schedule. Use matching fiberglass reinforcement based on the original structure: woven cloth for strength and finish control, biaxial fabric for directional strength, chopped strand mat only where the resin system permits it. Wet out each layer fully, remove air with a laminating roller, and build thickness in stages. Once cured, fair with marine filler, sand progressively, and finish with color-matched gelcoat or topside paint. Wear gloves, eye protection, and a respirator rated for organic vapors and fiberglass dust; repair dust is not harmless just because the job looks small.
Choosing Protective Systems for Gelcoat and Bottom Surfaces
After cleaning and any necessary fiberglass repair, protection keeps the surface stable. For topsides and hull sides, the main decision is between wax, synthetic sealant, and ceramic coating. Wax is affordable and easy to refresh, making it practical for seasonal boats stored under cover. Polymer sealants generally last longer and resist detergents better, so they suit boats exposed to more frequent washing. Ceramic coatings offer the strongest water behavior and easier cleanup, but only when applied to a fully corrected, oil-free surface; otherwise they lock in defects and disappoint. In my experience, owners choose coatings for durability but underestimate prep time. The product is not the system; prep is the system.
Bottom protection is more technical because it depends on immersion. A fiberglass hull kept in the water should be evaluated for an epoxy barrier coat if one is not already present, particularly on older boats where blister prevention is a concern. Antifouling paint comes in hard, ablative, and hybrid formulas. Hard paint tolerates scrubbing and higher speed but can build up over time. Ablative paint slowly wears away, exposing fresh biocide and reducing sanding buildup, which is useful for cruising boats. Water-based low-VOC options are improving, but local fouling pressure and environmental rules still determine what works.
| Hull Area | Main Threat | Best Protection | Typical Maintenance Interval |
|---|---|---|---|
| Topsides | UV, oxidation, stains | Wax, polymer sealant, or ceramic coating | 3 to 12 months depending on product and exposure |
| Waterline | Scum, tannin, mineral staining | Frequent washing plus sealant | Every trip to monthly |
| Bottom below waterline | Marine growth, water permeation | Barrier coat plus antifouling paint | Annual or multi-season by paint type |
| Repaired fiberglass area | Moisture entry, UV on exposed resin | Fairing, matched finish coat, then protective coating | Inspect after cure, then at each wash |
Tools, Products, and Methods That Actually Work
Reliable results come from using marine-specific products and the right abrasives. For washing, a pH-neutral soap from brands such as Star brite, Meguiar’s Marine, or 3M is safer than generic cleaners. For oxidation, use a rotary or dual-action polisher with wool or foam pads matched to the aggressiveness of the compound. Heavy-cut compounds remove dead gelcoat quickly, but they also remove measurable material, so follow with a finishing polish to restore gloss before applying protection. Random deep scratches usually need wet sanding first, commonly starting at 1000 or 1500 grit and stepping finer before compounding. Always keep the surface lubricated and monitor heat buildup, because overheated gelcoat can smear or burn.
For fiberglass hull repair, standard tools include a grinder with 36- to 80-grit discs, shears for cloth, mixing pots, calibrated pumps for epoxy ratios, plastic spreaders, fairing boards, and moisture-resistant masking materials. WEST System, MAS Epoxies, TotalBoat, and 3M all offer proven repair products, but mixing accuracy matters more than label loyalty. Incompatible shortcuts cause failures: polyester body filler on a wet repair, silicone contamination before painting, or applying wax over uncured polish oils. Owners also overlook manufacturer technical data sheets, which specify recoat windows, ideal temperatures, and solvent wipe instructions. Those sheets are not legal padding; they are the difference between a repair that blends in and one that prints through, peels, or yellows after a season.
Common Mistakes, Seasonal Planning, and Long-Term Value
The most common hull care mistake is aggressiveness at the wrong stage. People use harsh acid to solve a stain that soap would remove, compound every spring when polish would do, or keep sanding a gouge instead of filling it. Another frequent mistake is sealing contamination under protection. Waxing over oxidation makes a boat shine briefly, then fail fast. Painting over damp laminate traps moisture. Repairing a crack without finding the cause, such as a loose bunk, overtightened fitting, or repeated dock impact, guarantees a repeat failure. Good maintenance is diagnostic, not just cosmetic.
Seasonal planning makes the work manageable. In spring, inspect, decontaminate, correct oxidation, patch winter damage, and renew protection. During the season, wash after use and address stains while fresh. At haul-out, pressure-wash growth promptly because fouling releases easier before it hardens. Then inspect the bottom for blisters, coating adhesion loss, and impact damage from ramps or trailers. Document repairs with photos and dates. This record supports resale because buyers and surveyors trust visible maintenance history. It also improves budgeting; you can see whether a hull needs only annual polish and bottom paint or whether recurring cracks justify a deeper structural evaluation. Clean, protected fiberglass lasts longer, looks better, and turns major repair bills into smaller, planned maintenance tasks.
Hull cleaning and protection are the practical center of fiberglass boat maintenance because they combine appearance, performance, and early problem detection in one repeatable routine. A clean hull exposes damage, a protected hull resists weathering, and a disciplined owner spends less time correcting neglect. The repair side of the equation is straightforward when approached in order: wash, decontaminate, inspect, diagnose, dry, laminate, fair, finish, and then protect. Skip the prep and even expensive materials underperform. Follow the process and small chips, scratches, stains, and coating wear stay manageable instead of becoming moisture intrusion, blistering, or laminate failure.
If you maintain a fiberglass boat under the broader Boat Maintenance & Repairs category, use this hull cleaning and protection hub as your starting point for every related task. Build your routine around regular rinsing, scheduled polishing, the right protective coating for your environment, and prompt fiberglass patch and repair whenever damage appears. Inspect with intention, use compatible products, and trust technical data over guesswork. Start with the dirtiest section of your hull this week, clean it properly, and let what you uncover guide the next repair or protection step.
Frequently Asked Questions
What types of fiberglass hull damage can I patch myself, and when should I call a professional?
Many common fiberglass hull problems are well within the reach of a careful boat owner. Cosmetic scratches, minor gelcoat chips, shallow gouges, dock rash, and small localized impact areas that have not compromised the structure can usually be repaired at home with the right materials and patience. Small cracks in the gelcoat are also often repairable, provided they are not symptoms of deeper flexing, water intrusion, or laminate failure underneath. If the damaged area is dry, limited in size, and does not extend through the hull laminate or core, a DIY patch is often practical and cost-effective.
You should seriously consider professional repair if the damage is structural, extends below the waterline in a critical area, involves a large section of delaminated laminate, or affects a cored hull where moisture may have traveled beyond the visible damage. Soft spots, spider cracking over a wide area, deep punctures, collision damage, keel damage, or repairs near high-load zones such as transoms, stringers, chines, and through-hull fittings deserve expert evaluation. The same is true if you can see broken fiberglass cloth, crushed laminate, or signs that the hull shape has been distorted. In short, cosmetic repairs are often manageable for owners, but anything that affects strength, watertight integrity, or internal structure should be inspected by a marine repair professional.
How do I prepare a fiberglass boat hull before patching or repairing it?
Preparation is the part of the job that determines whether the repair lasts or fails early. Start by washing the hull thoroughly to remove salt, algae, oxidation, wax, grease, fuel residue, and any loose contamination. A fiberglass repair should never be applied over dirt or a polished surface, because resin and fillers need a clean, mechanically roughened substrate to bond properly. Once the area is clean, inspect the damage carefully and mark the true repair boundary, not just the visible chip or crack. Damage in fiberglass often extends slightly beyond what the eye first notices.
Next, grind or sand back the damaged area until you reach clean, solid material. For gelcoat or shallow laminate damage, feather the edges outward so the repair can transition smoothly into the surrounding hull. If there is any wet fiberglass, compromised core, loose laminate, or contaminated filler from an old repair, remove it completely. The area must be dry before rebuilding. Moisture trapped under a patch is a common cause of poor adhesion, blistering, and future failure. In some cases, especially below the waterline, it is wise to let the hull dry thoroughly before moving ahead.
After shaping the repair area, vacuum away dust and wipe with a solvent recommended for fiberglass prep, being careful not to soak the laminate. Then dry-fit any fiberglass cloth or mat you plan to use so you are not improvising while resin kicks off. Good preparation also means controlling the environment: avoid repairing in rain, direct blazing sun, or temperatures outside the resin manufacturer’s recommended range. A clean, dry, sanded, and properly beveled surface is what gives a fiberglass patch its strength and durability.
What materials and tools do I need for a proper fiberglass boat hull repair?
The exact list depends on the size and depth of the damage, but most hull repairs require a core group of materials and tools. For small cosmetic work, you may need marine filler or fairing compound, matching gelcoat, catalyst or hardener, mixing cups, stir sticks, spreaders, masking tape, sandpaper in multiple grits, and polishing compound for the finish. For deeper repairs that involve rebuilding the laminate, you will also need fiberglass cloth or biaxial fabric, resin and hardener, scissors dedicated to fiberglass, rollers or brushes for wet-out, and grinding tools to prepare the damaged area properly.
In terms of tools, expect to use an angle grinder or sander, sanding blocks, a shop vacuum, clean rags, and measuring tools to ensure the right resin ratio. Personal protective equipment matters just as much as repair materials: gloves, eye protection, and a proper respirator are essential when grinding fiberglass and working with resin systems. If the repair is below the waterline, you may also need barrier coat materials and compatible bottom paint to restore protection after the structural and cosmetic work is complete.
One important point is compatibility. Do not mix products casually without checking whether they are designed to work together. Resin system, filler, gelcoat, primer, barrier coat, and antifouling paint all need to be chosen as part of a repair system, not as random shelf items. Boat owners often focus on the patch itself, but the long-term success of the repair depends on the full sequence: laminate rebuild, fairing, sealing, finishing, and hull protection.
How do I actually patch a small hole, gouge, or crack in a fiberglass boat hull?
The repair process starts with identifying whether you are fixing cosmetic surface damage or rebuilding actual fiberglass structure. For a small gouge or chip that has not penetrated deeply, the usual process is to clean the area, grind or sand out any loose or fractured material, feather the edges, and fill the void with a marine-grade filler or gelcoat repair compound. Once cured, the repair is sanded fair and then finished with matching gelcoat or a compatible topcoat so the area is sealed from water and UV exposure.
For a small hole or deeper gouge that extends into the laminate, the job is more structural. After cleaning and grinding back to solid material, bevel the repair area so the new fiberglass can overlap onto sound laminate. Cut fiberglass pieces in graduated sizes so each layer builds back the hull thickness progressively. Wet out the surface with resin, apply the smallest piece first if rebuilding from the inside out or follow the layup plan appropriate to the repair geometry, and continue layering until the thickness matches the original hull. Once the laminate cures, sand it smooth, apply fairing compound if needed, then sand again to restore the original contour.
Cracks require extra care because the visible line is often only the symptom. A hairline gelcoat crack may need to be opened slightly with a grinder or rotary tool so the damaged material can be removed and the filler can bond properly. But if the crack keeps reappearing, that usually means the underlying panel is flexing or there is unresolved structural damage beneath the finish. After the repair is faired smooth, apply gelcoat or another suitable finish coat, allow full cure, then wet-sand and polish if a cosmetic match matters. The goal is not just to hide the damage, but to restore strength, watertightness, and surface protection.
How can I make sure a fiberglass hull repair lasts and does not fail after one season?
Long-lasting repairs come from careful diagnosis, complete surface prep, proper laminate rebuilding, and disciplined finishing. The biggest reason repairs fail is that owners rush to fill and paint over damage without removing all cracked laminate, moisture, contamination, or unsupported material. A patch bonded over wax, oxidation, damp fiberglass, or loose edges may look good at launch and start failing by the end of the season. Lasting repairs begin with a clean hull, a dry substrate, and a repair area ground back to unquestionably sound material.
Another key is preserving the hull’s protective envelope after the patch is complete. Fiberglass hull care is not just about fixing damage when you see it; it is also about keeping the surface clean, sealed, and protected so water intrusion and blistering do not gain a foothold. If the repair is below the waterline, restore any barrier coat that was removed and use the correct bottom paint system for the boat’s operating environment. If it is above the waterline, finish the repair with a UV-resistant coating or properly cured gelcoat. A repair that is structurally sound but poorly sealed can still absorb moisture and deteriorate prematurely.
Finally, inspect your work as part of routine hull maintenance. Clean the hull regularly, watch for discoloration, print-through, new cracks, or changes in contour, and address small issues early. A well-maintained hull runs more efficiently, resists water damage better, and makes new trouble easier to spot before it becomes expensive. That is one of the most overlooked truths in fiberglass boat ownership: patching damage is important, but ongoing hull cleaning and protection are what keep repairs small, manageable, and durable over time.