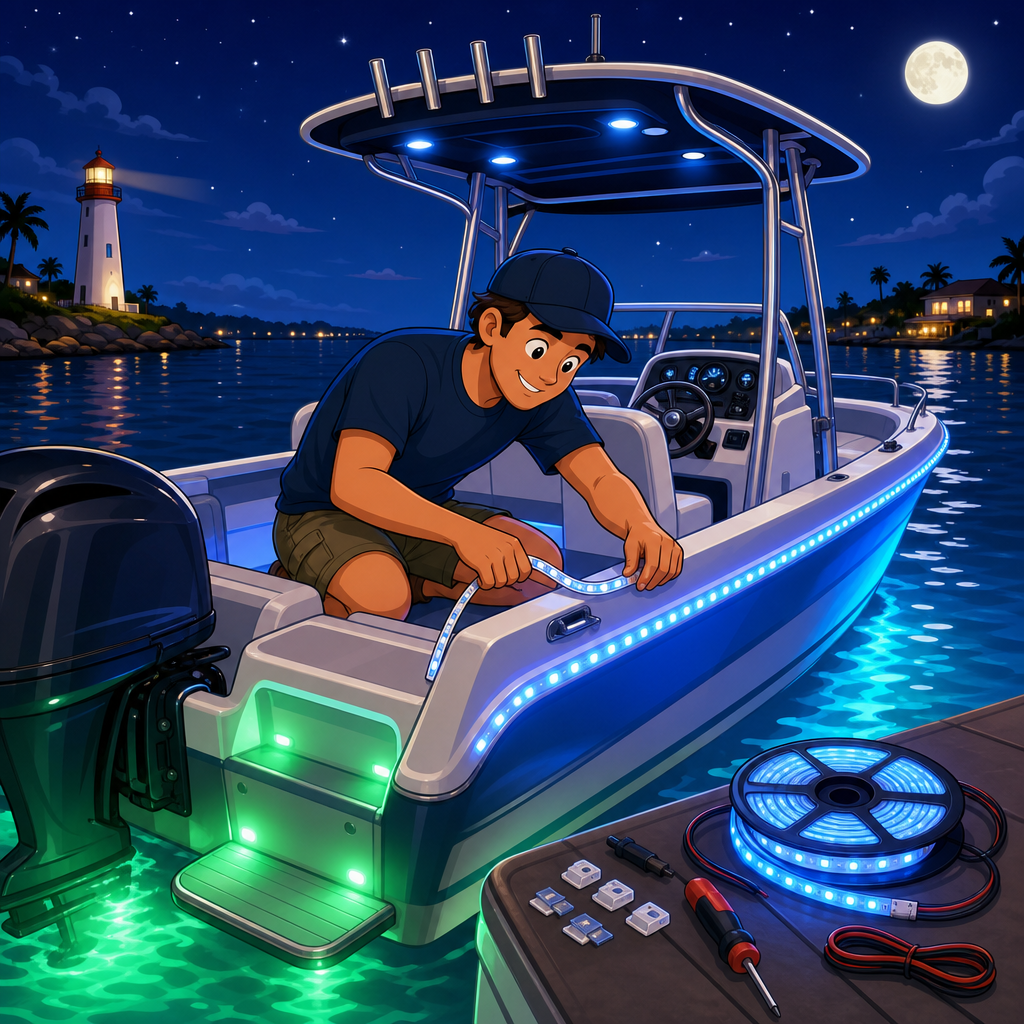
Installing LED lights on your boat for night boating improves safety, battery efficiency, and visibility while creating a cleaner foundation for every other marine electronics upgrade. In practical terms, LED stands for light-emitting diode, a solid-state lighting technology that converts electrical energy into light with far less heat and power draw than halogen or incandescent bulbs. On a boat, that matters because every amp matters. Whether you run a small center console, a pontoon, a bass boat, or a cruising sailboat, lighting affects navigation, deck safety, docking confidence, and how well you integrate other electronics and navigation systems. I have installed and troubleshot marine lighting on trailer boats and cabin cruisers, and the difference between a well-planned LED system and a rushed one shows up immediately at night: cleaner visibility, fewer wiring faults, and less drain on the house battery.
Night boating raises the stakes because your lighting is not just decorative. It is part of the vessel’s safety system and must work alongside chartplotters, GPS antennas, VHF radios, radar, AIS, depth finders, and switch panels. This article serves as a hub for the broader electronics and navigation systems category because lighting connects directly to power management, helm design, circuit protection, and compliance with navigation rules. Good marine LED installation means choosing fixtures rated for wet, salty, vibrating conditions; placing lights where they illuminate without blinding the operator; protecting circuits with the correct fuse or breaker; and understanding where navigation lights are legally required versus where courtesy, deck, underwater, or spreader lights are optional. If you want night boating lighting that lasts, the goal is not simply to mount bright fixtures. The goal is to build a reliable marine electrical system that supports safe operation after dark.
Why LED boat lights matter for safety, power, and navigation
LED boat lights matter because they improve conspicuity, reduce current draw, and increase reliability compared with older marine lighting technologies. A traditional incandescent bulb wastes significant energy as heat, while a marine-grade LED fixture can provide equivalent usable light at a fraction of the amperage. That lower draw helps preserve battery capacity for critical electronics and navigation systems, especially when the engine is off and the house bank is carrying loads like chartplotters, fish finders, cabin lights, stereo memory, and VHF standby.
On the water, safety comes first. Navigation lights tell other boaters your position, heading, and status. White all-round, stern, masthead, red, and green sidelights each have specific roles under navigation rules. A failed or improperly placed light can make your boat difficult to identify at night, which increases collision risk. Courtesy lights, step lights, and cockpit strip lights improve onboard footing, help passengers move safely, and reduce the chance of falls during anchoring or docking. Deck and spreader lights assist with line handling, anchor retrieval, and reading hardware without requiring a handheld flashlight that leaves one hand occupied.
LED lighting also supports human factors. Bright, cool-white floodlighting can destroy night vision at the helm, while warm or red task lighting can preserve adaptation and reduce glare on multifunction displays. In practice, I separate helm-area courtesy lighting from cockpit work lighting so operators can keep instrument readability while crew handle gear aft. That simple design choice has more value than just adding lumens. It aligns lighting with the way the boat is actually used.
Planning your boat LED lighting system before you drill holes
The best LED installation begins with a lighting plan, not a shopping cart. Start by dividing the project into zones: required navigation lights, helm lighting, deck and cockpit lighting, cabin lighting, livewell or compartment lighting, underwater lighting, and docking or spreader lighting. Then map each zone to a switch, a circuit, and a use case. This step prevents a common mistake: combining too many different lights on one circuit so that a failure, overload, or switch confusion affects multiple functions.
Next, assess your power system. Determine whether your boat uses a 12-volt or 24-volt DC system, identify available fuse block positions, and verify battery condition. LED fixtures are often sold as wide-range inputs such as 10 to 30 volts, but not all products regulate voltage equally well. On outboard boats, charging system spikes and marine corrosion expose weak electronics quickly. Use marine-grade tinned copper wire, adhesive-lined heat-shrink connectors, proper strain relief, and sealed switch panels. ABYC guidance and standard marine wiring practices exist for a reason: vibration, moisture, and saltwater punish shortcuts.
Think about beam angle and placement. For example, transom-facing cockpit floods can help while fishing but may reflect off stainless rails or splashwells. Gunwale courtesy strips should illuminate walking surfaces, not shine into eyes. Under-gunnel strips often work better than exposed puck lights because they hide the source and produce softer reflected light. At the helm, avoid direct line-of-sight LEDs anywhere near the windshield or displays. I mock up placements with painter’s tape and a portable battery before drilling because ten minutes of testing can save gelcoat repair later.
Choosing the right marine LED lights, wiring, and control hardware
Not every LED marketed for boats is truly marine grade. Choose fixtures with sealed housings, corrosion-resistant hardware, UV-stable lenses, and ingress protection appropriate for the location. IP67 or IP68 ratings are common indicators for water resistance, but ratings alone do not guarantee quality. Reputable marine brands design around vibration resistance, thermal management, and electromagnetic compatibility so the lights do not introduce noise into nearby electronics. Cheap drivers can create radio frequency interference that shows up on VHF reception or fish finder screens.
Color temperature matters. Around 2700K to 3000K creates warm cabin light, 4000K to 5000K works well for deck tasks, and red lighting is often preferred at the helm to preserve night vision. Blue accent lighting looks attractive but can create harsh reflections and should be used carefully around operating areas. For navigation lights, buy certified fixtures designed to meet visibility and arc requirements for your vessel length and configuration. Improvised strip lighting is not a substitute for compliant sidelights or all-round lights.
For wiring, use tinned marine duplex or triplex wire sized for the circuit length and current draw, not just the fixture rating. Voltage drop matters on long runs; keeping it low helps LEDs perform consistently. Include a fuse or breaker as close to the power source as practical. Use waterproof switches or digital switching modules if your helm already includes NMEA 2000 accessories and networked control. Many newer boats combine switching with MFD integration, but a simple labeled rocker panel remains effective and easier to troubleshoot offshore.
| Lighting type | Primary purpose | Best placement | Key installation note |
|---|---|---|---|
| Navigation lights | Legal visibility and collision avoidance | Bow, stern, mast or arch per vessel layout | Use certified fixtures with correct arcs and mounting height |
| Courtesy lights | Safe movement onboard | Steps, gunwales, cockpit toe-kicks | Aim at walking surfaces to reduce glare |
| Deck or spreader lights | Work illumination | T-top, hardtop, radar arch | Wire on separate switches from helm lighting |
| Cabin LEDs | Interior comfort and efficiency | Berths, galley, head | Choose warm white for less eye fatigue |
| Underwater lights | Stern visibility and aesthetics | Transom below waterline | Seal penetrations carefully and confirm hull compatibility |
How to install LED lights on your boat step by step
Begin by disconnecting battery power and verifying all affected circuits are dead. Gather the fixture template, drill bits, hole saw if required, marine sealant recommended by the manufacturer, cable clamps, fish tape, heat gun, adhesive-lined heat-shrink terminals, multimeter, and label maker. Dry-fit every fixture first. On cored decks or hardtops, overdrill, seal the core where needed, and avoid water intrusion paths. On aluminum boats, isolate dissimilar metals where hardware could promote galvanic corrosion.
Run wires along existing harness routes whenever possible. Support them at regular intervals with cushioned clamps, keep them away from fuel lines and high-heat areas, and protect any pass-through with grommets or conduit. If you are adding lights to a T-top or arch, leave service loops at hinge or removable joints and use waterproof deck glands where cables enter the structure. One of the most common failures I see is wire chafe at a hard edge that looked harmless on installation day.
Make electrical connections with crimped, adhesive-lined heat-shrink terminals rather than household wire nuts. After crimping, tug-test every terminal, then shrink evenly until sealant flows. Label the positive feed, return, and switch leg. Connect each circuit to an appropriately sized fuse based on conductor ampacity and actual load. If a set of deck lights draws 3 amps total, do not install an oversized fuse just because it is on hand. Proper overcurrent protection protects the wire, not the appliance.
Before final mounting, energize the circuit and test for brightness, switch function, and interference with radios or displays. Confirm that helm reflections are acceptable at night if possible. Then bed the fixture, secure hardware without overtightening, and create a drip loop where practical. After final installation, update your wiring diagram. That simple record will save time later when you expand electronics, add a second battery, or troubleshoot a dead circuit at the dock.
Integrating lighting with electronics and navigation systems
Lighting should be treated as part of the overall marine electronics architecture, not as an isolated accessory. On modern boats, the helm is crowded with chartplotters, sonar modules, radar displays, autopilot controls, USB charging, stereo remotes, and VHF microphones. Poorly planned lighting can wash out screens, create glare on tempered glass, or introduce electrical noise. Good planning improves both usability and diagnostics.
Start with the helm. Multifunction displays from Garmin, Simrad, Raymarine, Lowrance, and Furuno all offer night palettes, but they still suffer when bright white LEDs reflect off a windshield frame or gloss panel. Use dimmable red or amber courtesy lighting around footwells and switch banks, and keep direct deck floods off the helm circuit. If your boat has a networked digital switching system, create separate scenes for cruising, fishing, anchoring, and docking. That lets you activate only the required lights without searching for multiple switches in the dark.
Power budgeting is equally important. Suppose your chartplotter draws around 1.5 to 3 amps, radar more when transmitting, VHF standby less than 1 amp, and several LED zones another few amps combined. On a small battery bank, load stacking matters during long anchor periods. LEDs help because they reduce baseline consumption, but they do not eliminate the need for a battery monitor, healthy charging system, and clear circuit segregation between critical navigation loads and comfort lighting.
Interference deserves special attention. I have traced sonar screen noise and VHF static to poorly regulated LED drivers and bargain dimmers. If electronics behave strangely after a lighting upgrade, isolate the circuit, test with lights off and on, and inspect grounding and routing. In sensitive installations, ferrite chokes and higher-quality drivers can help, but the best fix is selecting proven marine components from the start.
Legal requirements, maintenance, and common mistakes to avoid
Boat owners often ask a direct question: can you install any LED lights and go boating at night? The answer is no. Required navigation lights must meet the correct color, visibility range, arc, and placement requirements for the vessel. Rules vary by boat type and size, and local enforcement may inspect obvious violations. Decorative lights cannot impair the visibility of required navigation lights or confuse other operators. If underwater lights, cockpit floods, or blue accent strips are visible while underway, use judgment and confirm local regulations before relying on assumptions.
Maintenance is simple but essential. Rinse salt-exposed fixtures, inspect seals and cable entries, clean lenses with manufacturer-safe products, and check fasteners for corrosion. Open the electrical panel periodically and look for green copper oxide, overheated terminals, or moisture. Exercise switches so contacts do not sit unused for seasons. At the start of each season, test every light at the dock before the first night run. Navigation light failures are easier to solve tied up than drifting near an inlet after sunset.
The most common mistakes are predictable: using automotive LEDs instead of marine-rated products, undersizing wire on long runs, skipping fuses, aiming lights into the operator’s eyes, sealing holes poorly, and overloading one switch with too many fixtures. Another frequent problem is mixing convenience and safety on the same circuit. If deck floods and navigation lights share a feed, one fault can compromise legal visibility. Keep required lights independent, protected, and easy to activate instantly.
Installing LED lights on your boat for night boating is one of the most practical upgrades in the boating gear and equipment category because it improves safety immediately and supports the rest of your electronics and navigation systems. The essential steps are straightforward: plan zones and circuits, choose certified marine-grade fixtures, use proper wire and overcurrent protection, mount lights where they help instead of hinder, and test the system in real night conditions. When done correctly, LED lighting reduces battery strain, sharpens onboard visibility, and makes docking, fishing, anchoring, and late returns far less stressful.
This electronics and navigation systems hub starts with lighting because lighting touches every core system on the boat: power distribution, helm ergonomics, screen visibility, wiring standards, and operational safety. From here, the next logical topics are switch panels, battery monitoring, GPS and chartplotter integration, VHF setup, radar basics, sonar networking, and corrosion-proof wiring practices. If you are building out a safer night-boating setup, start with a lighting plan, inspect your current wiring, and upgrade one circuit the right way this weekend.
Frequently Asked Questions
1. Why should I install LED lights on my boat for night boating instead of keeping traditional bulbs?
LED lights are one of the smartest upgrades you can make for night boating because they improve visibility, reduce power consumption, and hold up better in harsh marine conditions. Unlike incandescent or halogen bulbs, LEDs use far less current to produce the same or better light output. That matters on a boat because your electrical system has limited capacity, and every amp you save can be used for other important electronics such as GPS units, fish finders, VHF radios, pumps, and navigation systems. Lower power draw also means less strain on your battery bank, which can be especially valuable if you spend long evenings on the water or run a smaller vessel with limited charging capability.
Another major advantage is durability. LEDs are solid-state components, so they are more resistant to vibration, shock, and repeated use than fragile filament-style bulbs. Boats constantly deal with wave impact, engine vibration, moisture, salt air, and temperature swings, all of which can shorten the life of traditional lighting. A properly rated marine LED fixture is built to handle those conditions much better. LEDs also generate far less heat, which improves efficiency and can reduce the risk of heat-related damage around wiring, housings, or nearby materials.
From a practical boating standpoint, LEDs also provide cleaner, brighter, and more consistent illumination. That can help you move around the deck more safely, identify gear, read controls, and maintain awareness after dark. In addition, LED lighting options are extremely flexible. You can install navigation lights, cockpit lights, courtesy lights, underwater lights, compartment lights, and accent lighting in a way that matches how you actually use the boat. In short, switching to LEDs is not just about aesthetics. It is a functional upgrade that supports safety, battery efficiency, reliability, and future marine electronics expansion.
2. What types of LED lights should I install on my boat for safe and effective night boating?
The right LED setup depends on your boat size, layout, and how you use it after dark, but most installations start with essential safety lighting and then expand into functional deck or courtesy lighting. The first priority should always be navigation lights that comply with boating regulations. These typically include red and green sidelights, a white stern light, and, depending on your vessel, an all-round white light, masthead light, or anchor light. If your current navigation fixtures are outdated, dim, or unreliable, upgrading to marine-grade LED navigation lights is often the best place to start because they directly affect your visibility to other boaters.
After navigation lighting, many boat owners add cockpit or deck LEDs to improve movement and task visibility. These lights help when tying knots, landing fish, checking gear, opening storage compartments, or boarding at the dock. Courtesy lights are also useful in walkways, steps, helm areas, and seating zones because they provide enough illumination without destroying your night vision. Blue, red, or warm low-level LEDs are often popular for this reason, though the best color depends on your preference and intended use.
Interior cabin lights, bilge or compartment lights, spreader lights, livewell lights, and underwater LEDs are all optional additions depending on the style of boat. A center console may benefit from helm, compartment, and deck lighting, while a pontoon might prioritize perimeter courtesy lights and seating-area illumination. A fishing boat may need brighter task lighting in work zones, while a cruising boat may want a softer ambient setup. The key is to distinguish between legal navigation lighting, which must meet visibility and placement standards, and convenience lighting, which should improve safety and usability without creating glare or interfering with the operator’s vision. Choosing marine-rated fixtures designed for wet environments is just as important as choosing the right lighting category.
3. How do I install LED lights on my boat correctly and safely?
A safe LED boat light installation begins with a clear plan before you drill holes or run any wire. Start by deciding exactly which lights you want to add, where they will be mounted, and how they will be controlled. Map out wire routes that avoid sharp edges, moving parts, fuel lines, excessive heat, and areas where standing water is common. If you are upgrading existing fixtures, inspect the old wiring first. Many boat lighting problems come from corroded terminals, undersized wire, poor splices, or weak grounding rather than the fixture itself.
Next, disconnect battery power before doing any electrical work. Use only marine-grade tinned copper wire, marine heat-shrink connectors, waterproof fuse holders when needed, and corrosion-resistant hardware. These materials are worth the extra cost because they resist salt, moisture, and vibration much better than automotive parts. Each lighting circuit should be properly fused according to the manufacturer’s recommendations, and the wire gauge should match the total current draw and the length of the run to prevent voltage drop. Even though LEDs use less power than older bulbs, correct wiring practices still matter.
When mounting fixtures, make sure the surface is solid, clean, and properly sealed. Any screw holes or cable pass-throughs should be sealed with a marine-grade sealant to help prevent water intrusion into the hull, console, or deck structure. For navigation lights, placement is critical. They must be installed at the correct height, angle, and orientation so they remain visible from the required directions. A poorly placed light may look fine at the dock but still fail to meet safety standards on the water.
As you make electrical connections, keep them above bilge level whenever possible and support the wire with clamps or loom to prevent chafing. Labeling wires during installation can save a great deal of time later if you add more accessories or troubleshoot a circuit. Once everything is connected, restore power and test each light individually and as part of the full system. Check switch operation, brightness, beam direction, and any interference with other electronics. A good installation should be neat, secure, sealed, fused, and easy to service in the future.
4. Do boat LED lights need to be marine-grade, waterproof, and compliant with boating regulations?
Yes, absolutely. Marine-grade construction is essential for boat lighting because the marine environment is much more demanding than what standard household or automotive lights are designed to handle. On a boat, fixtures and wiring are exposed to humidity, spray, rain, UV radiation, vibration, salt air, and often direct washdown. A non-marine fixture may work temporarily, but it will usually fail faster, corrode internally, or create connection problems that become frustrating and potentially unsafe. Marine-grade LEDs are built with sealed housings, corrosion-resistant materials, and more durable internal components specifically for these conditions.
Water resistance matters just as much. Depending on where the light is installed, you may need splash-resistant, weather-resistant, or fully waterproof fixtures. Exterior deck lights, transom lights, and underwater lights should be selected with a suitable ingress protection rating and intended use clearly specified by the manufacturer. Even lights installed under a hardtop or inside a console can still be exposed to heavy moisture and condensation, so it is wise to use marine-rated components throughout the boat whenever possible.
Regulatory compliance is especially important for navigation lights. These are not just convenience accessories. They are required safety equipment, and they must meet visibility, color, arc, and placement requirements based on your boat’s size and type. Installing decorative or generic LED lights in place of certified navigation lights can create a legal issue and, more importantly, make your vessel harder for others to interpret at night. Other boaters rely on your light configuration to understand your direction and status on the water. If your nav lights are too dim, the wrong color, mounted incorrectly, or obscured by other lighting, that can increase collision risk.
The safest approach is to choose lighting products specifically labeled for marine use and, for navigation applications, verified as compliant with the relevant standards for your vessel. It is also wise to avoid over-lighting the helm or bow in ways that create glare. Good night boating lighting should help you see and be seen without compromising your own vision or confusing other vessels.
5. What are the most common mistakes to avoid when installing LED lights on a boat?
One of the most common mistakes is treating a boat lighting project like a simple automotive or home wiring job. Boats require specialized materials and techniques. Using non-marine wire, cheap butt connectors, unsealed switches, or indoor-rated fixtures often leads to corrosion, flickering, intermittent failures, and premature replacement. Another frequent issue is skipping circuit protection or using the wrong fuse size. Every electrical addition should be properly protected, even low-draw LEDs, because wiring faults in a marine environment can still create serious problems.
Poor wire routing is another major mistake. Wires should not be left loose in the bilge, dragged across rough fiberglass, or routed near fuel system components or hot engine parts. Unprotected wire can chafe over time and fail when you least expect it. Inadequate sealing is also a big one. Any hole drilled for mounting or cable entry should be sealed properly so you do not create pathways for water intrusion into decks, transoms, consoles, or cored structures.
Boat owners also commonly underestimate the importance of light placement. Navigation lights installed at the wrong angle, blocked by railings or gear, or mixed with bright accent lighting can reduce safety rather than improve it. Similarly, excessively bright interior or deck LEDs can hurt your night