A leaking boat hull demands immediate action because even a small breach can escalate from a nuisance to a flooding emergency within minutes. In practical terms, a temporary hull patch is any short-term repair that slows or stops water ingress long enough to reach safe harbor, haul out, or complete a permanent repair on land. I have used these methods on fiberglass runabouts, aluminum skiffs, and older wooden sailboats, and the same rule always applies: the goal is control, not perfection. You are buying time, protecting buoyancy, and reducing the chance of a preventable abandonment, grounding, or tow.
Boat owners often search for one magic fix, but emergency boat repairs work best as a sequence. First, control flooding with bilge pumps, bailing, and weight redistribution. Second, identify the leak source: puncture, split seam, failed through-hull, loose transducer, rudder packing, shaft seal, or impact crack. Third, choose the right temporary patch based on hull material, water pressure, location relative to the waterline, and what supplies are actually on board. A rag and collision mat can outperform a fancy adhesive if the hull is wet, contaminated, or flexing heavily in chop.
This matters because time, access, and sea state determine outcomes more than tools alone. The U.S. Coast Guard consistently emphasizes flooding control as a leading survivability issue in recreational boating emergencies, and marine insurers see avoidable sinkings after minor collisions every season. Temporary patching is part of emergency boat repairs and quick fixes, but it sits inside a larger response system that includes damage assessment, dewatering, communications, and safe return planning. As a hub for the broader Boat Maintenance & Repairs topic, this guide explains how to temporarily patch a leaking boat hull while connecting the decision-making behind every fast, field-expedient repair.
Key terms are straightforward. A soft patch uses flexible material such as a tarp, sailcloth, rubber sheet, cushion foam, or collision mat pressed over the leak. A hard patch uses something rigid or semi-rigid, such as plywood, sheet metal, or plastic backed by sealant and mechanical pressure. Plugging means inserting shaped wood, rubber, or fabric into a hole, especially around failed fittings. Dewatering means removing incoming water with bilge pumps, manual pumps, buckets, or even a crash pump. Knowing these definitions helps you match the method to the failure, which is the difference between stabilizing the boat and wasting precious minutes on a patch that immediately blows off.
First Response: Stabilize the Boat Before You Patch
The first step in any leaking hull emergency is to keep the boat afloat while you investigate. Start every installed bilge pump, switch on backup pumps if available, and assign one person to manual bailing if the inflow rate is climbing. If your boat has a high-water alarm, treat it as a flooding event until proven otherwise. Reduce speed unless keeping headway is necessary for steering in waves, because hull flex and spray often worsen leaks. On planing boats, coming off plane can change pressure around the damaged area; on displacement boats, altering heel may move the breach partly above the waterline.
Then make the boat easier to save. Hand out life jackets, issue a brief crew assignment, and send a distress call early if the leak is substantial or your pumps are losing ground. Move passengers and heavy gear away from the damaged side to reduce immersion. Shut seacocks to isolate failed hoses or fittings. I have seen owners tear into the wrong part of the bilge while a split livewell hose kept filling the boat; tracing the actual source matters. Use a flashlight and your hand, not just your eyes, because leaks often appear as spray, seepage along stringers, or a cold stream hidden behind machinery.
Once you know the leak location, prepare the patch area as much as conditions allow. Wipe away slime, fuel sheen, and loose debris. If the hull interior is reachable, pressing a patch from inside is usually easier and more secure than trying to attach one from outside in rough water. If the breach is below the waterline and inaccessible internally, a collision mat or weighted external patch may be the fastest answer. Every minute spent improving surface contact helps, but do not chase a perfect cleaning job while water is rising. Emergency boat repairs reward decisive, workable actions over tidy workmanship.
How to Identify the Leak Type and Choose the Right Temporary Patch
Different leaks require different fixes, and misdiagnosis causes many failed patches. A round puncture from submerged debris often accepts a plug or compression patch. A long crack in fiberglass tends to reopen unless bridged over a broad area. A leaking through-hull fitting usually responds better to closing the seacock, driving in a tapered softwood plug, or wrapping the fitting than smearing sealant over flowing water. On aluminum boats, rivet leaks and split seams behave differently from impact holes, while wooden hulls may leak through opened planks, fastener movement, or swelling changes after grounding.
The key factors are pressure, shape, material, and movement. Pressure increases with depth below the waterline, so a small hole near the keel can admit surprising volumes of water. Shape determines whether a plug can seat. Material matters because fiberglass, aluminum, steel, polyethylene, and wood all present different bonding challenges. Movement matters because slamming, engine vibration, and hull flex break brittle repairs. In my experience, a flexible patch with strong backing pressure often survives longer offshore than a hard adhesive repair applied to a wet, moving surface. If the boat is pounding, prioritize methods that tolerate motion.
| Leak type | Best temporary method | Why it works | Main limitation |
|---|---|---|---|
| Small round hole | Tapered wooden plug or rubber bung | Expands under pressure and seals quickly | Poor fit on irregular cracks |
| Long crack in fiberglass | Soft patch plus backing board and straps | Covers a wide area and tolerates flex | Needs solid compression |
| Failed through-hull or hose | Close seacock, plug fitting, clamp hose | Stops flow at the source | Access can be difficult |
| Seam leak in aluminum or wood | External mat, marine tape, seam packing | Reduces ingress along an uneven line | Rarely fully watertight |
| Large irregular breach | Collision mat, cushion, sailcloth, or tarp | Uses water pressure to hold material in place | May shift in heavy seas |
Choosing the patch is also about inventory. Smart emergency kits include tapered softwood plugs tied near every through-hull, underwater epoxy putty, butyl or rescue tape, heavy-duty plastic sheet, a small plywood panel, rags, cable ties, webbing straps, hose clamps, a mallet, and a manual diaphragm pump. For trailer boats, adding aluminum tape, polyurethane sealant, and a compact cordless drill can make a major difference once the boat is stable. This hub article covers the logic behind those tools; related pages in Emergency Boat Repairs & Quick Fixes should go deeper on bilge pump troubleshooting, failed hose repairs, seacock emergencies, and preparing a true flooding response kit.
Proven Temporary Patching Methods That Work on the Water
The fastest fix for a small hole is often a tapered plug. Softwood plugs are standard because they compress, swell slightly when wet, and can be driven into a round opening around a broken fitting or puncture. Keep multiple sizes aboard and tether them near seacocks and transducers. Tap the plug in firmly, not violently, to avoid enlarging the damage. If the hole is irregular, wrap the plug with cloth or rubber before insertion. Follow with tape, a rag wad, or epoxy putty if the area is accessible and the inflow has slowed enough to let secondary sealing materials stay in place.
For cracks and larger punctures, build a compression patch. Place rubber, thick cloth, foam, or folded rags over the leak, then cover that with a rigid board or plastic panel larger than the damaged area. Use lines, straps, poles, or bracing from the opposite structure to maintain pressure. This is old-school damage control, but it works because the soft inner layer conforms to the hull while the outer plate spreads force. On center-console boats, I have used a cockpit sole panel and two boat hooks as braces. On sailboats, cabin sole boards, berth tops, and even cutting boards become excellent backing plates.
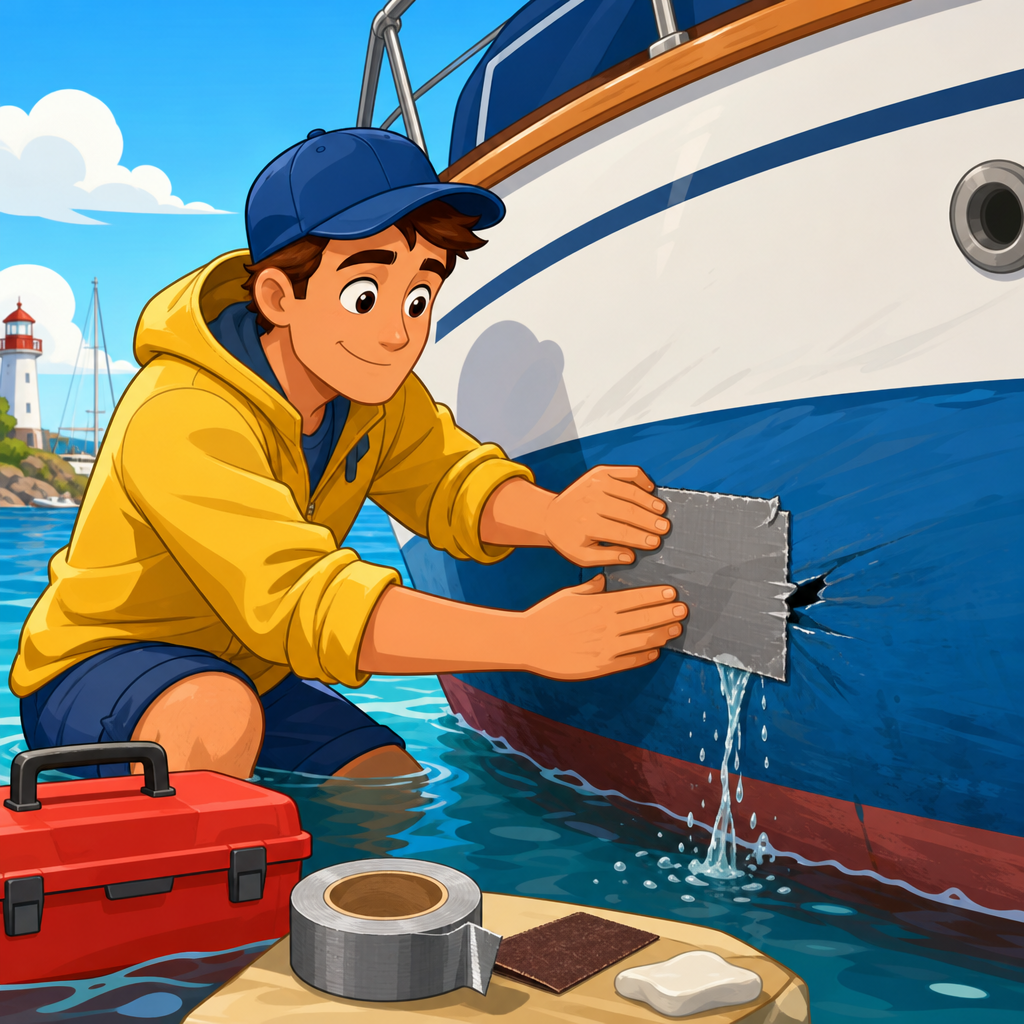
If you can reach the outside of the hull safely, a collision mat can be remarkably effective. A purpose-made mat is ideal, but a tarp, sail bag, bunk cushion, or heavy canvas can work. Lower it over the side and pull it under the hull so water pressure presses it against the opening. Secure the corners fore and aft to stop it from washing away. This method is especially useful for jagged or inaccessible damage because it does not rely on a clean bonding surface. Commercial crews have used fothering and collision mats for generations; the physics remain sound even on small recreational craft.
Adhesives have a place, but they are often misunderstood in emergency boat repairs. Underwater epoxy putty can seal slow leaks around cracks, fittings, and gouges if you knead it thoroughly and force it into the defect. Polyurethane marine sealants can help above the waterline or on damp surfaces once inflow is controlled. Fiberglass repair kits are rarely true on-water solutions unless the area can be dried, backed, and held still long enough to cure. Rescue tape and self-fusing silicone tape are excellent for split hoses and temporary wraps, but they are not substitutes for structural patches over significant hull breaches.
Material-Specific Advice for Fiberglass, Aluminum, Wood, and Polyethylene Hulls
Fiberglass boats are the most common recreational hulls, and they usually fail by cracking, puncture, or damage around fittings. A temporary fiberglass hull patch should focus on spanning the damaged laminate, not rebuilding it. Soft patch plus backing board is the most reliable afloat. If the crack is near the turn of the bilge, use extra padding so the board bears evenly. Epoxy putty can reinforce the edges of a compression patch, but do not trust resin alone on a wet, flexing hull. Once ashore, inspect for hidden delamination, core saturation, and fractured tabbing around nearby bulkheads or stringers.
Aluminum hulls bring different challenges. Sealants may not bond well to oxidized, wet metal, and impact damage can leave sharp edges that cut fabric patches. First blunt any dangerous burrs if possible. Then use rubber sheet, thick cloth, or a cushion backed by wood or metal plate. For split seams or popped rivets, external pressure is usually more effective than internal caulk. Aluminum tape can help on lightly weeping seams above the waterline, but it is not a dependable answer for submerged flooding damage. After the emergency, inspect for frame distortion, loose rivets, and galvanic corrosion around the failure zone.
Wooden boats can leak dramatically after impacts, drying, or fastener movement, yet they also respond well to traditional soft patching. Cotton waste, oakum substitutes, rags, or even waxed fabric can be pressed into seams temporarily, then covered with a backing patch. Avoid driving hard plugs into delicate planking where they may split the wood further. Because wooden hulls flex and swell, broad, gentle compression works better than brittle compounds. Polyethylene hulls, common on small tenders and kayaks, are the hardest to bond in an emergency because most adhesives do not stick well. Mechanical pressure patches and strapping are the realistic afloat options.
After the Patch: Monitor, Navigate Safely, and Plan the Permanent Repair
A temporary patch is only successful if you keep monitoring it all the way to safety. Mark the bilge level, note pump cycling intervals, and assign someone to inspect the repair every few minutes. If inflow increases, slow down, alter course for calmer water, or improve the patch immediately. Avoid hard turns and repeated slamming. Head for the nearest safe harbor, boat ramp, mooring field, or haul-out facility rather than your original destination. Call ahead for assistance. In many cases, a travel lift, trailer, or tow arranged early prevents a controlled emergency from becoming a sinking at the dock entrance.
Once ashore, treat the incident as a systems failure review, not just a hole repair. Find the root cause: collision, neglected hose, corroded clamp, failed bedding, fatigue crack, grounding, or installation error. Photograph the damage before dismantling, especially for insurance and warranty records. Then perform a proper permanent repair using manufacturer guidance, ABYC-aligned practices where applicable, and material-specific methods. That may mean laminate rebuild on fiberglass, welded or riveted repair on aluminum, plank or frame work on wood, or plastic welding on polyethylene. Replace any soaked flotation, wiring, insulation, or core material affected by flooding.
The broader benefit of learning how to temporarily patch a leaking boat hull is confidence under pressure. Emergency boat repairs and quick fixes are not about heroics; they are about rehearsed, practical steps using simple gear and calm judgment. Build a flooding kit, store plugs at every through-hull, test bilge pumps, and walk your crew through a leak response before the season starts. If you manage boats, create checklists and inspect known weak points regularly. Use this Boat Maintenance & Repairs hub as your starting point, then review the companion guides on bilge systems, hose failures, emergency electrical issues, and post-incident inspection so your next repair is controlled from the first minute.
Frequently Asked Questions
What should I do first when I discover my boat hull is leaking?
The first priority is to stay calm and control the situation before the leak gets ahead of you. Start by locating the source of the water as quickly as possible. That means checking the bilge, looking for visible cracks, impact points, failed through-hulls, loose drain plugs, separated seams, or fasteners that may have opened up. If you have passengers on board, assign simple jobs right away: one person can operate the bilge pump or bucket water, another can help identify where the water is entering, and another can prepare patching materials. Reducing incoming water is the goal, not creating a flawless repair on the spot.
Once you have identified the leak area, reduce stress on that part of the hull if you can. Slow the boat, shift weight away from the damaged section, and turn the vessel so waves are not pounding directly against the breach. Then begin dewatering immediately using electric bilge pumps, manual pumps, buckets, sponges, or anything available. A temporary hull patch works best when water flow is already being managed. If the leak is severe or worsening, call for assistance early rather than waiting until the situation becomes critical. A mayday or distress call is easier to make while you still have power, communications, and time to think clearly. In short, the sequence is find the leak, slow the ingress, pump out water, patch the damage, and head for the nearest safe harbor or haul-out location.
What materials work best for a temporary boat hull patch in an emergency?
The best emergency patching materials are the ones that can be applied quickly, conform to uneven surfaces, and stay in place long enough to get you ashore. Softwood plugs are essential for failed through-hulls or damaged fittings because they can be driven into round openings fast and effectively. Marine repair tape, heavy-duty duct tape, waterproof rescue tape, and self-fusing silicone tape can all help reduce water entry, especially on smaller cracks above or just near the waterline. Epoxy putty sticks are among the most valuable emergency items to keep aboard because they can be kneaded by hand and pressed directly into cracks, punctures, or seam failures on fiberglass, wood, and some metal surfaces.
Other useful temporary patch materials include collision mats, rubber sheets, canvas, sailcloth, cockpit cushions, spare life jackets, plywood scraps, and even a floor mat or cutting board combined with line or straps. For a larger breach, an exterior patch often works better than trying to force material from inside the hull alone. In those cases, pressing a flexible sheet or cushion over the outside of the damaged area and securing it with line can dramatically reduce water flow. For aluminum boats, metal-reinforced repair tape and epoxy putty may help in the short term, but mechanical backing pressure is often what makes the difference. For wooden boats, cloth, sealant, wedges, and external pressure are often more effective than tape alone. The smartest approach is to carry a compact damage-control kit before you ever need it: plugs, putty, tape, rags, gloves, a mallet, line, and a few patching sheets can turn a serious leak into a manageable emergency.
Can I patch a leaking boat hull from the inside, or does the patch need to go on the outside?
You can often patch a leaking hull from the inside, and in many real-world emergencies that is the fastest and safest option because it avoids putting anyone overboard or forcing awkward work alongside the hull. Interior patching is especially practical when the leak is accessible, the damaged area is small, and the incoming water can be slowed enough to let putty, plugs, or backing material seat properly. For example, a crack in fiberglass below the waterline may be temporarily controlled by pressing epoxy putty into the opening, then reinforcing it with cloth, tape, or a rigid backing plate held in place under pressure. A failed through-hull or hose fitting is often best addressed from the inside with a tapered wooden plug, sometimes wrapped with sealant or cloth to improve the seal.
That said, outside patches can be much more effective when the water pressure is forcing material inward or when the opening is too large or irregular for an interior-only repair to hold well. Water pressure naturally pushes an external patch against the hull, which can help seal the breach. This is why collision mats, canvas wraps, cushions, or flexible rubber sheets pulled tight across the outside of the damaged section are classic emergency methods. In practice, the strongest temporary solution is often a combination: slow the leak from inside, then add an external cover if conditions allow. The decision depends on sea state, boat type, accessibility, crew safety, and the size of the damage. If going outside the hull creates significant risk, do not do it. A less perfect inside patch that keeps water under control is far better than a dangerous attempt at an ideal repair.
How reliable is a temporary hull patch, and how far can I travel with one?
A temporary hull patch should be treated as a short-term control measure, not a restored seaworthy condition. Its reliability depends on the size and location of the damage, the hull material, water pressure at the leak point, boat speed, wave action, and how well the patch was applied. A small crack near the waterline that has been dried, packed with epoxy putty, and reinforced may hold surprisingly well for the trip back to the dock. A jagged puncture below the waterline in rough water is a very different situation and may require constant pumping and active monitoring all the way to safety. In every case, assume the patch can weaken, shift, or fail without much warning.
That is why the safest plan is always to travel the shortest practical distance, at the slowest speed that maintains control, toward the nearest haul-out, ramp, marina, or protected shoreline. Keep someone assigned to watch the bilge continuously, and be ready to rework the patch if water flow increases. Avoid hard turns, pounding into chop, wake impacts, or any maneuver that flexes the hull or increases pressure on the repair. If the leak is not clearly under control, do not continue on a long run just because the boat is still floating. Call for a tow or rescue assistance instead. Temporary patches buy time. They do not guarantee it. The right mindset is that every minute gained should be used to reach safety, not to extend the trip.
What mistakes should I avoid when making a temporary patch on a leaking boat hull?
The most common mistake is wasting precious time trying to create a perfect repair while water continues to enter the boat. In an emergency, your job is to reduce flooding quickly, not perform a shop-quality fix. Another frequent error is failing to dewater aggressively before and during the patching effort. Even a good patch can seem ineffective if water is already accumulating faster than you are removing it. People also make the mistake of choosing the wrong material for the type of leak, such as relying on tape alone for a hole that really needs a plug, backing plate, or pressure-held external cover. A patch that is not mechanically supported often washes out or peels away under pressure.
Safety-related mistakes are just as important to avoid. Do not send someone over the side in rough conditions unless there is no alternative and it can be done safely. Do not run the boat fast after patching just to get home sooner; speed can increase hull stress and worsen water intrusion. Do not ignore the possibility that the leak may be coming from something other than the hull itself, such as a hose, shaft seal, livewell fitting, transducer mount, or drain connection. Finally, do not assume the problem is solved once the patch is in place. Continue checking bilge levels, monitoring the repaired area, and preparing for backup actions. The most effective temporary patch jobs succeed because the crew stays disciplined: control the water, support the patch, monitor constantly, and head directly for a permanent repair location.