How to properly wire your boat’s electrical system starts with understanding that marine wiring is not just household wiring placed on water. A boat’s electrical system operates in a harsher environment, with constant vibration, moisture, salt exposure, confined spaces, and critical safety demands. In practical terms, proper wiring means selecting marine-grade components, following accepted standards, sizing conductors and protection correctly, organizing circuits logically, and testing every connection under load. When I inspect boats with chronic electrical problems, the root cause is rarely one dramatic failure. It is usually a chain of small mistakes: undersized wire, corroded terminals, missing fuses, poor battery isolation, or unsupported cable runs chafing behind panels.
This topic matters because the electrical system powers nearly everything that makes a modern boat usable and safe. Navigation lights, bilge pumps, electronics, freshwater pumps, macerators, chargers, windlasses, inverters, and engine starting circuits all depend on reliable distribution. A wiring error can disable critical equipment, drain batteries, damage expensive electronics, or start a fire. On cruising boats, electrical and plumbing systems are tightly connected. Pressure water pumps, shower sump pumps, head systems, water heaters, tank monitors, and automatic bilge devices all sit at the intersection of both systems, so a hub article on electrical and plumbing systems must explain the full picture.
Key terms are worth defining clearly. DC systems usually run at 12V or 24V and supply most onboard loads from battery banks. AC systems typically provide 120V or 230V shore or generator power for outlets, chargers, air conditioning, and galley appliances. A circuit begins at a power source, travels through overcurrent protection, a switch or control device, the load, and returns through a negative or grounding path. Voltage drop is the loss of electrical pressure across wire length and resistance. Bonding is the connection of metallic underwater fittings for corrosion control and fault management, while grounding has different meanings in AC and DC contexts and must be handled carefully.
If you want your boat’s electrical system to be dependable, serviceable, and safe, approach it as an integrated design rather than a collection of add-on accessories. The best installations are easy to trace, properly labeled, protected close to the source, and built around expected loads instead of guesswork. That discipline also improves every related plumbing component because pumps, sensors, alarms, and controls perform better when the underlying electrical supply is stable.
Plan the system before you pull a single wire
The right way to wire a boat begins on paper. Start by listing every electrical load in the boat, separating DC and AC equipment and identifying what is continuous, intermittent, or mission critical. On a typical cruiser, that means engine start, house loads, navigation electronics, lighting, bilge pumps, freshwater pressure pump, livewell or washdown pump, macerator, refrigerator, windlass, inverter, charger, water heater, and air conditioning. Note the current draw in amps, startup surge where relevant, circuit length, and whether the circuit must remain energized when the battery switch is off. Bilge pumps and alarms often fall into that category.
I build the plan around battery banks first because storage determines the rest of the architecture. A common arrangement is one dedicated engine start battery and one or more house batteries, linked through an automatic charging relay or DC-to-DC charger. Larger boats may add bow thruster or windlass batteries forward to reduce voltage drop. Once the battery layout is set, create a single-line diagram showing battery switches, main fuses, busbars, charge sources, distribution panels, and major loads. The American Boat and Yacht Council, especially ABYC E-11, is the benchmark standard most marine electricians use for DC and AC design decisions.
Labeling matters at the planning stage, not after installation. Every circuit should have a name, a fuse or breaker value, and an intended wire gauge. That makes future troubleshooting faster and safer. It also helps when adding plumbing-related devices later, such as a second sump pump or a tank level sender. Good planning reduces hidden splices, overloaded panels, and the classic boatyard mystery where nobody knows which red wire feeds what.
Choose marine-grade wire, terminals, and protection devices
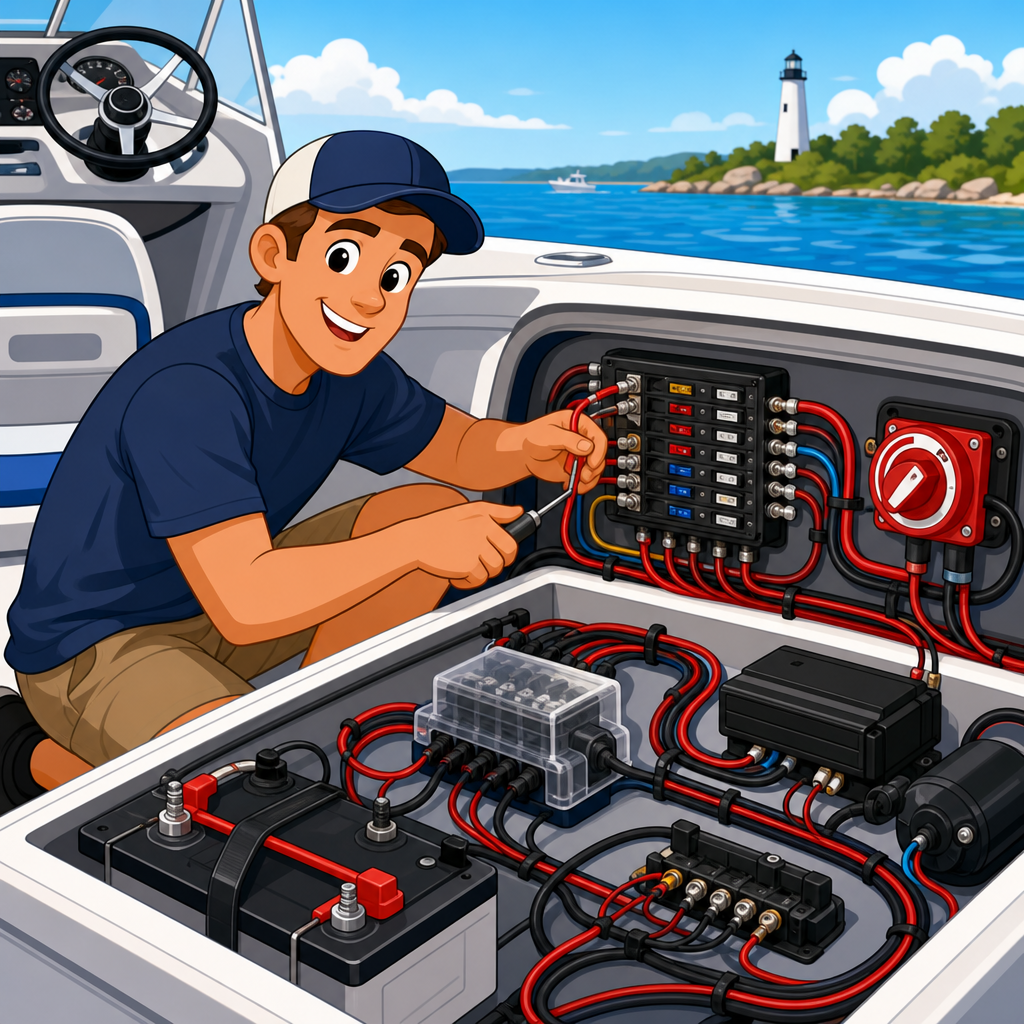
Marine-grade materials are nonnegotiable. Use stranded, tinned copper wire that resists corrosion and survives vibration better than solid conductors. Insulation should be oil, heat, and moisture resistant, with common choices meeting UL 1426 or equivalent marine requirements. Ancor and Pacer are widely used brands because their conductor counts, insulation quality, and color consistency make panel work cleaner and more durable. Household wire, hardware-store crimp terminals, and automotive fuse holders fail early in bilges and engine spaces, especially in saltwater boats.
Terminations deserve as much attention as wire. Use adhesive-lined heat-shrink ring terminals and a quality ratcheting crimper designed for marine connectors. Crimp quality is one of the most frequent causes of voltage drop and intermittent faults. I avoid cheap multi-tool crimpers because they flatten barrels inconsistently and often leave a connection that passes a quick tug test but heats under load. Heat-shrink seals out moisture and provides strain relief. Ring terminals are preferred over spade connectors in most marine applications because vibration is relentless and accidental loosening is common.
Overcurrent protection must be placed as close to the source as practical. That means battery-fed circuits need fuses near the battery or busbar, not somewhere convenient behind the helm. Class T fuses are common for high-current inverter circuits because they interrupt fault current quickly. MRBF terminal fuses are useful on battery posts for compact branch protection. Blade fuses work well on lower-current accessory circuits. Circuit breakers are ideal where reset capability and panel switching are helpful. The protection device is chosen to protect the wire, not just the appliance.
| Component | Best Practice | Common Mistake | Why It Matters |
|---|---|---|---|
| Primary wire | Tinned stranded copper, marine rated | Automotive or household wire | Resists corrosion and vibration failure |
| Terminals | Heat-shrink ring terminals | Open spades or unsealed crimps | Prevents loosening and moisture intrusion |
| Main protection | Fuse within short distance of battery | Unfused battery lead | Reduces fire risk during a short circuit |
| Support | Clamped runs with chafe protection | Loose wires in bilge or lockers | Avoids abrasion and intermittent faults |
Size wires and circuits for current, length, and voltage drop
Correct wire sizing is where many otherwise neat installations go wrong. A wire can be large enough to avoid overheating yet still too small to deliver acceptable voltage to the load. On boats, voltage drop is often the deciding factor because long cable runs are common. As a rule, critical circuits such as bilge pumps, navigation lights, electronics, and blower motors should be designed for about 3 percent voltage drop, while less sensitive loads may allow about 10 percent. Manufacturers publish amp draw, but you still need the round-trip conductor length to size wire correctly.
For example, a 12V freshwater pump drawing 10 amps located 20 feet from the panel actually has a 40-foot round-trip run when you include the negative return. If you undersize that circuit, the pump may run slowly, cycle poorly, or pull higher current during startup. The same principle applies to macerator pumps and shower sump systems. Many plumbing complaints are electrical problems in disguise. A weak pump is not always a bad pump; it may be starved by a poor feed, corroded connection, or undersized return path.
Use a marine wire-sizing chart or an ABYC-compliant calculator rather than guesswork. Blue Sea Systems publishes practical reference material and quality distribution hardware that many installers rely on. For high-current loads like windlasses, inverters, and thrusters, run dedicated feeds from properly fused busbars or batteries, and account for surge current. The right cable size may look excessive compared with automotive practice, but on boats the combination of distance, low voltage, and safety margin makes larger conductors normal. Oversizing slightly is usually wise; undersizing never is.
Build a clean distribution system for batteries, charging, and onboard loads
A clean electrical layout separates starting, house, and specialty loads while making charging straightforward. The modern standard on many recreational boats is a start battery for the engine and a house bank for everything else. This protects the ability to crank the engine after running lights, refrigerators, pumps, and electronics at anchor. Battery switches should be intuitive and clearly labeled. A “combine” or emergency parallel function is useful, but it should not be the normal charging strategy. Automatic charging relays, voltage-sensitive relays, and DC-to-DC chargers manage charging better and reduce operator error.
Distribution should flow from the battery bank to a main fuse, then to positive and negative busbars, then to branch circuits and panels. Using busbars instead of stacking multiple ring terminals on battery studs creates cleaner, more serviceable installations. It also reduces resistance and makes future additions easier. I prefer to reserve battery posts for essential battery connections only: one feed to the main fuse, one charger or engine lead as designed, and one properly managed negative path. Everything else belongs on rated distribution hardware.
Charging sources need equal attention. Alternators, shore chargers, solar controllers, and generators should each connect through appropriate regulation and protection. Smart multistage chargers are worth using because flooded, AGM, and lithium batteries all have different charging profiles. If lithium is installed, system design becomes more specialized. Battery management systems, alternator protection, temperature considerations, and charger compatibility must all be addressed deliberately. A mixed-quality setup with premium batteries and poor distribution hardware is still a poor electrical system.
Plumbing-related loads should have dedicated, labeled circuits with realistic duty assumptions. Bilge pumps often require both automatic and manual control paths. Freshwater pumps benefit from low-resistance feeds because pressure switches are sensitive to voltage instability. Marine sanitation devices, sump pumps, and tank monitoring systems should not be tied haphazardly into spare accessory circuits. Treat them as critical service systems and wire them accordingly.
Install safely, route neatly, and test every function under real conditions
Installation quality determines whether a good design survives in service. Support wiring at regular intervals with cushioned clamps or secure mounts, keep conductors above bilge water whenever possible, and protect cables passing through bulkheads with grommets or chafe guards. Separate AC and DC runs unless an approved enclosure or barrier is used. Keep wiring away from fuel lines, exhaust components, moving steering gear, and high-heat engine surfaces. Drip loops, service loops, and accessible junction points make future maintenance easier without turning the boat into a nest of hidden connectors.
Color coding and labels are essential. At minimum, maintain consistent positive, negative, bonding, and AC conductor identification throughout the vessel. Use heat-shrink labels or permanent machine labels at both ends of every wire. During troubleshooting, that simple discipline saves hours. On larger refits, I also create a circuit directory and panel legend that includes fuse sizes, spare capacity, and device locations. This is especially helpful in electrical and plumbing zones where multiple pumps, float switches, and sensor wires converge.
Testing should happen in stages. First verify continuity, polarity, and insulation condition before energizing. Then confirm charging voltages, branch circuit voltage drop, and current draw under load using a multimeter and clamp meter. Simulate real conditions: run the freshwater pump while electronics are on, test bilge pump automatic switching, check shore power polarity, and verify GFCI or ELCI protection where required. Corrosion prevention is ongoing, not one-time. Use dielectric practices where appropriate, keep terminals dry, inspect annually, and replace any connection showing heat discoloration or green copper oxide.
Proper boat wiring is ultimately about reliability. When the system is planned carefully, built with marine-grade materials, protected correctly, and tested realistically, every connected subsystem performs better, including lighting, navigation electronics, bilge protection, and plumbing equipment. That is why electrical and plumbing systems belong together in boat maintenance planning: pumps, alarms, heaters, and monitoring devices are only as dependable as the circuits behind them. Build the system so it can be understood years later, not just finished today. If you are upgrading your boat, start with a wiring diagram, audit every critical circuit, and bring the installation up to marine standard before adding new accessories.
Frequently Asked Questions
1. What makes boat wiring different from household wiring?
Boat wiring has to survive conditions that household electrical systems never face. On a boat, wires and connections are exposed to constant vibration, humidity, salt air, temperature swings, tight installation spaces, and the possibility of direct water intrusion. Because of that, proper marine wiring is built around durability, corrosion resistance, and safety. Marine-grade wire is typically stranded and tinned, which helps it remain flexible and resist corrosion far better than the solid or lower-grade conductors often used in residential applications. Household wiring methods, connectors, and circuit practices can fail quickly in a marine environment, even if they seem fine at first.
Another major difference is the safety standard expected on a boat. Electrical faults on the water can do more than damage equipment; they can create fire hazards, disable critical systems, drain batteries, or increase shock and corrosion risks. That is why proper boat wiring involves more than simply connecting positive and negative leads. It includes correct circuit protection, secure terminations, thoughtful routing, support for wires to prevent chafe, proper grounding and bonding practices where applicable, and careful separation of systems. In short, marine wiring should always be approached as its own discipline, with components and methods chosen specifically for boating conditions rather than adapted from home electrical work.
2. What type of wire and electrical components should I use in a boat?
The best practice is to use marine-grade, tinned copper stranded wire along with marine-rated electrical components throughout the system. Tinned copper resists corrosion much better than bare copper, which is especially important in damp and salty environments. Stranded wire is also essential because it flexes with vibration and movement instead of becoming brittle or cracking over time. Beyond the wire itself, every part of the installation matters. Terminals, bus bars, fuse blocks, switches, breakers, heat-shrink connectors, battery switches, and distribution panels should all be chosen for marine use so they can handle the environment and deliver dependable long-term performance.
It is also important to avoid mixing in low-quality automotive or household parts, even if they appear cheaper or easier to find. Marine-rated components are designed to better resist corrosion, provide secure connections, and hold up under the motion and stress that boats experience. For connections, adhesive-lined heat-shrink terminals are a strong choice because they help seal out moisture while supporting the conductor. For routing and organization, use clamps, loom, and protective sleeving where needed to prevent movement and chafing. Choosing the right components from the beginning makes the system more reliable, easier to troubleshoot, and far safer over the life of the boat.
3. How do I properly size wires, fuses, and circuit breakers on a boat?
Proper sizing starts with knowing the load, the length of the circuit, and the acceptable voltage drop for the equipment being powered. On a boat, wire size is not selected by amperage alone. Because cable runs can be relatively long and systems often operate on 12V or 24V DC, voltage drop becomes a major issue. A wire that seems large enough to carry the current may still be too small if the run is long, leading to dim lights, weak pump performance, electronics malfunctions, overheating, or inefficient operation. That is why accepted marine standards and wiring charts are used to match conductor size to both current and total circuit length.
Circuit protection must also be chosen carefully. Every circuit should be protected by a fuse or breaker sized to protect the wire, not just the device. In practical terms, that means the wire ampacity and installation conditions must support the protective device rating. Oversized fuses are a common and dangerous mistake because they allow wiring to overheat before the fuse opens. Undersized protection, on the other hand, can lead to nuisance trips. The right approach is to calculate the actual load, choose the correct conductor size based on current and distance, and then install the appropriate fuse or breaker as close to the power source as practical. This approach protects the circuit, supports proper equipment operation, and reduces the risk of electrical failure or fire.
4. How should a boat’s electrical circuits be organized and installed for safety and reliability?
A well-wired boat should have a logical, clearly planned electrical layout rather than a collection of add-on wires installed wherever space was available. Good organization starts with dividing circuits by function, such as lighting, navigation electronics, pumps, communication equipment, engine-related systems, and accessories. These circuits should be distributed through properly labeled panels, fuse blocks, or breaker panels so each one can be isolated, serviced, and tested easily. Keeping the system organized makes troubleshooting much faster and helps prevent overloaded circuits, hidden splices, and confusion during maintenance or emergencies.
Physical installation matters just as much as circuit layout. Wires should be routed neatly, supported at regular intervals, and kept away from heat sources, fuel lines, sharp edges, moving parts, and areas prone to standing water whenever possible. Where wires pass through bulkheads or tight openings, they should be protected from abrasion with grommets or chafe guards. Connections should be mechanically secure and protected from moisture intrusion. It is also wise to label wires and keep an up-to-date wiring diagram for future service. A clean, methodical installation is not just about appearance. It reduces vibration damage, lowers the chance of accidental shorts, improves access, and makes the entire electrical system safer and more dependable.
5. Why is testing every connection and circuit so important after wiring a boat?
Testing is one of the most important parts of wiring a boat because even a neatly installed system can still have hidden problems. A loose crimp, incorrect polarity, undersized wire, poor ground return, or a connection with excess resistance may not be obvious during installation, but it can create serious issues once the boat is in use. Those issues might show up as intermittent electronics, pumps that run weakly, batteries that do not charge properly, blown fuses, overheating wires, or unexplained voltage loss. Thorough testing helps catch these problems before they become failures on the water.
After installation, each circuit should be checked for continuity, correct polarity, secure operation, proper fuse or breaker function, and acceptable voltage under load. Connections should be inspected to confirm they are tight, supported, and protected from moisture. Voltage drop testing is especially valuable because it reveals resistance problems that may not show up in a simple visual inspection. It is also smart to test the system in realistic operating conditions, with multiple loads active, to verify that charging, distribution, and individual circuits behave as expected. Careful testing turns a wiring job from “probably fine” into a reliable marine electrical system you can trust when safety and performance matter most.