
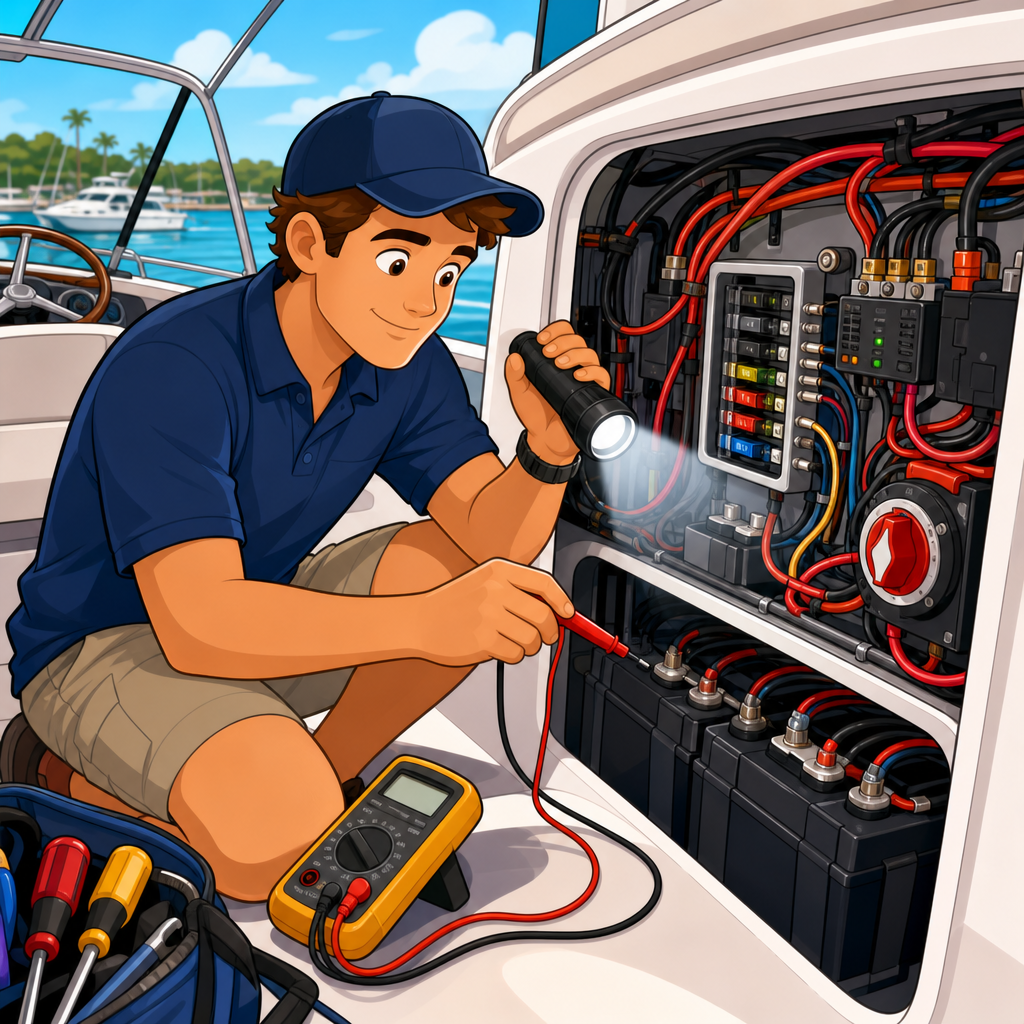
Buying a used boat without a careful inspection is the fastest way to turn an exciting deal into a repair project. I have walked docks with buyers, surveyors, and mechanics long enough to know that most expensive surprises are visible before purchase if you inspect methodically. This hub explains how to inspect a boat before buying, with special emphasis on the boat’s electrical system because wiring faults can affect safety, reliability, insurance, and resale value. If you understand how to evaluate structure, propulsion, systems, paperwork, and sea-trial performance, you can separate normal wear from costly neglect.
A pre-purchase boat inspection is a structured evaluation of the vessel’s condition, maintenance history, legal status, and suitability for your intended use. It is not the same as a casual showing, and it is not fully replaced by a marine survey, though a certified survey remains essential for most purchases. The goal is to identify defects, estimate near-term repair costs, confirm that major systems operate as claimed, and decide whether the asking price reflects actual condition. For buyers comparing several boats, a disciplined inspection process also creates a fair basis for comparison.
The electrical system deserves special attention because modern boats depend on it for engine starting, navigation lights, bilge pumps, electronics, charging, refrigeration, and shore power. Faults can hide behind panels while still creating fire risk, battery drain, corrosion, or intermittent failures that appear only under load. A sound inspection therefore begins broad, then narrows into high-risk systems, especially wiring, batteries, chargers, and AC components. The sections below cover what to inspect, what defects matter most, and how to turn your findings into a smarter purchase decision.
Start with the right inspection process
The best boat buyers inspect in phases. First, review the listing critically and compare it against market value guides, sold listings, and similar models in your region. Then inspect the boat on land if possible, because the hull, running gear, transom, and bottom are easier to evaluate out of the water. After that, test systems dockside, review service records, and schedule a sea trial. Finally, hire a qualified marine surveyor and, for inboard or sterndrive boats, an engine technician familiar with that brand. This sequence saves money because you do not pay for professional reports on a boat that already shows obvious deal-breaking issues.
Bring a flashlight, inspection mirror, phone camera, notepad, moisture meter if you know how to use one, multimeter for basic electrical checks, and clothes suitable for crawling into lockers. Ask that the boat remain unstarted before you arrive so you can inspect cold-start behavior. A seller who warms the engines first may only be trying to be helpful, but cold starts reveal battery health, smoke, idle quality, and fuel or ignition problems more clearly. Also ask for all keys, manuals, maintenance receipts, registration, title or documentation papers, and any warranty transfers available.
As you inspect, focus on patterns rather than isolated flaws. A scratched rub rail may mean normal use; a scratched rub rail plus poor wiring, water stains, cracked hoses, and missing records usually means deferred maintenance throughout the boat. In my experience, a clean bilge, labeled circuits, orderly battery installations, and consistent service documentation often predict a boat that has been cared for properly in less visible areas too. Condition tells a story. Your job is to decide whether the story is routine ownership, hard commercial use, amateur modifications, storm damage, or long neglect.
Inspect hull, deck, and structural integrity first
Before getting deep into systems, confirm that the boat itself is fundamentally sound. Walk the hull and topsides slowly and look along the surface at a shallow angle for unfairness, patches, mismatched gelcoat, blistering, star cracks, or signs of impact. Small cosmetic crazing around deck hardware can be minor, but cracks radiating from stress points near cleats, chainplates, outdrives, or transom assemblies may indicate structural movement. On fiberglass boats, tap suspicious areas lightly and listen for changes in tone that can suggest delamination or poorly bonded repairs.
Check the deck for soft spots by walking every accessible section, especially around hatches, stanchion bases, windlasses, helm seating, and the bow where water intrusion is common. Soft decking often means wet core material, which can require expensive repair. Open lockers and inspect the underside of deck fittings for backing plates, sealant condition, and water staining. Inside the cabin and compartments, look for mold, dark streaks, bulkhead separation, and compression damage. On aluminum boats, inspect welds and look for corrosion near dissimilar metals. On wooden boats, use extra caution around rot, fastener movement, and moisture retention.
The transom deserves close attention because it handles engine load, especially on outboard boats. Push on the lower unit or skeg gently and watch for transom flex. Inspect mounting bolts, sealant, splashwell cracks, and any sign that water has entered the core. If the boat is on a trailer, inspect bunks, rollers, winch post alignment, and whether the hull appears to sit evenly. Uneven support can hide or create damage. Structural defects usually outrank cosmetic concerns because they affect safety, insurability, and the economics of ownership more than faded upholstery ever will.
How to inspect a boat’s electrical system for issues
A boat electrical inspection should begin with layout and workmanship. Open access panels and look for marine-grade stranded wire, proper color coding, heat-shrink terminals, chafe protection, drip loops, and secure routing above the bilge where practical. Sloppy household wire, wire nuts, untinned copper in damp spaces, overloaded terminal studs, and unsupported cable runs are red flags. Quality work tends to look deliberate and labeled. Poor work often looks improvised, with add-on electronics stacked over years without circuit protection or documentation. That kind of system may function today but fail unpredictably under vibration and moisture.
Move next to the batteries and charging setup. Verify the number, type, age, and purpose of batteries: starting, house, thruster, trolling motor, or generator. Battery boxes should be secured, terminals clean, and positive posts protected against accidental shorting. Corrosion on terminals, swollen cases, mixed battery chemistries on the same charging profile, or undersized cables point to future trouble. Use a multimeter to check resting voltage after loads have been off if possible. Around 12.6 volts suggests a healthy fully charged lead-acid battery, while materially lower readings can indicate discharge or deterioration.
Now inspect distribution and protection. Every major circuit should have an appropriately rated fuse or breaker close to the power source. Battery switches should operate smoothly and be clearly marked. At the DC panel, test lights, pumps, electronics, horn, wipers, and accessory sockets one by one. Watch for dimming, flicker, hot breakers, or equipment that only works when a neighboring switch is moved, which can suggest shared grounds or panel faults. Automatic bilge pumps deserve special attention: lift the float switch or activate the electronic sensor and confirm the pump runs independently of the main panel where designed to do so.
On boats with shore power, inspect the AC side carefully and, if anything looks questionable, bring in a marine electrician. Shore power in a wet environment can injure people and start fires. Check the shore inlet for heat damage or discoloration, inspect cord ends for burned blades, and look for a galvanic isolator or isolation transformer if fitted. A proper AC panel should include polarity indication and branch protection. Equipment such as battery chargers, water heaters, air conditioning, and outlets should be tested under load. Corroded connections, unprotected splices, and reverse-polarity history are serious concerns.
| Electrical checkpoint | What good looks like | Common warning sign | Why it matters |
|---|---|---|---|
| Batteries | Secured boxes, clean terminals, dated labels | Swelling, corrosion, loose hold-downs | Poor starting, fire risk, charging problems |
| Wiring | Tinned marine wire, support, labels, fuses | Wire nuts, household cable, chafe | Short circuits, voltage drop, unreliable systems |
| DC panel | Clear labeling, working breakers, even loads | Dead circuits, warm breakers, flicker | Hidden faults and neglected maintenance |
| Bilge pumps | Manual and automatic modes both work | Only manual mode works, stuck float switch | Flooding risk when unattended |
| Shore power | Clean inlet, intact cord, proper protection | Burn marks, corrosion, reverse polarity | Shock hazard and electrical fire risk |
Finally, assess charging performance with engines and chargers operating. With the engine running, voltage should rise above resting battery voltage, commonly into the mid-13 to low-14 volt range depending on system design. If the boat has solar, inverter-charger equipment, or an automatic charging relay, verify that each component is installed neatly and works as intended. Ask for wiring diagrams and invoices for upgrades. An organized electrical refit by a reputable yard adds value; amateur modifications usually subtract it because troubleshooting labor escalates quickly once hidden faults appear.
Evaluate engine, fuel, plumbing, and mechanical systems
After the electrical inspection, turn to propulsion and support systems. Engine hours matter, but maintenance quality matters more. A 1,200-hour diesel with documented service can be a better buy than a 300-hour gasoline engine that sat neglected with ethanol fuel in the system. Inspect belts, hoses, clamps, filters, fluid levels, and evidence of leaks. Pull the engine dipstick and check oil condition. Milky oil can indicate water intrusion; metallic sparkle can signal internal wear. Look under the engine for absorbent pads soaked with fuel, coolant, or oil, and inspect motor mounts for corrosion or movement.
On outboards, examine the lower unit for impact damage, oil leaks, skeg repairs, and propeller condition. Remove the cowling and look for corrosion, salt buildup, brittle wiring insulation, and non-factory splices. On sterndrives and inboards, inspect bellows, gimbal areas, steering components, shaft seals, stuffing boxes, couplers, and exhaust elbows or manifolds. Compression testing, leak-down testing, or engine computer diagnostics may be justified depending on value and engine type. For many late-model engines, dealer diagnostic reports reveal fault history, operating profile, and overheating events that a visual check alone cannot show.
Fuel and plumbing systems also deserve disciplined review. Fuel lines should be rated for marine use and free of cracks, soft spots, or sweating. Tanks should show no corrosion weeping or fuel odor in enclosed spaces. Operate freshwater pumps, heads, macerators, washdowns, and showers. Check seacocks for smooth movement and verify hoses are double-clamped where appropriate below the waterline. A failed toilet pump is annoying; a frozen seacock or leaking fuel fitting is a safety issue. Mechanical neglect usually spreads across systems, so findings here help confirm whether the seller maintained the boat consistently.
Review electronics, safety gear, records, and the sea trial
Navigation electronics add value only when they are functional, current enough for your needs, and integrated properly. Power up multifunction displays, radar, VHF, AIS, autopilot, depth sounder, and transducers. Confirm that chart cards are present, screens are readable, buttons work, and networked devices communicate correctly. Electronics age faster than hulls, so an older but working setup may still justify a lower offer if replacement is in your plan. Safety gear should be inventoried separately: life jackets, flares, fire extinguishers, EPIRB, carbon monoxide alarms, visual distress signals, and ground tackle all have service dates or condition standards that affect readiness.
Paperwork can save or sink a transaction. Confirm the seller has clear title, registration, hull identification number, and lien releases where needed. Match the HIN on paperwork to the boat. For documented vessels, verify federal documentation records and any outstanding mortgage filings. Review maintenance receipts for engines, haul-outs, bottom paint, battery replacement, and major upgrades such as electronics, canvas, or refrigeration. A thick file does not guarantee a perfect boat, but records make claims testable. When a seller states that batteries are new, manifolds were replaced, or wiring was redone, receipts should confirm dates, brands, and installers.
The sea trial is where separate observations come together. Watch cold start behavior, oil pressure, charging voltage, exhaust smoke, and whether alarms self-test properly. Underway, note acceleration, planing time, cruise rpm, top-end rpm against manufacturer specification, steering feel, vibration, trim response, and temperatures after sustained load. Test every electrical function again while the alternator is charging and vibration is present, because intermittent faults often show here. After the trial, recheck the bilge and engine space for fresh leaks. If the boat performs well, your final step is simple: hire the right survey professionals, use the findings to negotiate intelligently, and buy with confidence rather than guesswork.
Inspecting a boat before buying is really about reducing uncertainty. Start wide with structure, narrow into systems, and then verify claims through records and a sea trial. Give the electrical system extra weight because battery health, wiring quality, circuit protection, and shore power condition directly affect safety and reliability. A careful buyer can spot soft decks, neglected engines, poor repairs, title issues, and dangerous electrical shortcuts long before they become personal expenses. That knowledge improves negotiation and helps you walk away from the wrong boat without regret.
The main benefit of a thorough pre-purchase inspection is not merely finding faults. It is understanding the true cost of ownership in the first year. Some defects are routine and negotiable, such as aged batteries, expired safety gear, or outdated electronics. Others, including wet core, severe corrosion, reverse-polarity damage, or chronic overheating, can change the entire value equation. When you inspect methodically, you stop reacting to shiny gelcoat and start judging the boat as a complete asset with structural, mechanical, and legal realities attached.
If you are serious about buying, use this article as your hub checklist and build a repeatable process for every showing. Take notes, photograph everything, compare findings across boats, and always confirm major decisions with a marine surveyor and qualified technician. A disciplined inspection protects your budget, your time, and your safety on the water. Start with the next boat you view, and inspect it like the ownership experience depends on it, because it does.
Frequently Asked Questions
What are the first signs that a used boat’s electrical system may have problems?
The first warning signs are usually visible long before you start chasing circuits with a meter. Begin with a broad visual inspection at the helm, inside lockers, under berths, around the battery compartment, and behind the electrical panel. Look for brittle insulation, cracked wire jackets, taped repairs, wire nuts, household extension-cord style splices, green or black corrosion on copper, melted connectors, scorch marks, and unsupported wiring hanging loosely in the bilge. Any of those signs suggest the system may have been altered over time without proper marine-grade materials or installation practices.
You should also pay attention to how the boat behaves when power is applied. Dim cabin lights, electronics that reboot when another device turns on, pumps that sound weak, breakers that trip unexpectedly, and gauges that fluctuate are all common symptoms of voltage drop, poor grounding, failing batteries, or overloaded circuits. Corrosion around battery terminals, mismatched batteries wired together, and evidence of water intrusion near electrical components are especially important because moisture and electricity create both reliability and safety issues. If you see multiple quick fixes instead of clean, labeled, organized wiring, assume there may be hidden electrical work still to uncover.
How should I inspect the boat’s batteries, battery cables, and charging setup?
Start at the batteries because they are the foundation of the entire electrical system. Check the age, type, and condition of each battery. Labels should be legible, cases should not be swollen or cracked, and terminals should be clean and tight. Corrosion, acid residue, loose hold-downs, or batteries sitting unsecured in the compartment are all red flags. Battery boxes or trays should be solid, and the area should be dry and ventilated as appropriate for the battery type. If the boat has multiple batteries, identify whether they are for starting, house loads, or both, and verify that the arrangement makes sense for the boat’s size and equipment.
Next, inspect the cables. Marine battery cables should be heavy enough for the load, properly crimped, protected from chafe, and routed neatly. Look for stiff cable ends, discolored copper, patched sections, or undersized wire that may overheat under load. Battery switches should operate smoothly and be clearly labeled so you can tell which banks are being isolated or combined. Then review the charging side of the system, including the alternator, battery charger, solar controller, or inverter-charger if installed. Charging equipment should be securely mounted, appropriately fused, and connected with marine-grade wiring. If possible, test battery voltage at rest and again while charging to confirm the system is actually bringing batteries up correctly. A healthy setup should not show random voltage swings, hot cable ends, or signs that one battery bank is chronically neglected.
What wiring and electrical panel issues should I look for during a pre-purchase inspection?
The electrical panel tells you a lot about how carefully the boat has been maintained. Open the panel if access is safe and practical, and look for clean organization, labeled circuits, proper breakers or fuses, and wires that are bundled and supported instead of tangled together. A good marine panel typically reflects deliberate installation and easier future troubleshooting. A bad one often reveals years of add-on accessories wired in without planning. Watch for unlabeled switches, bypassed fuses, oversized breakers, corroded bus bars, loose terminals, and multiple wires stacked on connections not designed for them.
It is also important to examine the quality of the wire itself. Marine-grade tinned copper wire is preferred because it resists corrosion far better than automotive or household wire. If you see mixed wire colors with no logic, speaker wire used for critical equipment, or solid-core household wire, that is a warning sign. Check that wires passing through bulkheads are protected with grommets and that they are kept clear of sharp edges, heat sources, and standing water. Every critical circuit should have overcurrent protection near the power source. If important systems such as bilge pumps, navigation lights, blower motors, or electronics are fed by messy, improvised wiring, you should expect both repair costs and possible safety concerns after purchase.
How can I tell whether the boat has shore power or AC electrical problems?
Shore power deserves special attention because AC faults can create serious fire and shock hazards. Start with the shore power inlet and cord. The plug blades should be clean, not burned or pitted, and the cord should not show melted ends, cracked insulation, or makeshift adapters that bypass the intended setup. Inside the boat, inspect the AC panel for proper breakers, clear labeling, and evidence of overheating such as discoloration, burnt smells, or warped plastic. If the vessel has outlets, press any test and reset buttons on GFCI-protected receptacles where fitted and confirm they function properly.
Beyond the obvious visual checks, look for signs that AC and DC systems have been mixed carelessly. Wiring should be separated and secured, not bundled together haphazardly. The battery charger, water heater, air conditioning, and galley appliances are common areas where shortcuts show up. Corrosion around the shore power inlet, heat damage at breaker terminals, and old non-marine extension methods are all reasons to slow down and investigate further. If you are not qualified to test AC systems, this is an area where a marine electrician or surveyor is especially valuable. A used boat can have perfectly serviceable cosmetics and still hide a poorly maintained shore power system that affects safety, insurability, and the true cost of ownership.
What tools and tests are most useful when evaluating a boat’s electrical system before buying?
You do not need a full workshop to learn a lot, but a few tools make the inspection far more useful. A quality digital multimeter is the most important. It allows you to check battery voltage, charging voltage, continuity in some situations, and whether circuits are delivering power where they should. A clamp meter can help identify current draw on major circuits if you know how to use it. A flashlight, inspection mirror, notebook, and phone camera are also practical because so much of electrical inspection involves documenting wire runs, labels, and hard-to-reach compartments. If the boat has shore power, a receptacle tester may be helpful for checking outlets, though marine systems still require a broader evaluation than a simple plug-in test.
As for testing, begin with the batteries at rest, then observe voltage under load and with charging sources active. Turn on lights, pumps, electronics, and other accessories individually and together. Watch for dimming, erratic behavior, unusual heat, or tripping breakers. Operate the bilge pump, horn, navigation lights, blower, freshwater pump, and electronics because intermittent problems often reveal themselves only when multiple systems are running. If the engine starts, note whether cranking causes major voltage sag or resets onboard electronics. The goal is not just to confirm that something works for a few seconds, but to see whether the electrical system behaves consistently and logically. If your inspection turns up questionable wiring, corrosion, missing circuit protection, or unexplained voltage issues, the smartest next step is a detailed follow-up by a qualified marine surveyor or electrician before closing the purchase.