
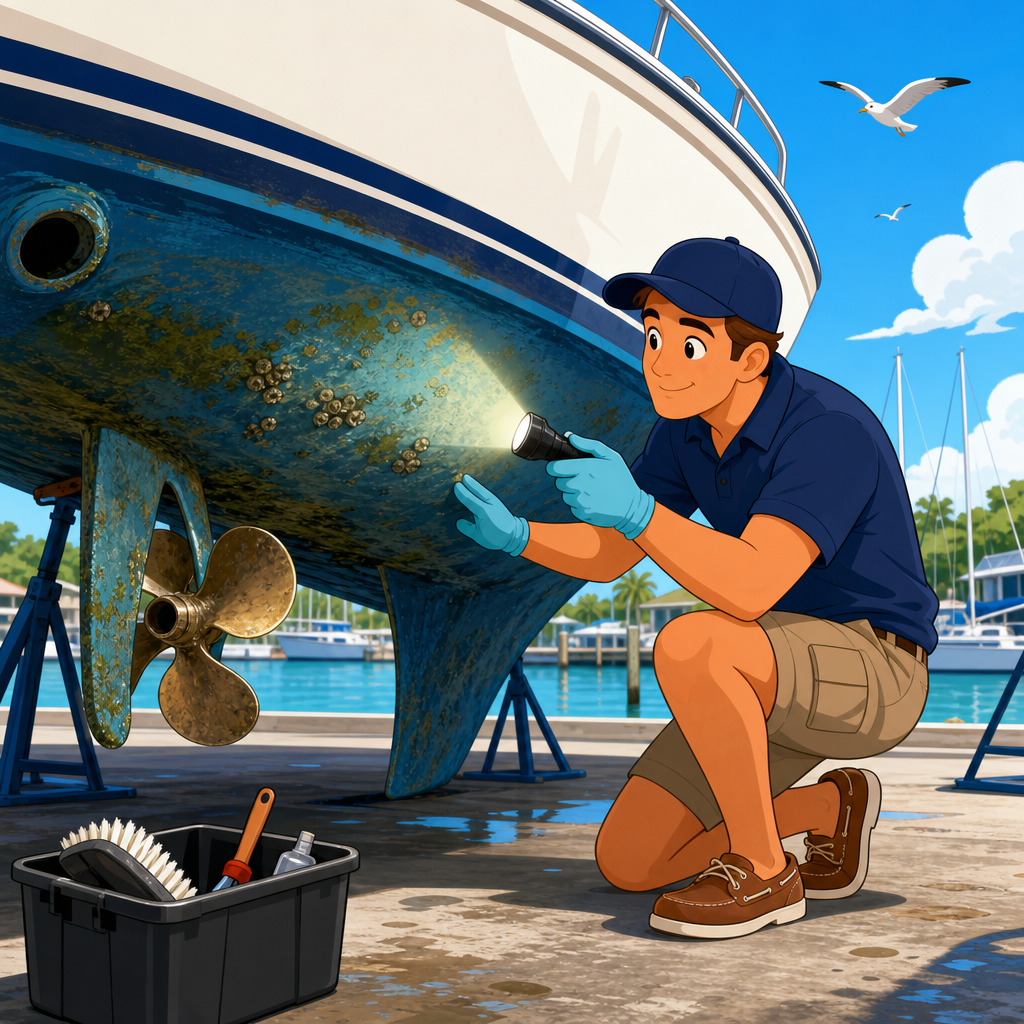
Buying a used boat without a disciplined inspection is the fastest way to turn a dream purchase into a repair project. A professional-style boat hull inspection is the foundation of smart due diligence because the hull is the boat’s primary structure, its watertight barrier, and the most expensive area to correct when problems are missed. When people search how to inspect a boat before buying, they often focus on engines, electronics, or upholstery first. In practice, I start with the hull every time, because structural defects, water intrusion, collision damage, and poor repairs can erase any bargain price in a single haul-out invoice.
A boat hull inspection is a systematic evaluation of the underwater body, topsides, deck-to-hull joint, transom, stringer support areas, and visible evidence of impact or moisture damage. It includes visual inspection, percussion sounding, moisture assessment, and close review of stress points such as chines, strakes, through-hulls, keel attachments, and trailer contact zones. On fiberglass boats, the process often centers on detecting osmotic blistering, laminate delamination, gelcoat cracking, and core saturation. On aluminum boats, the focus shifts toward weld quality, corrosion, pitting, and deformation. On wood boats, decay, fastener condition, and seam integrity become critical. The material changes, but the principle is the same: identify whether the structure is dry, fair, solid, and honestly represented.
This matters because hull defects affect safety, insurance, financing, and resale value. A soft transom can mean the outboard is no longer properly supported. A wet cored deck near stanchion bases can indicate years of leaking hardware. A cluster of repaired blisters can be cosmetic, while wide stress cracks radiating from chainplates or lifting strakes can signal structural movement. Surveyors know that surface shine proves very little. Serious buyers should know that too. This guide serves as the hub for inspecting a boat before buying, with the hull as the central priority and with practical methods you can apply before paying for a full marine survey.
Start With Preparation, Access, and the Right Inspection Sequence
The best hull inspection begins before you touch the boat. Ask for maintenance records, storage history, accident disclosures, and any prior survey. A boat kept in the water year-round in warm saltwater presents different risks than one rack-stored indoors in a northern climate. I also ask when the bottom paint was last applied, whether any blister repair has been performed, and whether the owner has rebedded deck hardware, replaced through-hulls, or repaired grounding damage. These answers do not replace inspection, but they tell you where to look harder.
Inspect the boat out of the water whenever possible. A hull can hide major defects below the waterline that no sea trial will reveal. Good light matters; angled morning or late afternoon sunlight is ideal because it makes unfair surfaces, filled repairs, and waviness easier to see. Bring a bright flashlight, notepad, camera, plastic or phenolic hammer for sounding, moisture meter if you know how to interpret one, mirror, gloves, and a rag to wipe suspect areas. A cheap magnet can also help identify filler over steel fasteners or hidden repairs in some contexts.
The inspection sequence should be consistent. Walk the perimeter first and view the hull from several angles to spot asymmetry, hook, rocker, or mismatched gloss. Then move close and inspect the bottom, keel, chines, strakes, transom, through-hulls, trim-tab mounts, swim platform brackets, and rub rail. After that, check the deck, cockpit sole, hatches, and interior structural access points such as bilge compartments, stringers, bulkheads, and backing plates. Finish by cross-checking findings during the sea trial. This order reduces the chance that a cosmetic detail distracts you from a structural issue.
How to Read the Exterior Hull Surface Like a Surveyor
On fiberglass boats, begin with the gelcoat. Hairline crazing around corners and fittings can be common on older boats, but long, open cracks deserve more attention, especially around the transom, engine mounts, chainplates, and hard points. Cracks that run in straight lines or radiate from loaded hardware often point to stress, not simple age. Look for color mismatch, uneven orange peel texture, overspray on fittings, or sanding marks under the finish. Those are typical signs of previous repair. A good repair is not automatically a deal breaker, but undocumented structural repair should trigger caution and price negotiation.
Bottom blisters need context. A few small cosmetic blisters in older polyester laminate may be manageable. Hundreds of quarter-size blisters across broad areas suggest a more serious osmotic issue. Press gently around opened blisters if any are visible. A vinegar-like smell from fluid is a classic sign of hydrolysis. Ask whether the boat has had a proper peel, dry-out, and epoxy barrier coat, or merely spot filling before paint. The difference matters because temporary blister repair often returns within a few seasons.
On aluminum hulls, inspect weld beads for uniformity and look for cracking at high-load areas like transom corners and stringer intersections. White powdery residue can indicate active oxidation. In saltwater boats, dissimilar-metal corrosion near stainless fasteners or neglected sacrificial anodes is common. Dents along the running surface may alter performance, and sharp creases can indicate overstressed plating. On steel hulls, coating failure, rust scale, and pitting around weld seams are major concerns. On wood hulls, paint bubbles, black staining, and proud fasteners often hint at trapped moisture and decay.
The transom deserves its own close pass. Sight along it for flexing or distortion. Around sterndrive cutouts and outboard mounting bolts, search for cracks, sealant failure, and damp staining. If the engine is trimmed and you can gently lift on the lower unit or skeg, watch for transom movement. Any visible deflection can indicate core or laminate problems. I have seen attractive family runabouts with clean upholstery fail this simple check and later require transom replacement that cost more than a quarter of the purchase price.
Use Sounding, Moisture Clues, and Physical Checks to Find Hidden Damage
Visual inspection catches only part of the story. Hidden damage often reveals itself through sound, feel, and moisture patterns. Percussion sounding is straightforward: tap the laminate with a plastic hammer or the handle of a screwdriver and listen. Solid laminate usually returns a crisp, sharp note. Delaminated or poorly bonded areas often produce a dull, lower sound. Move in a grid around suspect sections, especially near through-hulls, stringer lines, transoms, repaired patches, and deck hardware. Sounding is comparative, so listen for changes between adjacent areas rather than chasing a perfect tone.
Moisture meters help, but they are not lie detectors. Readings vary by laminate thickness, metal backing plates, bottom paint, and core material. Use the meter as a pattern tool, not a final verdict. High readings around bow rails, cleats, windshield bases, hatches, and stanchions frequently indicate leaking bedding compounds. In cored decks or hull sides, trapped moisture can migrate, so map the perimeter of elevated readings and compare port to starboard. If the seller permits, remove an access panel and inspect the underside for darkened core, weeping fasteners, or separated skin layers.
Physical pressure checks also matter. Walk the deck slowly and feel for flexing underfoot, especially around the helm, in front of consoles, and near ladder mounts. Open and close hatches to see whether openings are out of square, which can suggest structural movement. In the bilge, look for tabbing cracks where bulkheads and stringers bond to the hull. A clean bilge is nice, but a freshly painted bilge can hide repairs or persistent leaks. I prefer some honest dirt over suspiciously new bilge paint with no documentation.
| Inspection area | What to look for | What it may mean |
|---|---|---|
| Bottom below waterline | Blisters, filler patches, waviness, grounding scars | Osmosis, prior impact, unfair repair, laminate damage |
| Transom | Cracks at bolts, moisture stains, flex under load | Wet core, compression failure, structural weakness |
| Deck around hardware | Soft spots, high moisture, failed sealant | Core intrusion from leaking fittings |
| Bilge and stringers | Tabbing cracks, dark wood, standing water | Delamination, rot, neglected maintenance |
| Through-hulls and seacocks | Corrosion, poor backing, brittle hoses | Flooding risk and deferred replacement |
Check High-Risk Structural Zones Most Buyers Miss
Many buyers spend too much time on visible hull sides and too little on structural transition points. Start with the keel or centerline. On deep-vee fiberglass boats, look for grounding scars, repaired laminate, and cracking along the keel where impact loads concentrate. On sailboats with ballast keels, inspect keel bolts, sump areas, and the keel-to-hull joint for rust streaks, fairing cracks, or the classic smile-shaped gap that can follow a hard grounding. Not every joint crack means disaster, but it always deserves professional follow-up.
Next, inspect chines and strakes. These features stiffen the hull and influence handling, so impact or poor trailer support often shows here first. Repeated loading on bunk edges can print through the laminate, especially on lighter trailer boats. If the trailer bunks do not match the hull form or are badly adjusted, the boat may have spent years supported unevenly. I have found hull distortion on otherwise low-hour boats that were simply stored poorly. Correcting support issues early is easy; correcting a permanently deformed hull is not.
Through-hulls and seacocks are another high-risk zone. Bronze seacocks from reputable makers such as Groco or Apollo can last decades if maintained, but household brass valves, green corrosion, frozen handles, and unsupported plumbing are red flags. For cored hulls, every through-hull should be properly sealed so water cannot migrate into the core. Backing blocks should be solid, dry, and mechanically sound. Tug lightly on hoses and inspect double clamps below the waterline. These details seem small until one fails offshore or at the dock.
Finally, inspect the hull-to-deck joint and rub rail. Evidence of separation, missing fasteners, sealant gaps, or collision repairs near the bow can indicate prior impact. The joint handles loads from pounding, lifting, and docking. On many production boats it is mechanically fastened and chemically bonded; if either system has been compromised, leaks and movement follow. Water stains on the inside hull liner beneath the rub rail often point directly to this issue.
Connect Hull Findings to Sea Trial, Survey, and Buying Decisions
A good hull inspection does not end on the hard. It should shape the sea trial and the professional survey. If you found repaired bottom sections, ask the surveyor to focus on laminate consistency and moisture in those areas. If the transom looked suspect, watch for movement under acceleration, trim changes, or following-sea loads. If the deck showed soft spots near hardware, test whether fittings leak when the boat takes spray. Hull clues on land often become clearer when the boat is running at speed.
Sea trial observations that support hull concerns include unusual pounding, list, porpoising, steering pull, or vibration that cannot be explained by propeller damage alone. Water appearing in the bilge after a run may come from shaft seals, livewells, plumbing, or deck drains, but it can also reveal leaking through-hulls or hull penetrations. Note where water enters and how quickly. Use a dry bilge as a baseline before departure if the owner allows it.
For purchase decisions, separate cosmetic defects from structural defects and estimate each realistically. A faded gelcoat, old bottom paint, or minor dock rash affects negotiation but rarely kills a deal. Widespread core moisture, active delamination, severe blistering, compromised stringers, or transom movement can justify walking away unless the boat is priced as a project. This is where a SAMS or NAMS-accredited surveyor earns value. Buyers sometimes skip survey costs to save money, but that is rarely wise when structural repairs can run into five figures.
The most effective approach to inspect a boat before buying is layered. Do your own hull review first, document every concern, then pay for a survey and sea trial on a conditional offer. That sequence saves time, protects leverage, and keeps emotion out of the transaction. A polished listing can hide a wet core, but a disciplined inspection exposes the truth. If you want a better boat and a stronger negotiating position, start with the hull, trust evidence over appearance, and make professional inspection the standard for every purchase.
Frequently Asked Questions
What should I look for first during a boat hull inspection before buying a used boat?
Start with the overall shape, condition, and consistency of the hull before you focus on any single defect. Walk the entire boat slowly and look at the hull from multiple angles in good natural light. You want to spot unfair lines, waves, bulges, repairs that do not match the surrounding surface, and areas where the finish changes abruptly. A healthy hull should look symmetrical, straight where it is supposed to be straight, and smooth where it is supposed to be smooth. If one side looks different from the other, that deserves a closer look. This first pass helps you identify signs of impact damage, poor repairs, long-term stress, or hidden structural issues.
After the broad visual check, inspect the gelcoat or painted surface closely. Look for spider cracking, star cracks around fittings, blistering, chips, gouges, exposed laminate, and areas of discoloration. Some minor cosmetic flaws are normal on older boats, but cracks that radiate from high-stress points, repairs with rough texture differences, or blister clusters below the waterline can indicate more serious problems. Pay special attention to the keel, chines, strakes, bow stem, transom, and around through-hulls, trim tabs, and transducers. These are common impact and stress zones. If the boat has been stored on a trailer, inspect bunk contact areas too, because poorly adjusted trailers can create pressure damage that is easy to miss on a casual walkthrough.
Finally, combine sight, touch, and sound. Run your hand along suspicious areas to feel for ripples, soft spots, or uneven repair transitions. Tap the hull lightly with a plastic hammer or the handle of a screwdriver and listen for changes in tone. A crisp, consistent sound usually suggests solid laminate, while a dull or flat sound can point to delamination, water intrusion, or voids. This does not replace a marine survey, but it is exactly the kind of disciplined process that separates a smart buyer from someone who gets distracted by shiny upholstery and forgets to inspect the most expensive structure on the boat.
How can I tell whether hull cracks are cosmetic or signs of structural damage?
The key is location, pattern, depth, and what is happening around the crack. Cosmetic cracks are often limited to the gelcoat, the outer finish layer on many fiberglass boats. They may be short, fine, and isolated, especially around corners, hardware, hatches, and other areas where the surface flexes slightly over time. Structural cracks, on the other hand, tend to appear in high-load areas such as the transom, stringer locations, bulkhead tie-ins, chainplate zones on sailboats, around engine mounts, near the keel, or at the hull-to-deck joint. If a crack seems to follow a stress path, is wide enough to catch a fingernail deeply, or appears alongside deformation, moisture intrusion, or movement, it deserves much more concern.
Look closely at the shape of the cracking. Random hairline crazing may be mostly cosmetic, but star-shaped cracks often point to impact. Long, straight cracks can suggest flexing or structural movement. Multiple parallel cracks in one area may mean the substrate underneath has been stressed or improperly repaired. Press gently around the crack. If the area feels soft, moves, or sounds dull when tapped, there may be more than a surface issue. Also inspect the inside of the hull directly behind the cracked area if access allows. Interior tabbing failures, damp core material, separated laminate, or fresh repair marks can confirm that the crack is only one visible symptom of a deeper problem.
One of the most reliable ways to judge seriousness is to connect the exterior evidence with the boat’s history and construction. Ask whether the boat has ever run aground, been dropped, collided, or had hull repairs. A seller may describe damage as minor, but your inspection should verify whether the repair was structurally sound and professionally faired. Moisture meter readings, percussion sounding, and a surveyor’s evaluation are especially valuable when cracks appear near critical structural areas. In short, small cosmetic cracking is common; cracking combined with distortion, softness, moisture, repeated repair evidence, or high-stress location is a strong signal to slow down and investigate further.
How do I inspect a fiberglass boat hull for blisters, delamination, and water intrusion?
Begin below the waterline, because this is where many costly fiberglass hull issues first appear. Blisters are raised bumps in the gelcoat or laminate caused by water-related chemical processes, and they can range from small cosmetic defects to symptoms of deeper laminate deterioration. Scan the entire bottom methodically, not just one side. Use your eyes first, then your hands. Small scattered blisters may feel like pinhead-sized bumps, while more advanced blistering may appear in clusters or larger domes. If any are broken open, note whether they contain fluid, smell acidic or vinegary, or reveal laminate damage beneath the surface. A few minor blisters on an older hull are not automatically a deal breaker, but extensive blistering across the bottom can become a major negotiation point or a reason to walk away.
For delamination, use a careful tapping routine across suspect areas. Delaminated fiberglass often produces a noticeably dull, flat, or lower-pitched response compared with surrounding solid laminate. Concentrate on broad panels, repaired zones, around the keel, near strakes, and anywhere the finish looks wavy or irregular. Press with moderate hand pressure where appropriate. A hull section should feel firm. If it gives slightly, sounds dead, or shows flex where it should not, there may be separation between laminate layers or between fiberglass skin and core. On cored hulls, moisture intrusion is especially important because wet core can lead to loss of stiffness, hidden decay in some materials, and expensive reconstruction.
Water intrusion often leaves clues both outside and inside the boat. Outside, look for cracks around fittings, unsealed penetrations, failed bedding, discolored repairs, and blistering. Inside, inspect the corresponding hull sections for staining, mold, weeping, damp insulation, rust on nearby fasteners, and previous patchwork. A moisture meter can be useful, but readings must be interpreted carefully because laminate thickness, bottom paint, temperature, and previous repairs can affect results. That is why the best approach combines visual inspection, sounding, touch, interior access, and professional confirmation when the stakes are high. If a used boat shows widespread blisters, suspicious moisture readings, and areas that sound hollow, assume you are evaluating a structural and financial issue, not just a cosmetic one.
Which parts of the hull are most likely to hide expensive problems?
The transom is high on the list because it carries major loads from the outboard or sterndrive and is a common place for water intrusion, especially on older boats with poorly sealed fasteners. Look for cracks radiating from engine mounting bolts, flex when the motor is moved, water staining inside the bilge, and damp or soft material around penetrations. A compromised transom can require extensive structural rebuilding, so even subtle warning signs matter. The keel and keel attachment area are also critical, particularly on sailboats or boats with grounding history. Damage here may show up as cracking, filler repairs, distorted lines, or separation where loads have been transferred through the hull.
Cored hull sections and cored decks near the hull interface can hide serious issues because the surface may still look acceptable while the material underneath has absorbed water. Pay special attention around through-hulls, trim tab mounts, transducers, struts, rudder fittings, and any location where fasteners penetrate the laminate. Poorly bedded hardware is a classic path for water intrusion. The hull-to-deck joint is another area many buyers overlook. Inspect for uneven sealant, missing fasteners, signs of impact, interior leaks, and repairs that suggest the boat may have struck a dock, been transported poorly, or suffered structural movement.
Also examine the bilge, stringer attachments, bulkheads, and interior tabbing because hull problems are often easier to identify from the inside out. Cracked tabbing, separated bulkheads, repairs with mismatched fiberglass work, and hidden moisture can reveal long-term structural stress even when the exterior finish looks decent. Trailer-kept boats deserve extra attention along bunk lines and roller contact points, while boats kept in the water need very careful bottom inspection for osmotic blistering and neglected antifouling cycles. In practical terms, the most expensive hidden problems usually gather where load, water, and poor maintenance intersect. That is why a professional-style inspection does not just admire the shiny sides of the hull; it concentrates on the zones where structural failure starts quietly and repair invoices get loud.
Can I inspect a boat hull myself, or do I still need a marine surveyor?
You can absolutely perform your own preliminary hull inspection, and you should. A disciplined self-inspection helps you eliminate poor candidates early, ask sharper questions, and avoid falling in love with a boat before you understand its structural condition. Buyers who inspect the hull themselves often notice obvious red flags such as mismatched repairs, blister fields, transom cracks, grounding scars, and poorly sealed fittings long before they pay for a full survey. Your inspection is the first layer of due diligence, and it can save significant time and money when shopping among multiple used boats.
That said, a self-inspection is not