Boat water leaks rarely start as dramatic failures; they usually begin as small, easily missed pathways around fittings, hoses, wiring penetrations, pumps, or tanks, then grow into expensive structural, electrical, and safety problems. In boat maintenance and repairs, preventing and fixing boat water leaks means understanding how water moves through electrical and plumbing systems, where common leak points develop, and how inspection routines stop minor seepage before it becomes flooding, corrosion, or equipment loss. On working boats and family cruisers alike, I have found that owners often focus on hull damage first, yet many persistent leaks actually come from freshwater plumbing, sanitation lines, deck hardware over wire chases, air-conditioning condensate drains, bilge pump discharge loops, and neglected hose clamps.
Electrical and plumbing systems are tightly connected on a boat because water intrusion does not stay confined to one compartment. A leaking freshwater pump fitting can spray onto a DC distribution panel. A failed cockpit drain hose can wet wire bundles and create hidden corrosion. A cracked livewell line can cycle the bilge pump constantly, masking the true source until batteries are depleted. Preventing boat water leaks therefore requires a systems view: identify every place water is supposed to be, every place it can escape, and every component that is damaged when it does.
Key terms matter. A leak source is the actual origin of unwanted water entry or escape. Water intrusion is outside water entering the vessel. Water migration is water traveling from the source into a different compartment, often making diagnosis harder. Capillary action pulls water along threads, wire insulation, and laminate edges. A proper repair is not simply “making it stop for now”; it is restoring the correct sealing method, hose routing, support, and material compatibility so the fault does not return under vibration, heat, pressure, or movement at sea.
This hub article covers the full electrical and plumbing systems picture: leak detection, high-risk components, diagnostic methods, prevention schedules, repair standards, and when replacement is smarter than patching. Use it as the starting point for every leak-related task under boat maintenance and repairs, because consistent control of water is what protects safety, reliability, resale value, and your time on the water.
Where Boat Water Leaks Usually Start in Electrical and Plumbing Systems
The most common leak sources in this subtopic are hose connections, pumps, strainers, tanks, through-hulls, seacocks, sanitation components, deck fills, water heater fittings, washdown systems, and wire or pipe penetrations through decks and bulkheads. On many boats, leaks appear at interfaces, not in the middle of components. That means threaded adapters, barbed hose tails, compression fittings, inspection ports, sender gaskets, and mounting fasteners deserve more attention than owners usually give them.
Freshwater systems often leak at the pressure pump, accumulator tank, water heater relief valve, faucet supply lines, and quick-connect fittings. A cycling pump when no tap is open usually indicates pressure loss somewhere in the system. That could be a visible drip under a sink, but it may also be a hidden seep behind liners or beneath a sole panel. Sanitation systems bring a different set of risks: odor-permeated hoses, cracked joker valves, loose hose clamps, vent line blockages that raise system pressure, and tank fittings stressed by hull movement. Raw-water systems, including air conditioning, baitwell, engine cooling support plumbing, and washdowns, commonly fail from hose aging, scale buildup at strainers, and clamp corrosion.
Electrical leak pathways are less obvious but just as important. Deck lights, antennas, solar cable glands, transducers, mast partners, outlet boxes, and shore-power inlets can all admit water. Once inside, water follows gravity until it meets a wire loom, backing plate, or bulkhead, then travels laterally. I have traced a “mystery bilge leak” back to an unsealed arch wiring penetration nearly fifteen feet away from where the water finally appeared. That is typical on boats, and it is why leak diagnosis must start above and upstream of the wet area.
Material mismatch also creates failures. Brass fittings in contact with incompatible metals, non-marine sealants on plastic tank ports, automotive hose in sanitation service, and household wire connectors in damp lockers all shorten service life. The American Boat and Yacht Council standards are useful here because they emphasize support, chafe protection, ignition protection where required, and proper conductor and hose installation methods that reduce secondary leak damage.
How to Diagnose a Boat Water Leak Accurately
The best way to find a boat water leak is to separate the problem into categories: rainwater intrusion, freshwater pressure loss, raw-water seepage, sanitation leakage, and condensation. Start by asking four direct questions. When does water appear? Is it fresh, salty, or foul-smelling? Does it happen only underway, only in rain, only when a pump runs, or all the time? Does turning off a breaker, pump, or seacock stop it? Those answers narrow the search quickly.
In practice, I use a dry-then-test sequence. First, dry the area completely with towels and a wet vacuum. Then place absorbent pads or paper under suspected fittings. Run one system at a time. Pressurize freshwater plumbing and watch the pump. Operate washdown and livewell circuits independently. Hose the deck in controlled sections if rain intrusion is suspected. Add nontoxic fluorescent leak dye to freshwater systems where appropriate and inspect with a UV light. For wiring penetrations and deck hardware, remove interior trim and look for staining, salt crystals, rust tracks, soft core, or green copper oxide on conductors.
Some clues are indirect. Repeated bilge pump cycling means water is entering somewhere even if you never see standing water. Low battery voltage after mooring can point to a hidden leak that forced pumps to run. A musty smell near an electrical locker often signals wet insulation or trapped moisture. Corrosion on fuse blocks, charger terminals, and bus bars usually means water has been present longer than anyone realized. Moisture meters can help around cored decks and bulkheads, but they are screening tools, not final proof, because laminate composition affects readings.
| Symptom | Most Likely Source | Best First Check | Typical Fix |
|---|---|---|---|
| Freshwater pump cycles with all taps closed | Pressure-side plumbing leak | Inspect pump, water heater, faucets, and fittings for drips | Replace fitting, hose, O-ring, or clamp; retest pressure |
| Water appears after rain | Deck hardware or wiring penetration leak | Hose-test sections of deck and cabin top | Rebed hardware and reseal cable gland properly |
| Bilge fills only underway | Raw-water hose, shaft seal area, or through-hull stress leak | Inspect seacocks, hoses, and fittings under load | Replace hose, clamps, or fitting; verify support and routing |
| Bad odor with damp bilge | Sanitation hose or tank fitting leak | Check vent, permeated hose, and tank connections | Renew sanitation hose and seals; clear vent blockage |
| Corrosion on electrical panel | Leak above panel or condensation accumulation | Trace wiring penetrations and inspect drip paths | Seal entry point and replace damaged terminals |
Accurate diagnosis saves money because marine leaks often create false trails. Always confirm the source by reproducing the leak before disassembly and confirm the repair by repeating the same test after completion.
Preventing Plumbing Leaks Before They Start
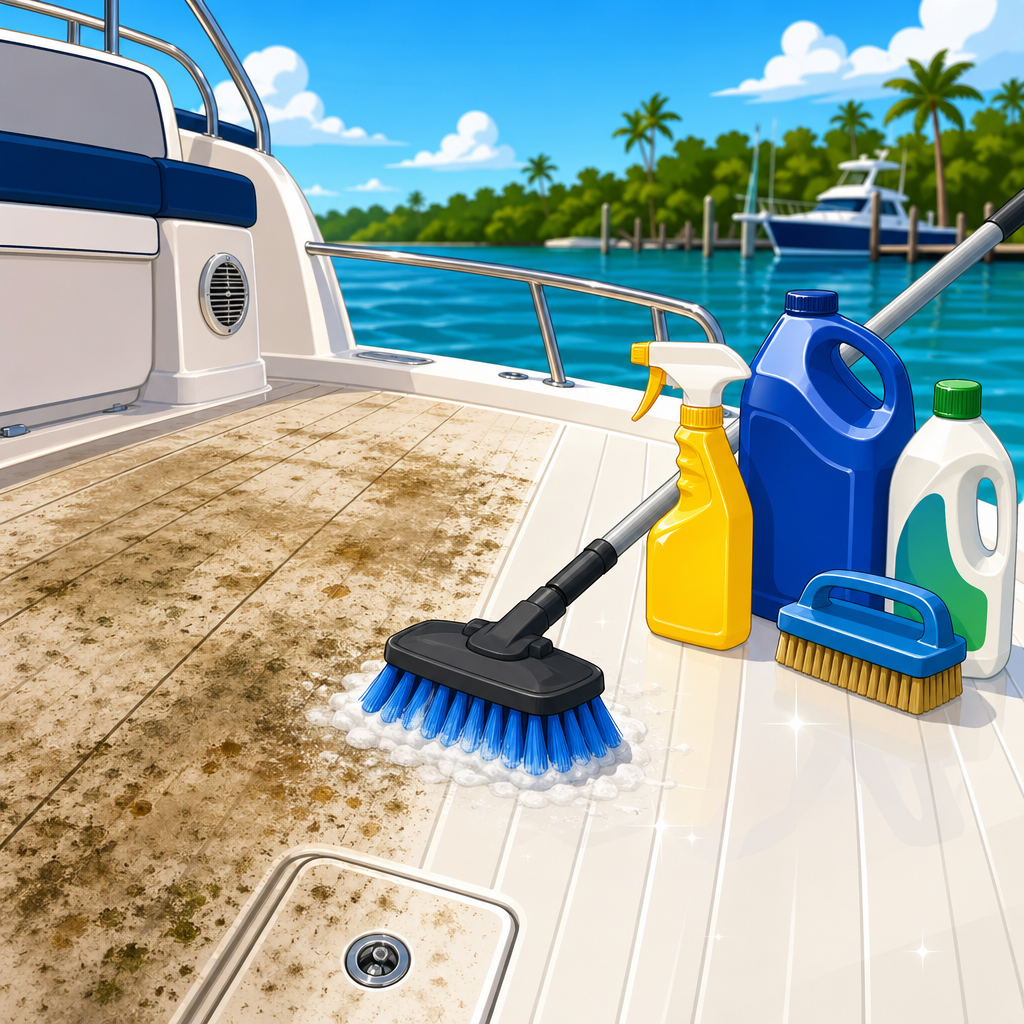
Preventing plumbing leaks on a boat comes down to inspection frequency, proper materials, and strain control. Hoses should be marine-rated for their service: potable-water hose for freshwater, sanitation hose for waste, reinforced wet-exhaust or raw-water hose where specified, and the correct temperature-rated line at water heaters. Replace hoses that are stiff, cracked, swollen, sticky, or odor-permeated. If a hose has taken a permanent set at a bend, it is already under stress and more likely to split at the barb.
Every hose connection should be fully seated past the barb and secured with corrosion-resistant clamps of the correct size. On critical raw-water and sanitation lines, double clamping is common practice when the fitting length allows it, with screw housings positioned opposite each other. Clamp quality matters. Non-perforated marine-grade clamps reduce band damage to hoses, while bargain clamps often corrode rapidly in damp lockers. Support long hose runs with cushioned clamps so vibration is not carried by the fitting itself.
Pumps, filters, and strainers need service discipline. Strainer bowls should be checked for hairline cracks and lubricated with the manufacturer-approved O-ring grease, not petroleum products that can swell seals. Pump mounting screws should remain tight, but overtightening plastic housings leads to distortion and leaks. Winterization is another major prevention tool. Water left in pumps, faucets, filters, and low-point loops can freeze, split housings, and create leaks that only show up months later. Even in mild climates, draining and protecting seasonal systems prevents expensive spring commissioning surprises.
Tanks and fills deserve equal attention. Water tank inspection ports, sending unit gaskets, vent lines, and deck fill caps all age. A cracked fill hose can leak directly into the bilge during refueling or dockside filling. Waste tanks often leak at fittings because the tank moves slightly while unsupported hoses resist that movement. Good installation includes flexible routing and proper support near every tank connection. If you are repeatedly tightening a fitting to stop seepage, the underlying issue is usually a failed gasket, thread incompatibility, or misalignment, not insufficient torque.
Protecting Electrical Systems from Water Intrusion
Boat electrical systems do not have to sit underwater to suffer leak damage. Repeated dampness is enough to wick water into copper strands, increase resistance, and trigger intermittent faults that are difficult to diagnose. Prevention starts at entry points. Every cable passing through a deck, cabin top, transom, or equipment box should use a proper gland, grommet, or clamshell fitting with a drip loop. Sealant alone is not a cable management strategy. Movement from vibration and thermal cycling eventually breaks the seal if the cable is unsupported.
Terminations matter just as much as penetrations. Use marine-grade tinned copper wire, adhesive-lined heat-shrink terminals, and enclosed fuse protection in damp spaces. Open automotive crimp connectors corrode quickly in bilges and lazarettes. I have replaced many bilge pump circuits where the pump itself was fine, but butt connectors hidden low in the bilge had turned black and resistive after months of minor seepage. Routing helps too: keep wire bundles above probable leak paths, away from plumbing joints, and clear of condensation drip points from air-conditioning units and refrigeration lines.
Electrical panels and battery compartments need ventilation without exposure. If water is reaching a breaker panel, the correct repair is to stop the leak upstream, then clean or replace affected components. Contact cleaners can help with light contamination, but heavily corroded breakers, bus bars, and charger terminals should not be trusted offshore. Galvanic and stray-current issues are separate from leak prevention, yet water intrusion often accelerates both by creating conductive contamination where none should exist.
Inspection should include shore-power inlets, bonding conductors, navigation light bases, transducer cabling, and solar or electronics installations added after the boat left the factory. Aftermarket work is a common leak origin because installers sometimes drill quickly, seal poorly, or fail to protect cored structures. Any time new electronics are added, verify that fasteners are bedded correctly and that cable penetrations include mechanical support, compression sealing, and a water-shedding route.
Best Practices for Repairing Boat Water Leaks Permanently
A permanent repair begins with removing failed materials completely. Smearing more sealant over an old leak rarely lasts, especially on contaminated surfaces. For deck hardware and wiring penetrations, disassemble the fitting, clean away old bedding, inspect for core damage, dry the area, and rebuild with the right sealant for the substrate and the possibility of future removal. Polyurethane, polysulfide, butyl tape, and silicone do not serve the same purpose. For example, butyl tape is excellent for many mechanically fastened deck fittings because it stays flexible and serviceable, while some plastics are incompatible with stronger solvent-based compounds.
For plumbing repairs, replace compromised sections instead of patching them. A split hose near the end should usually be renewed entirely unless enough undamaged length remains and routing is still correct. Threaded fittings should be matched by thread type; forcing NPT and straight-thread parts together is a common source of chronic seepage. Use thread sealant only where appropriate, never on fittings that seal with a gasket or O-ring face. After repair, pressure-test the system and inspect it again after the boat has run long enough to introduce vibration and heat.
When electrical components get wet, fix both the leak and the electrical consequence. Drying a soaked terminal without cutting back blackened copper strands leaves hidden resistance in the circuit. Replace corroded connectors, fuse holders, terminal blocks, and unsupported splices. On critical circuits such as bilge pumps, alarms, and navigation lights, restoration should return the installation to marine best practice, not simply restore temporary function.
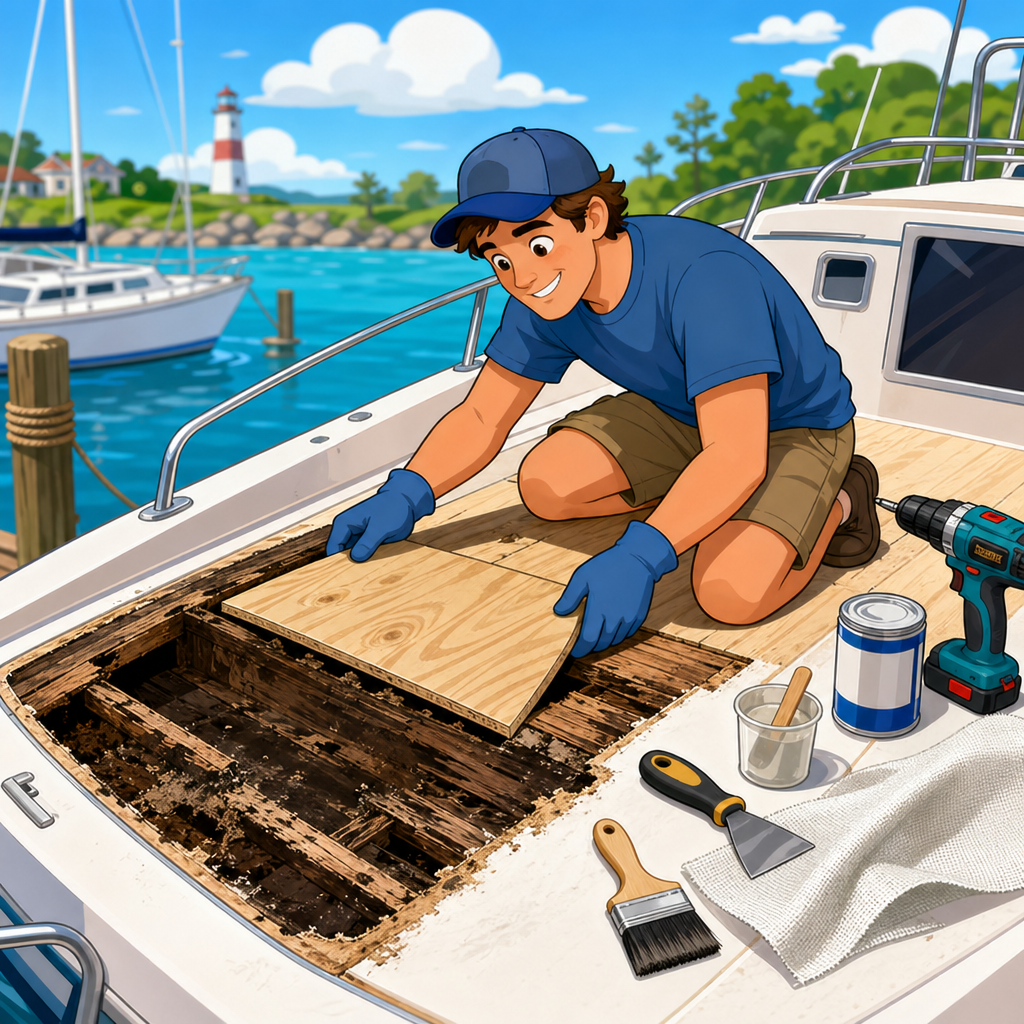
Some situations require escalation. Soft decks around leaking hardware, saturated coring, recurring leaks at through-hulls, and widespread electrical corrosion are not cosmetic jobs. They demand a structured repair plan and, often, a qualified marine technician or surveyor. The cost of doing that work properly is far lower than the cost of structural rot, electrical fire, or flooding.
Inspection Schedule and Hub Topics for Ongoing Leak Control
The most effective leak prevention plan is scheduled, not reactive. Check bilges, pump cycles, hose clamps, strainers, and visible fittings monthly during the season. Quarterly, inspect deck penetrations, battery compartments, freshwater pumps, water heaters, sanitation hoses, and all accessible seacocks. Annually, test every bilge pump and float switch, service raw-water strainers, inspect hose age and labeling, review wiring in damp compartments, and rebed any hardware showing movement or staining. Before long passages, open access panels and inspect with a bright light and mirror. Small salt trails, green corrosion, and dried mineral deposits are early warnings.
As the hub page for electrical and plumbing systems within boat maintenance and repairs, this topic naturally branches into focused subjects: bilge pump troubleshooting, freshwater pump repair, marine hose and clamp selection, sanitation system maintenance, deck hardware rebedding, through-hull inspections, water tank leaks, marine sealant selection, diagnosing rainwater intrusion, protecting battery systems from moisture, and corrosion repair after leaks. Together, those tasks form a complete leak-control program rather than a series of isolated fixes.
Preventing and fixing boat water leaks is ultimately about discipline. Find the true source, use the correct marine materials, restore proper support and routing, and verify the repair under real operating conditions. Do that consistently, and you protect the boat’s structure, its electrical reliability, and everyone aboard. Build leak inspection into your regular maintenance routine, and use this hub as your starting point for every electrical and plumbing repair that keeps unwanted water out of your boat.
Frequently Asked Questions
What are the most common places boat water leaks start?
Most boat water leaks begin at small penetration points or aging connections rather than from a sudden crack in the hull. Common problem areas include through-hull fittings, seacocks, hose clamps, livewell and bilge pump hoses, deck hardware, hatches, windows, rub rails, shaft seals, transducers, water tanks, and plumbing connections around sinks, heads, and freshwater systems. Electrical and rigging penetrations are also frequent trouble spots because wires and cables often pass through decks, bulkheads, and lockers where sealant can dry out, crack, or pull away over time. Even a tiny opening around a fitting can allow repeated moisture intrusion that slowly saturates coring, damages backing materials, and creates hidden rot or corrosion.
Another reason these leaks are easy to miss is that water rarely shows up exactly where it enters. It can travel along hoses, wiring looms, stringers, liners, and interior surfaces before appearing in the bilge or inside a compartment far away from the actual source. That is why the “wet spot” is not always the leak location. On boats, vibration, thermal expansion, UV exposure, and constant movement all work against sealants, clamps, gaskets, and threaded fittings. A hose connection that looks acceptable at a glance may seep under pressure, and a deck fitting that appears secure may leak only when the boat is underway or in heavy rain. The best prevention strategy is to inspect these high-risk points routinely and treat minor seepage as an early warning sign, not a cosmetic issue.
How can I tell whether the leak is coming from rainwater, plumbing, or below the waterline?
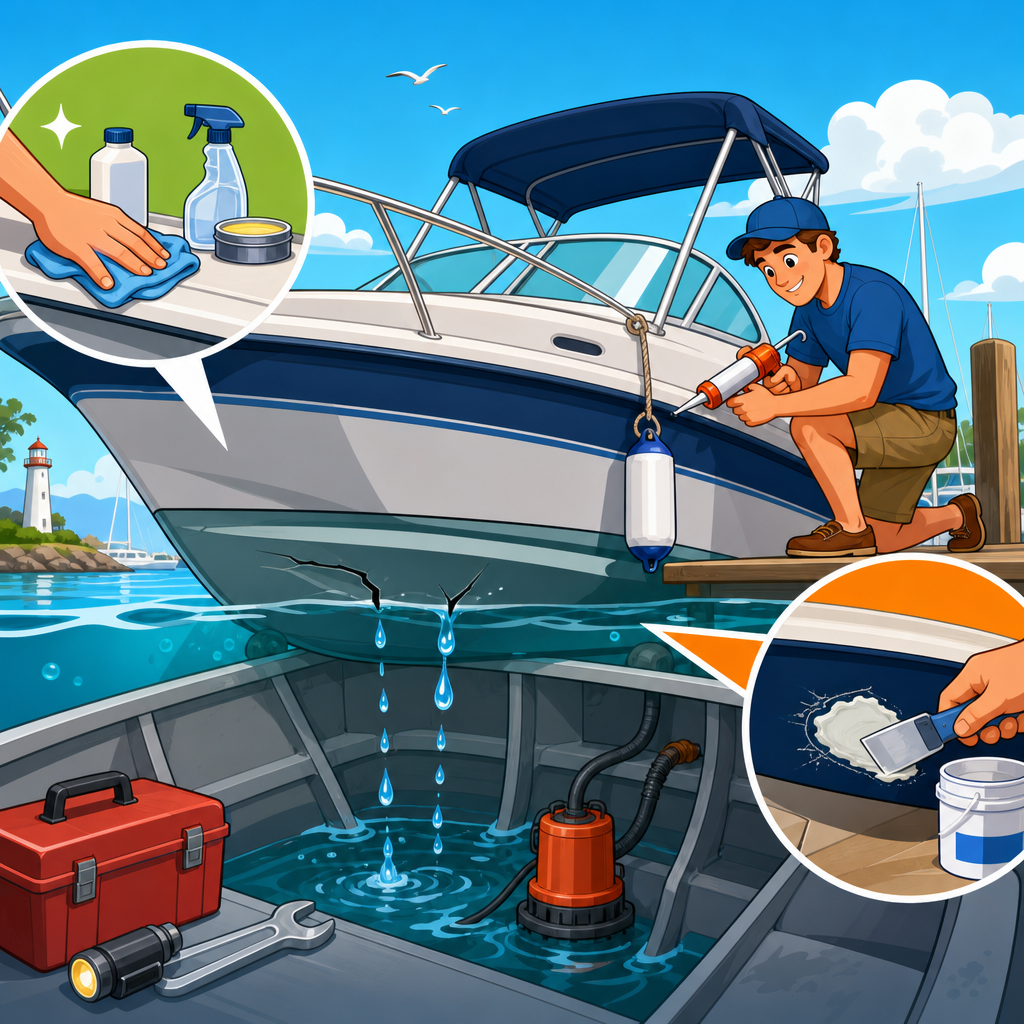
Identifying the type of leak is one of the most important steps because the repair approach depends on where the water is coming from. Start by observing when and where the water appears. If water shows up after rainfall, washing the boat, or rough spray over the bow, the source is usually topside: hatches, windows, cleats, rails, antenna mounts, deck fittings, wiring penetrations, or cockpit drains. If the leak appears when a pump runs, when a faucet is opened, when the head is flushed, or when the freshwater system pressurizes, the problem is more likely in the plumbing. If water enters continuously while the boat is sitting in the water, especially around bilge areas, shaft logs, rudder posts, transducers, seacocks, or through-hulls, then you should suspect a below-the-waterline issue and treat it with urgency.
A practical way to narrow it down is to isolate systems one at a time. Dry the suspected area completely, then test under controlled conditions. Use a hose on specific deck sections to check rain-style intrusion. Pressurize the freshwater system and listen for pump cycling, which can indicate a hidden leak. Inspect sanitation hoses and drains for odor, dampness, or drips. For below-waterline concerns, monitor whether the bilge accumulates water while all onboard plumbing is off. You can also check the taste or feel of the water cautiously in some situations: freshwater leaks are often clear and odorless, rainwater may appear after weather events, while seawater often leaves salt residue or promotes corrosion around metal components. The goal is to avoid guessing. Careful isolation saves time, prevents unnecessary resealing, and helps you fix the actual source instead of the symptom.
What is the best way to inspect a boat for leaks before they become serious?
The best inspection routine is systematic, repeatable, and focused on both visible drips and hidden moisture migration. Begin with a dry boat whenever possible so fresh signs stand out. Check the bilge first, but do not stop there. Inspect all through-hulls and seacocks for corrosion, staining, moisture trails, and movement. Look at hose connections for salt crystals, green corrosion, rust on clamps, or dark damp rings. Examine pumps, strainers, manifolds, water heaters, tanks, and filters for seepage around fittings and housings. Then move upward to deck hardware, portlights, hatches, rails, and mounts, checking for failed sealant, loose fasteners, soft deck areas, and interior staining on headliners or bulkheads. Use a flashlight and mirror to inspect behind tanks, under steps, in lockers, and along wiring runs where leaks commonly hide.
Good leak prevention also means watching for indirect evidence. Musty odors, discolored wood, bubbling finishes, mildew, swollen cabinetry, rusty fasteners, unexplained bilge pump cycling, and recurring battery or electrical problems can all point to chronic water intrusion. It helps to keep a maintenance log and note when water appears, under what conditions, and how much accumulates. If you want a more advanced approach, a moisture meter can help detect saturation in cored decks or interior structures, though it should be used as part of a broader inspection rather than as the only diagnostic tool. Finally, inspect regularly, not just during haul-out. Quick monthly checks and a more thorough seasonal review are often enough to catch a minor leak before it develops into structural damage, electrical failure, mold growth, or a safety issue underway.
What materials and repair methods work best for fixing boat water leaks properly?
The right repair depends on the source of the leak, the material involved, and whether the component must remain serviceable in the future. In many cases, the correct fix is not simply adding more sealant over a wet or failing joint. For deck hardware and fittings, the best practice is usually to remove the hardware, clean away old sealant completely, inspect for damage or wet core, dry the area, and then re-bed the fitting with a marine-grade sealant appropriate for the application. Hoses should be replaced if they are cracked, hardened, kinked, or poorly supported, and clamps should be marine stainless and properly sized. Threaded plumbing fittings may need thread sealant approved for marine systems, while gasketed components may require new seals rather than adhesive. If a leak has caused soft core, delamination, or rot, repairing the underlying substrate is essential; otherwise, the leak will return no matter how much sealant is applied.
It is also important to match the repair product to the job. Flexible marine sealants are commonly used where movement and future removal are expected, while stronger adhesive sealants may be reserved for more permanent installations. Epoxy may be appropriate for structural repairs or filling damaged areas, but it is not a universal answer for every leak. On plumbing systems, replacing old hoses, upgrading clamps, securing hose runs, and relieving strain at fittings often solves chronic seepage more effectively than repeated patching. For below-the-waterline leaks, any uncertainty should be treated seriously, and professional evaluation is often wise, especially around seacocks, transducers, shaft seals, or hull penetrations. A proper repair restores watertight integrity, supports the hardware correctly, and addresses the reason the leak started in the first place—movement, age, corrosion, pressure, poor installation, or hidden structural damage.
How can I prevent boat water leaks from coming back after repairs?
Long-term leak prevention comes down to maintenance discipline, correct installation practices, and understanding that boats are always moving, flexing, and aging. After a repair, recheck the area regularly instead of assuming the problem is solved forever. Tighten nothing blindly, because overtightening hardware can squeeze out sealant, crack fittings, damage gaskets, or crush deck core. Support hoses so they do not vibrate or pull against fittings. Replace aging clamps proactively and use double clamps where appropriate on critical below-waterline hose connections. Keep cockpit drains, scuppers, and limber holes clear so water drains where it should instead of backing up into compartments. Make sure wiring penetrations are sealed and routed with drip loops so water does not travel directly into electrical spaces. Good preventive work is often simple, but it must be done consistently.
You should also build leak prevention into your normal operating routine. Check the bilge before and after each outing, monitor pump activity, and investigate any new moisture immediately. During seasonal maintenance, inspect bedding around deck hardware, test plumbing under pressure, examine tanks and pumps, and look for signs of movement around through-hulls and seacocks. Keep records of what was repaired, what products were used, and when components were installed so you know what may be nearing the end of its service life. Most importantly, never ignore minor seepage because “it has always done that.” On a boat, a slow drip can turn into core damage, hidden corrosion, flooded compartments, or electrical hazards if left alone. Preventing leaks from returning is less about one perfect repair and more about creating a habit of early detection, proper materials, and ongoing inspection.